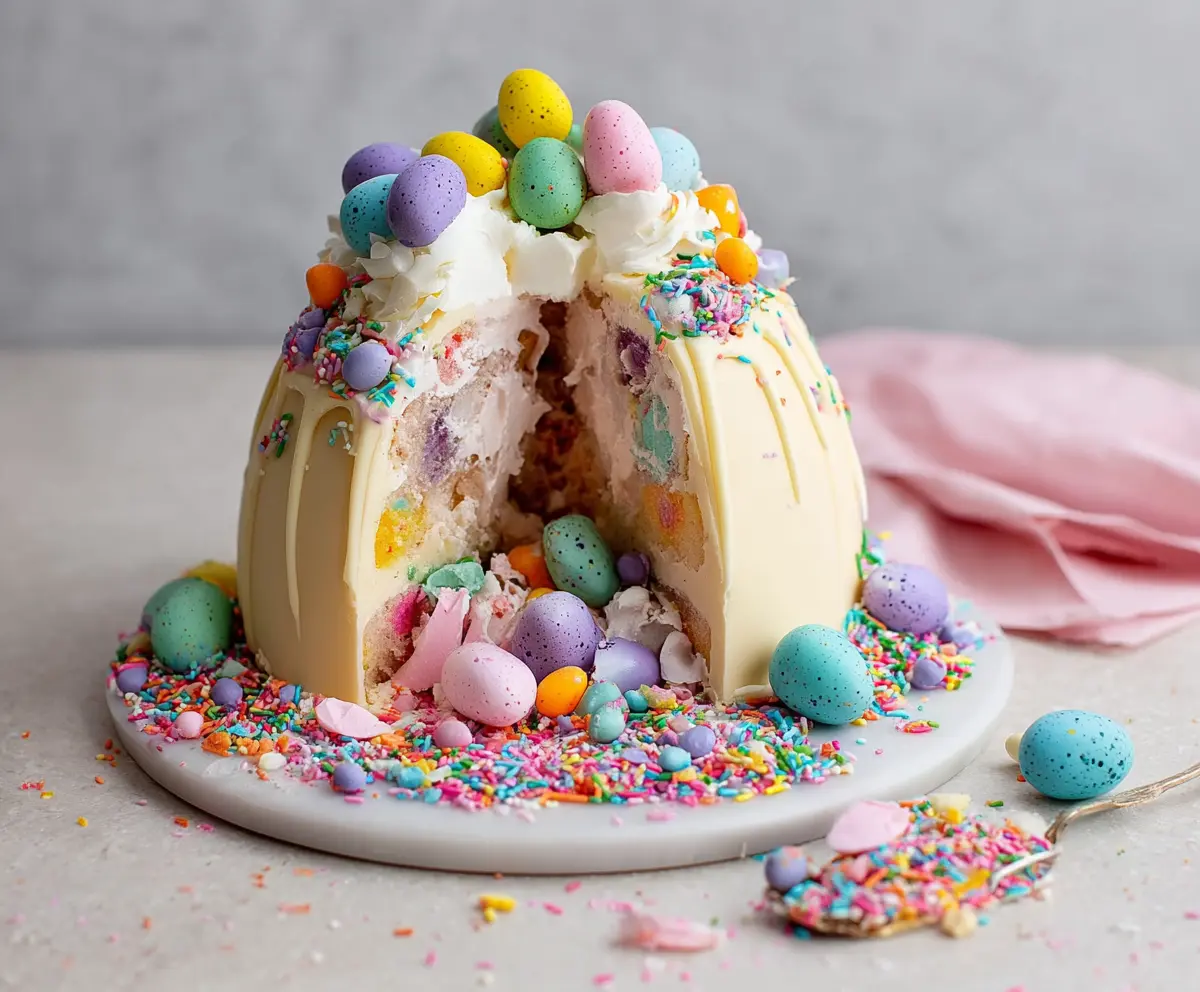
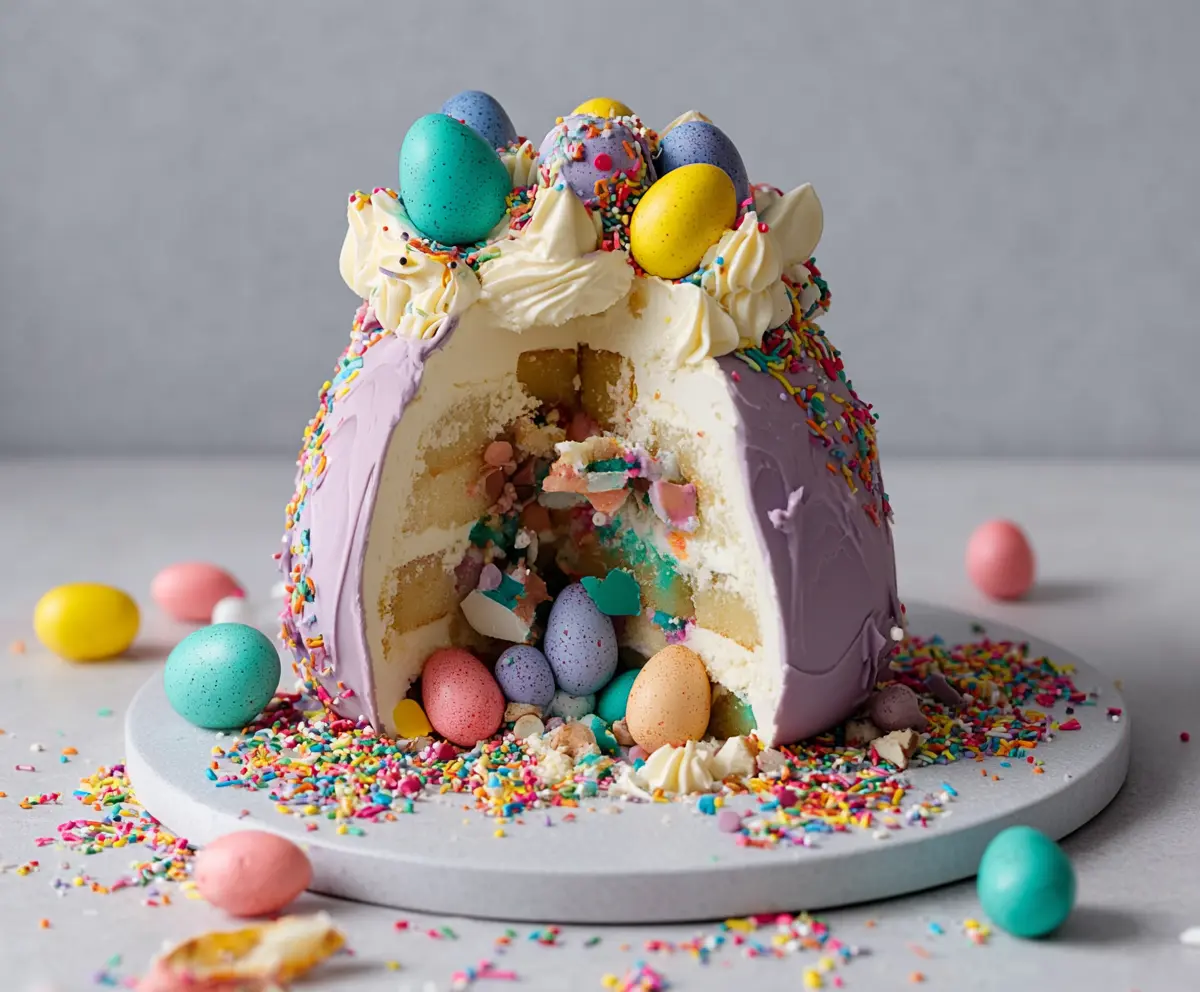
The Epic Easter Egg Smash Cake is a fun and colorful dessert that looks just like a giant Easter egg! It’s soft, sweet, and filled with surprise treats inside.
You won’t believe how joyful it is to smash into! I love watching the kids’ faces light up when they see the candies spill out. It’s perfect for creating fun memories on Easter! 🐣
Key Ingredients & Substitutions
All-Purpose Flour: This is the foundation of your cake. If you’re looking for a gluten-free option, you can substitute it with a 1:1 gluten-free flour blend. I’ve found brands that measure just like regular flour. Be sure to check the blend for the best results!
Unsalted Butter: Using unsalted butter helps you control the salt levels in your cake. If you’re out of butter, you can use margarine or even coconut oil, but the flavor may vary a little. I love how butter adds a rich creaminess to baked goods.
Heavy Whipping Cream: This is key for a fluffy filling. If you’re looking for a lighter option, you can use whipped topping, but this may not have the same richness. I prefer real whipped cream for its taste and texture, especially when folded with the candy!
White Chocolate: High-quality chocolate melts beautifully, but if you’re dairy-free, try using a dairy-free white chocolate alternative. You could also use dark or milk chocolate for a different flavor, but that changes the look of the final shell!
What’s the Best Way to Whip Cream to Stiff Peaks?
Whipping cream might seem tricky at first, but it’s all about the right tools and temperatures. Start with a chilled bowl and beaters for the best results. Here’s how:
- Pour the heavy cream into the chilled bowl and add powdered sugar and vanilla.
- Using an electric mixer, whip on medium speed until the cream starts to thicken.
- Increase the speed to high and keep beating until stiff peaks form—this means when you lift the beaters, the peaks hold their shape without collapsing.
Don’t over-whip, or you’ll end up with butter! The perfect whipped cream should be light, fluffy, and able to hold its shape.
How Do I Create the Ideal Cake Dome Shape?
Creating a dome shape for your cake is about layering and packing in the filling correctly. Here’s how to do it:
- After baking and cooling, slice the layers horizontally to increase height and create more surface area.
- When stacking, use more filling between the layers, and gently compress the cake together to form a nice dome.
- Pack in whole mini candy eggs inside the layers for a fun surprise when you cut into the cake! This adds both height and a delightful “smash” experience.
Chilling the assembled cake helps it hold the shape before covering with white chocolate.
Enjoy making your Epic Easter Egg Smash Cake, and don’t worry if it’s not perfect—this cake is all about fun and deliciousness!
How to Make an Epic Easter Egg Smash Cake
Ingredients You’ll Need:
For the Cake:
- 2 ½ cups all-purpose flour
- 2 ½ tsp baking powder
- ½ tsp salt
- 1 cup unsalted butter, softened
- 1 ¾ cups granulated sugar
- 4 large eggs
- 1 tbsp vanilla extract
- 1 cup whole milk
- ½ cup sprinkles (rainbow jimmies)
For the Filling:
- 1 cup heavy whipping cream
- 2 tbsp powdered sugar
- 1 tsp vanilla extract
- 1 cup mini pastel candy-coated chocolate eggs, crushed slightly
For the White Chocolate Shell:
- 20 oz white chocolate melts or high-quality white chocolate, chopped
- 1 tbsp coconut oil or vegetable oil (optional, to thin)
Decorating & Extras:
- Assorted pastel candy-coated chocolate eggs (mini and regular size)
- Rainbow sprinkles (jimmies and confetti style)
- Whipped cream for topping
- Edible flower petals (optional)
- Colored jelly beans or small pastel candies
How Much Time Will You Need?
This delightful cake will take about 45 minutes to prepare and bake, plus chilling time. You’ll want to allow at least 30 minutes for the assembled cake to chill and firm up. So, total time from start to finish is about 1 hour and 15 minutes, plus cooling time. Perfect for a fun Easter dessert!
Step-by-Step Instructions:
1. Bake the Cake Layers:
Start by preheating your oven to 350°F (175°C). Grease and flour two 8-inch round cake pans to prevent sticking. In a mixing bowl, sift together the flour, baking powder, and salt. In a large mixing bowl, cream the softened butter and granulated sugar together until light and fluffy. Add in the eggs one at a time, making sure to beat well after each addition. Then stir in the vanilla extract.
Now, alternate adding the flour mixture and the milk to the batter, starting and ending with the dry ingredients. Gently fold in the rainbow sprinkles for a fun touch! Once mixed, divide the batter evenly between the prepared pans and bake for 25-30 minutes. You can check for doneness by inserting a toothpick in the center; it should come out clean. Let the cakes cool completely on a wire rack.
2. Prepare Whipped Cream Filling:
In a chilled bowl, whip the heavy cream with powdered sugar and vanilla extract until stiff peaks form. This means that when you lift the whisk, the peaks should hold their shape. Then, gently fold in the crushed mini candy eggs for a fun surprise in each slice!
3. Assemble the Inside of the Cake:
Once the cake layers are completely cool, slice each layer horizontally so you have a total of 4 layers. Place the first layer on your serving plate and spread a generous amount of the whipped cream filling on top. Repeat this process with the remaining layers, stacking them one on top of the other. To create a dome shape, pile the cake up rather than leaving it flat—add extra filling and some whole mini candy eggs into the layers for that “hidden candy” effect.
4. Chill the Cake:
After stacking, chill the cake in the refrigerator for about 30 minutes. This helps it firm up before you add the white chocolate shell.
5. Prepare White Chocolate Shell:
In a microwave-safe bowl, melt the white chocolate by heating it in 30-second intervals, stirring in between, until it’s smooth. If you’d like to thin it a little for pouring, stir in coconut oil. Let the melted chocolate cool slightly, but make sure it’s still fluid.
6. Create the Chocolate Shell:
Remove the chilled cake from the fridge. Place it on a parchment or silicone mat on a plate to catch drips. Pour the melted white chocolate evenly over the top of the cake, allowing it to drip down the sides to create that lovely eggshell effect. Work quickly so the chocolate doesn’t harden too much before you finish. Chill again for around 20 minutes to set the shell.
7. Decorate the Cake:
For the fun decorating part, pipe whipped cream rosettes on the top and sides if you’d like. Add pastel candy eggs on top and around the base. Sprinkle with rainbow jimmies and confetti sprinkles for extra sparkle. Feel free to add more candies and edible flower petals for a pop of color!
8. The Smash Surprise:
Just before serving, place some candy eggs inside the hollow opening of the cake. This will create a surprising “smash” moment when it’s cut open!
9. Serve and Enjoy:
Serve your cake chilled, and to enjoy the “smash” effect, just break through the white chocolate shell and scoop out slices that include the creamy interior and candy fillings. It’s a festive and delicious treat for the whole family!
Enjoy this vibrant, colorful Epic Easter Egg Smash Cake as the centerpiece of your holiday dessert table! It’s sure to delight everyone and create fun memories.
Can I Use Different Types of Sprinkles?
Absolutely! While rainbow jimmies add a fun touch, you can use any type of sprinkles, like confetti sprinkles or chocolate sprinkles, depending on your theme. Just make sure they’re colorful to keep that festive vibe!
What If I Don’t Have White Chocolate?
No worries! If you don’t have white chocolate, you can substitute it with milk or dark chocolate for a different flavor. Just remember, the look will change—a darker shell won’t have the same “eggshell” effect, but it can still be delicious!
Can I Make the Cake in Advance?
Yes! You can bake the cake layers a day ahead and store them wrapped in plastic wrap at room temperature. Just assemble and decorate the cake on the day you plan to serve it for the freshest taste!
How Do I Handle Leftovers?
If you have leftovers, store them in an airtight container in the fridge for up to 3 days. You can gently reheat individual slices in the microwave for about 10-15 seconds if desired, just to soften the whipped cream filling again!