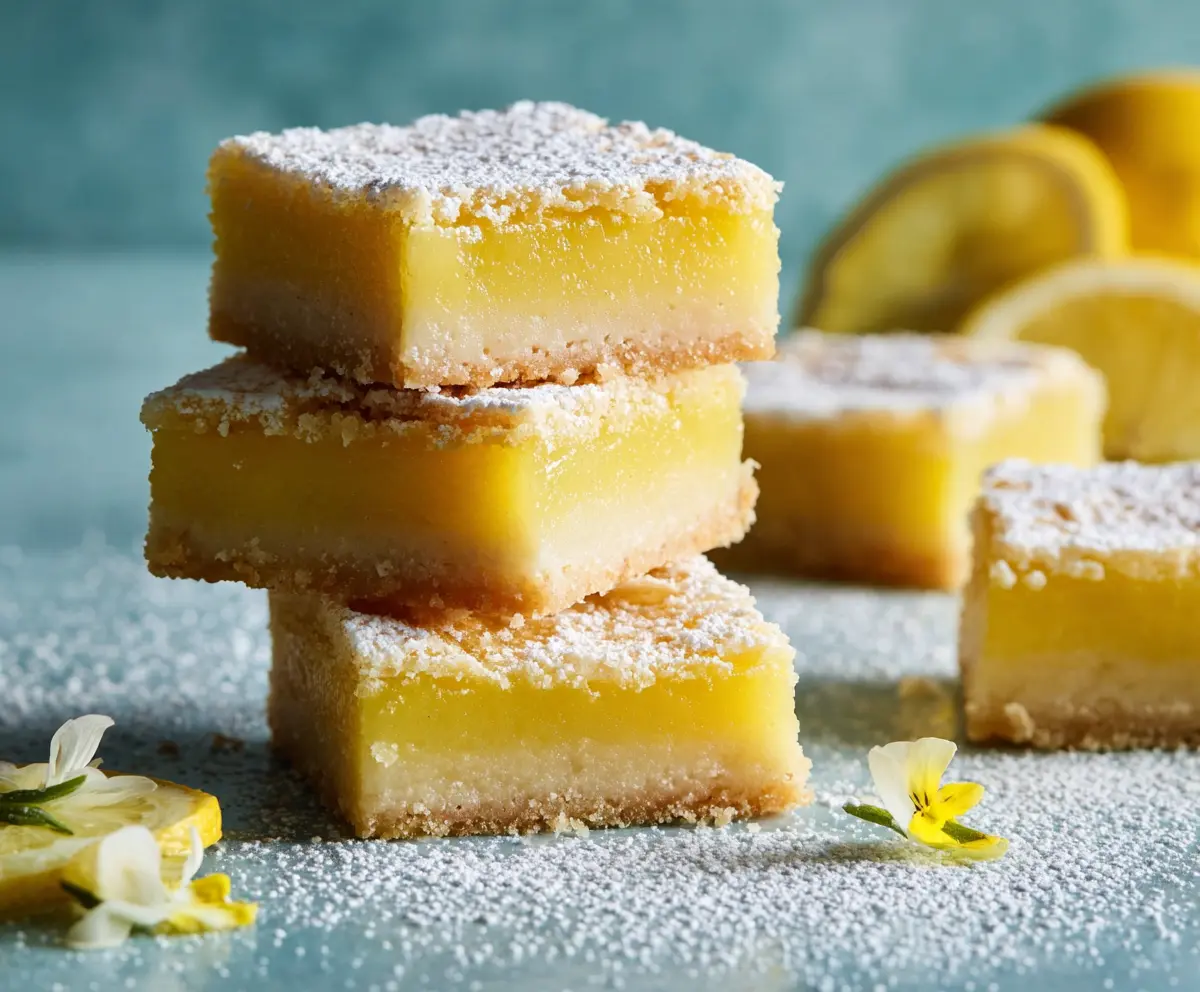
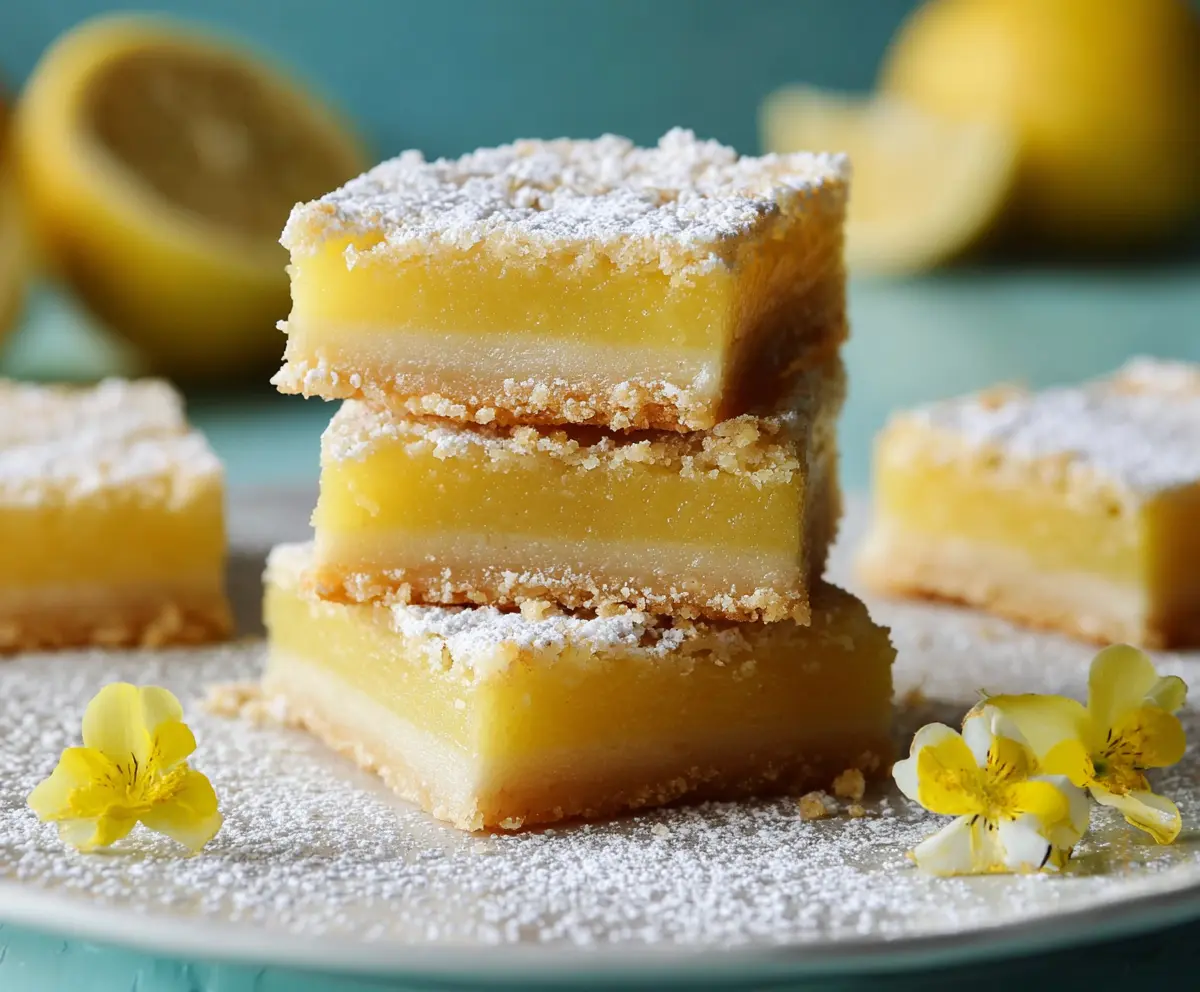
These Spring Lemon Bars are a bright and zesty treat that brings sunshine to any day! With a buttery shortbread base and a tangy lemon filling, they’re simply irresistible.
Whenever I make these, I can’t help but sneak a few bites before serving! Perfect for a picnic or just because—who needs an excuse for lemony goodness, right? 😄
Key Ingredients & Substitutions
Unsalted Butter: This is essential for a rich crust. If you’re looking for a dairy-free option, you can use coconut oil or vegan butter. I find the flavor is slightly different, but it still works nicely!
Granulated Sugar: Used both in the crust and the filling, sugar is key for sweetness. You can swap some sugar for honey or maple syrup in the filling, but that may slightly change the texture.
All-Purpose Flour: This gives the crust and filling structure. If you’re gluten-free, try using a 1-to-1 gluten-free flour blend. I’ve had good results with almond flour in the crust too, giving it a nice nutty flavor.
Lemon Juice & Zest: Fresh lemons are a must for the tangy flavor. If they’re not available, you can use bottled lemon juice, but fresh really brightens the flavor. Zest adds an extra kick, so I suggest not skipping it!
How Do You Get the Perfect Lemon Filling Texture?
Getting the lemon filling just right is essential for those delicious Spring Lemon Bars. You want it to be set but still slightly jiggly in the center once baked. Here are some tips:
- Make sure your eggs are at room temperature; this helps them blend better.
- Whisk the mixture well to combine everything smoothly; lumps can lead to uneven texture.
- Watch the baking time closely! Overbaking can make the filling rubbery. Start checking a few minutes early.
How to Make Spring Lemon Bars
Ingredients You’ll Need:
For The Crust:
- 1 cup (2 sticks) unsalted butter, softened
- 1/2 cup granulated sugar
- 2 cups all-purpose flour
- 1/4 tsp salt
For The Lemon Filling:
- 4 large eggs
- 1 1/2 cups granulated sugar
- 1/4 cup all-purpose flour
- 2 tsp grated lemon zest (about 2 lemons)
- 1/2 cup fresh lemon juice (about 3-4 lemons)
For Garnish:
- Powdered sugar for dusting
- Optional: edible spring flowers for decoration
How Much Time Will You Need?
This delightful treat takes about 15-20 minutes of prep time, plus around 35-45 minutes of baking time, and then a cooling time of at least 2 hours. Altogether, set aside about 3 hours to prepare, bake, cool, and chill before serving. It’s worth the wait for those yummy lemony flavors!
Step-by-Step Instructions:
1. Preheat and Prepare the Pan:
Start by preheating your oven to 350°F (175°C). Line a 9×13-inch baking pan with parchment paper or give it a light grease with cooking spray. This will help make removing the bars so much easier later!
2. Make the Crust:
In a large bowl, combine the softened butter and 1/2 cup of granulated sugar. Using a mixer or a fork, cream these together until the mixture is light and fluffy. Next, add 2 cups of flour and 1/4 teaspoon of salt. Mix until you have a crumbly dough.
3. Bake the Crust:
Press the dough evenly into the bottom of your prepared baking pan. Place the pan in the oven and bake for about 15-18 minutes, or until the edges are lightly golden. Once baked, carefully remove it from the oven and set it aside to cool slightly.
4. Prepare the Lemon Filling:
While that crust is baking, let’s whip up the zesty lemon filling! In a separate bowl, whisk together the 4 large eggs, 1 1/2 cups of granulated sugar, 1/4 cup of flour, grated lemon zest, and fresh lemon juice. Make sure everything is fully combined; this will create that delicious filling!
5. Combine and Bake Again:
Once the crust has cooled a bit, pour the lemon filling over the warm crust. Return the pan to the oven and bake for an additional 20-25 minutes. Keep an eye on it; the filling should be set but slightly jiggly in the center when done.
6. Cool and Chill:
After baking, remove the pan from the oven and allow it to cool completely at room temperature. Then, refrigerate for at least 2 hours to allow the bars to fully set.
7. Serve and Enjoy:
Once chilled, sprinkle the top generously with powdered sugar for a sweet finish. If you like, add some edible spring flowers to make it look extra festive! Cut into squares, serve chilled, and enjoy your bright, tangy Spring Lemon Bars!
Can I Use Different Types of Flour?
Yes! You can substitute all-purpose flour with a gluten-free flour blend if you’re looking for a gluten-free option. Almond flour can also be used for a nutty flavor in the crust, but it may alter the texture slightly.
How Do I Keep the Bars From Sticking?
To prevent sticking, line your baking pan with parchment paper, leaving some overhang to easily lift the bars out later. Additionally, lightly greasing the pan can help ensure they come out smoothly.
Can I Make These Bars Ahead of Time?
Absolutely! Spring Lemon Bars can be made a day in advance. Once they’ve cooled and set in the refrigerator, just cover them tightly with plastic wrap or foil to keep them fresh until you’re ready to serve.
What’s the Best Way to Store Leftovers?
Leftover lemon bars should be stored in an airtight container in the refrigerator, where they’ll stay fresh for up to 3 days. They’re best enjoyed chilled! Just dust with powdered sugar again before serving if desired.