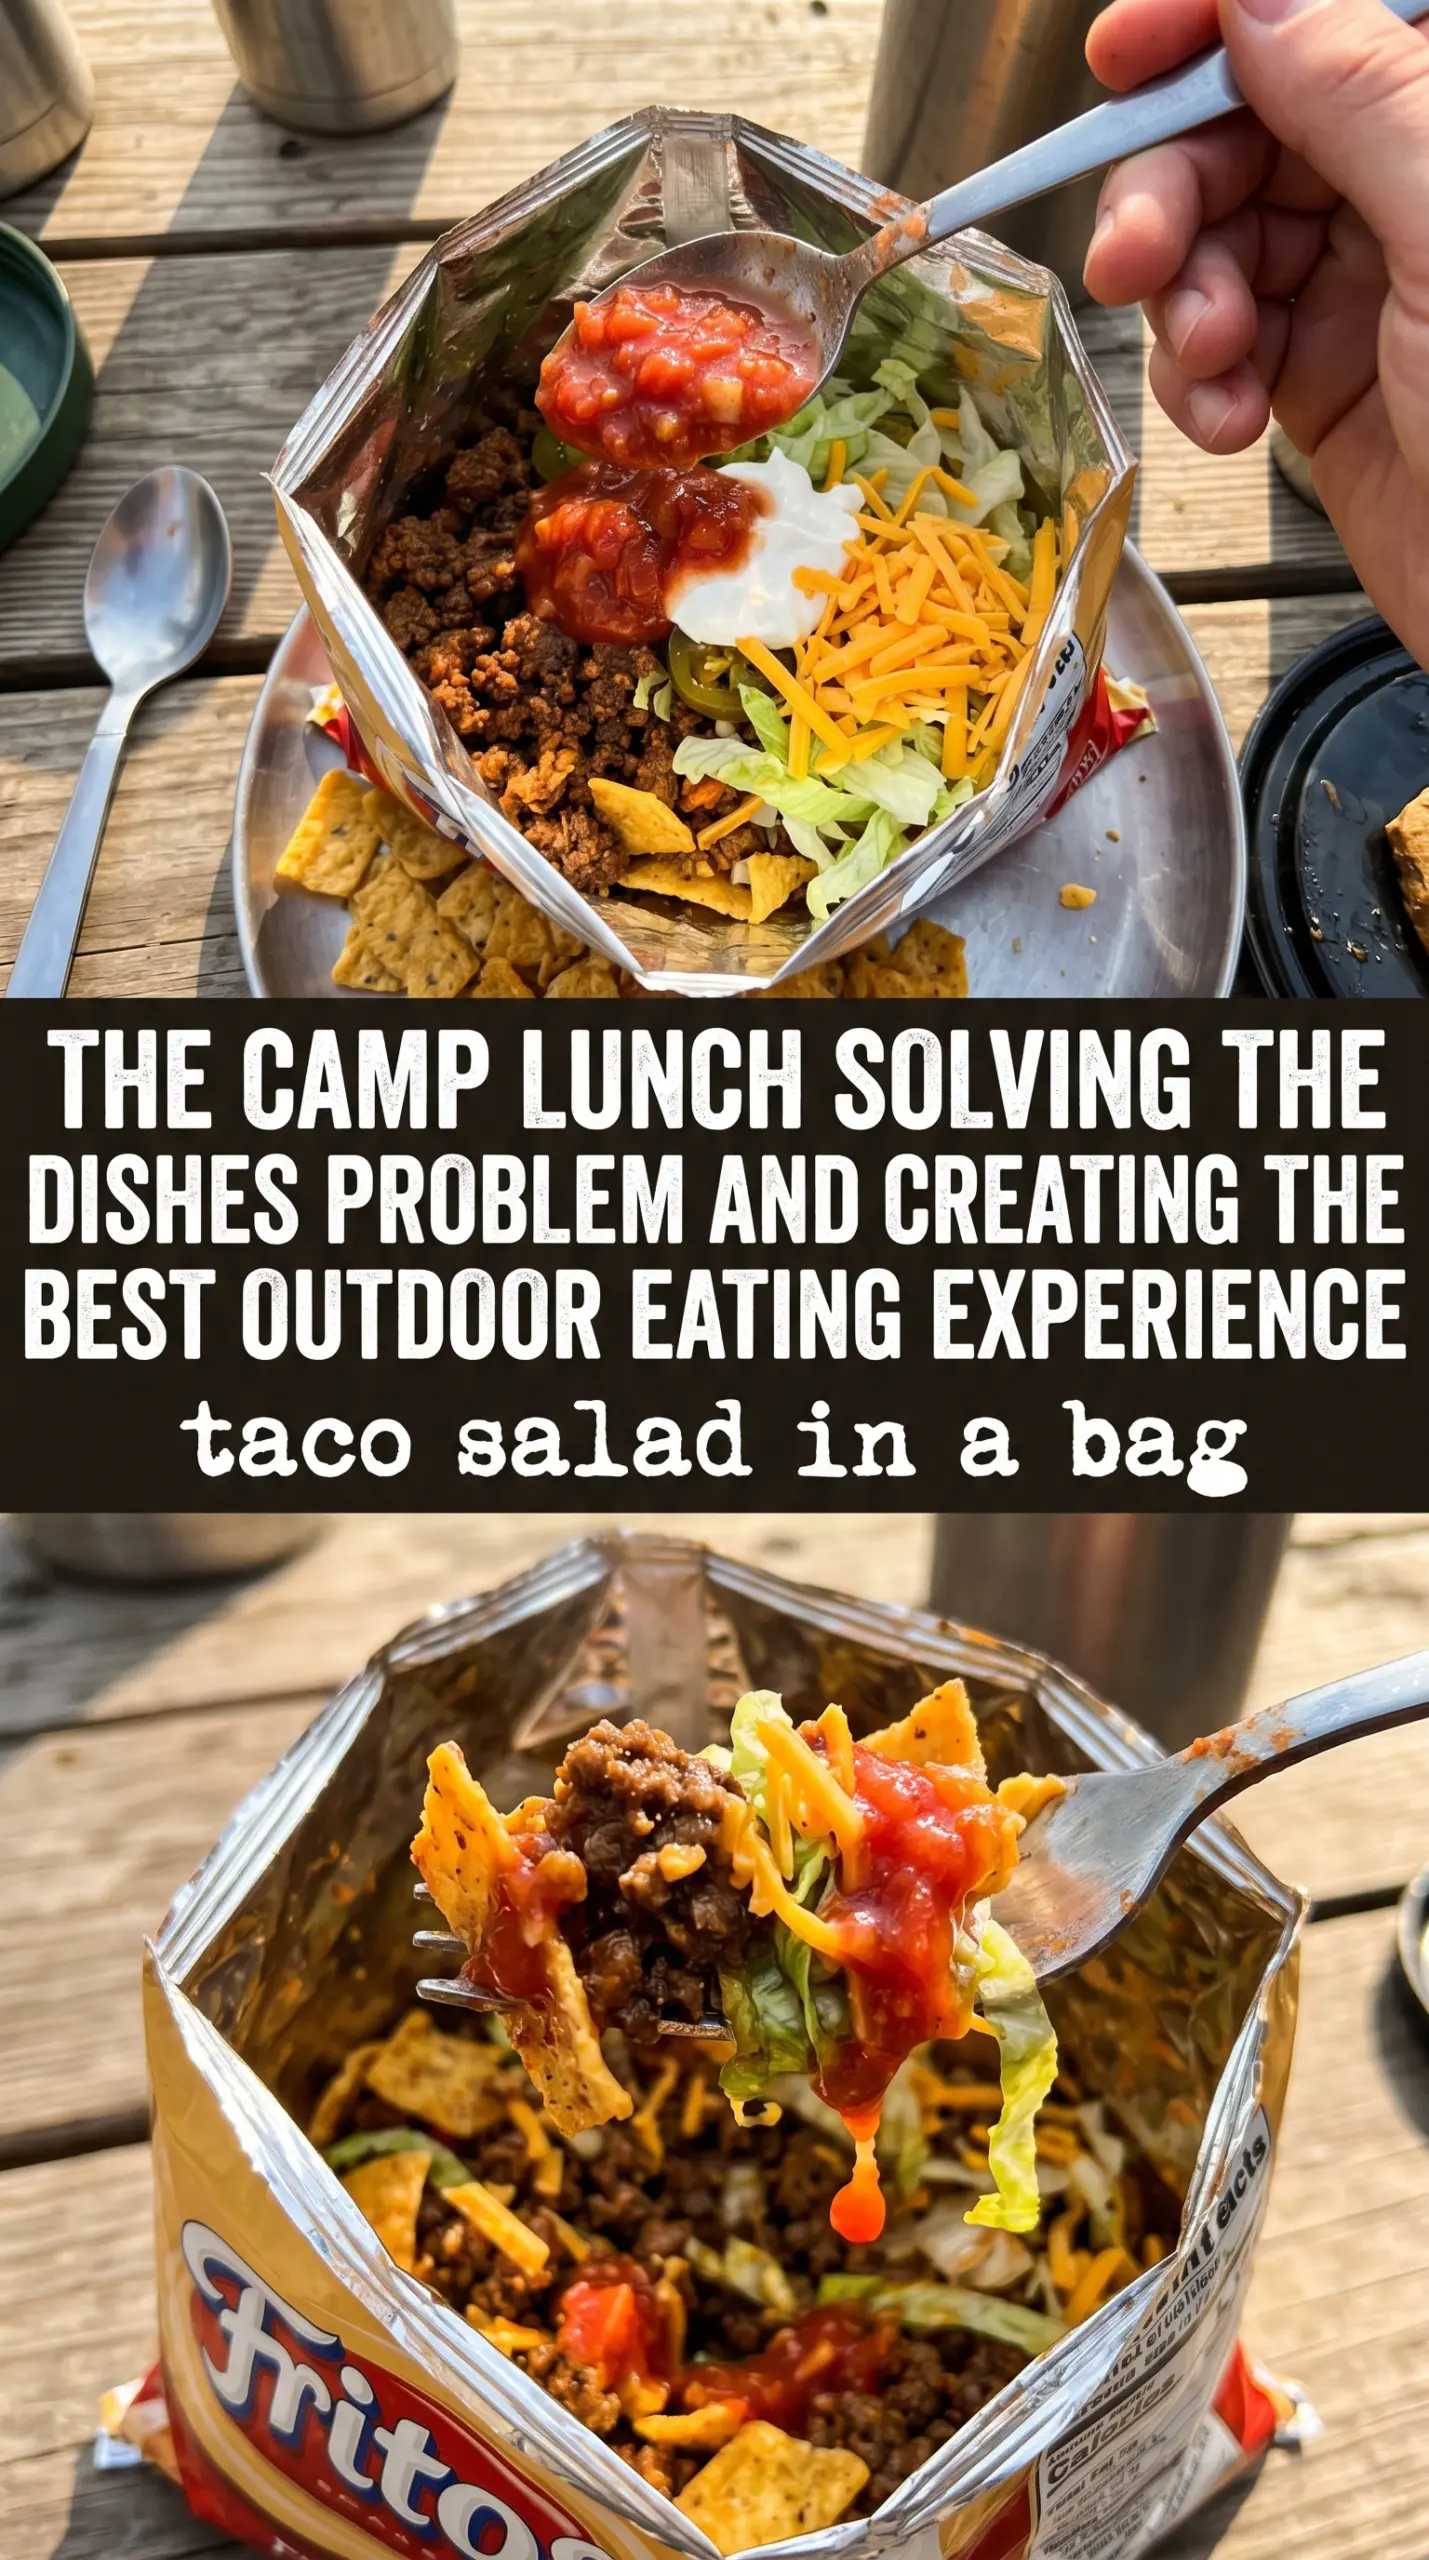
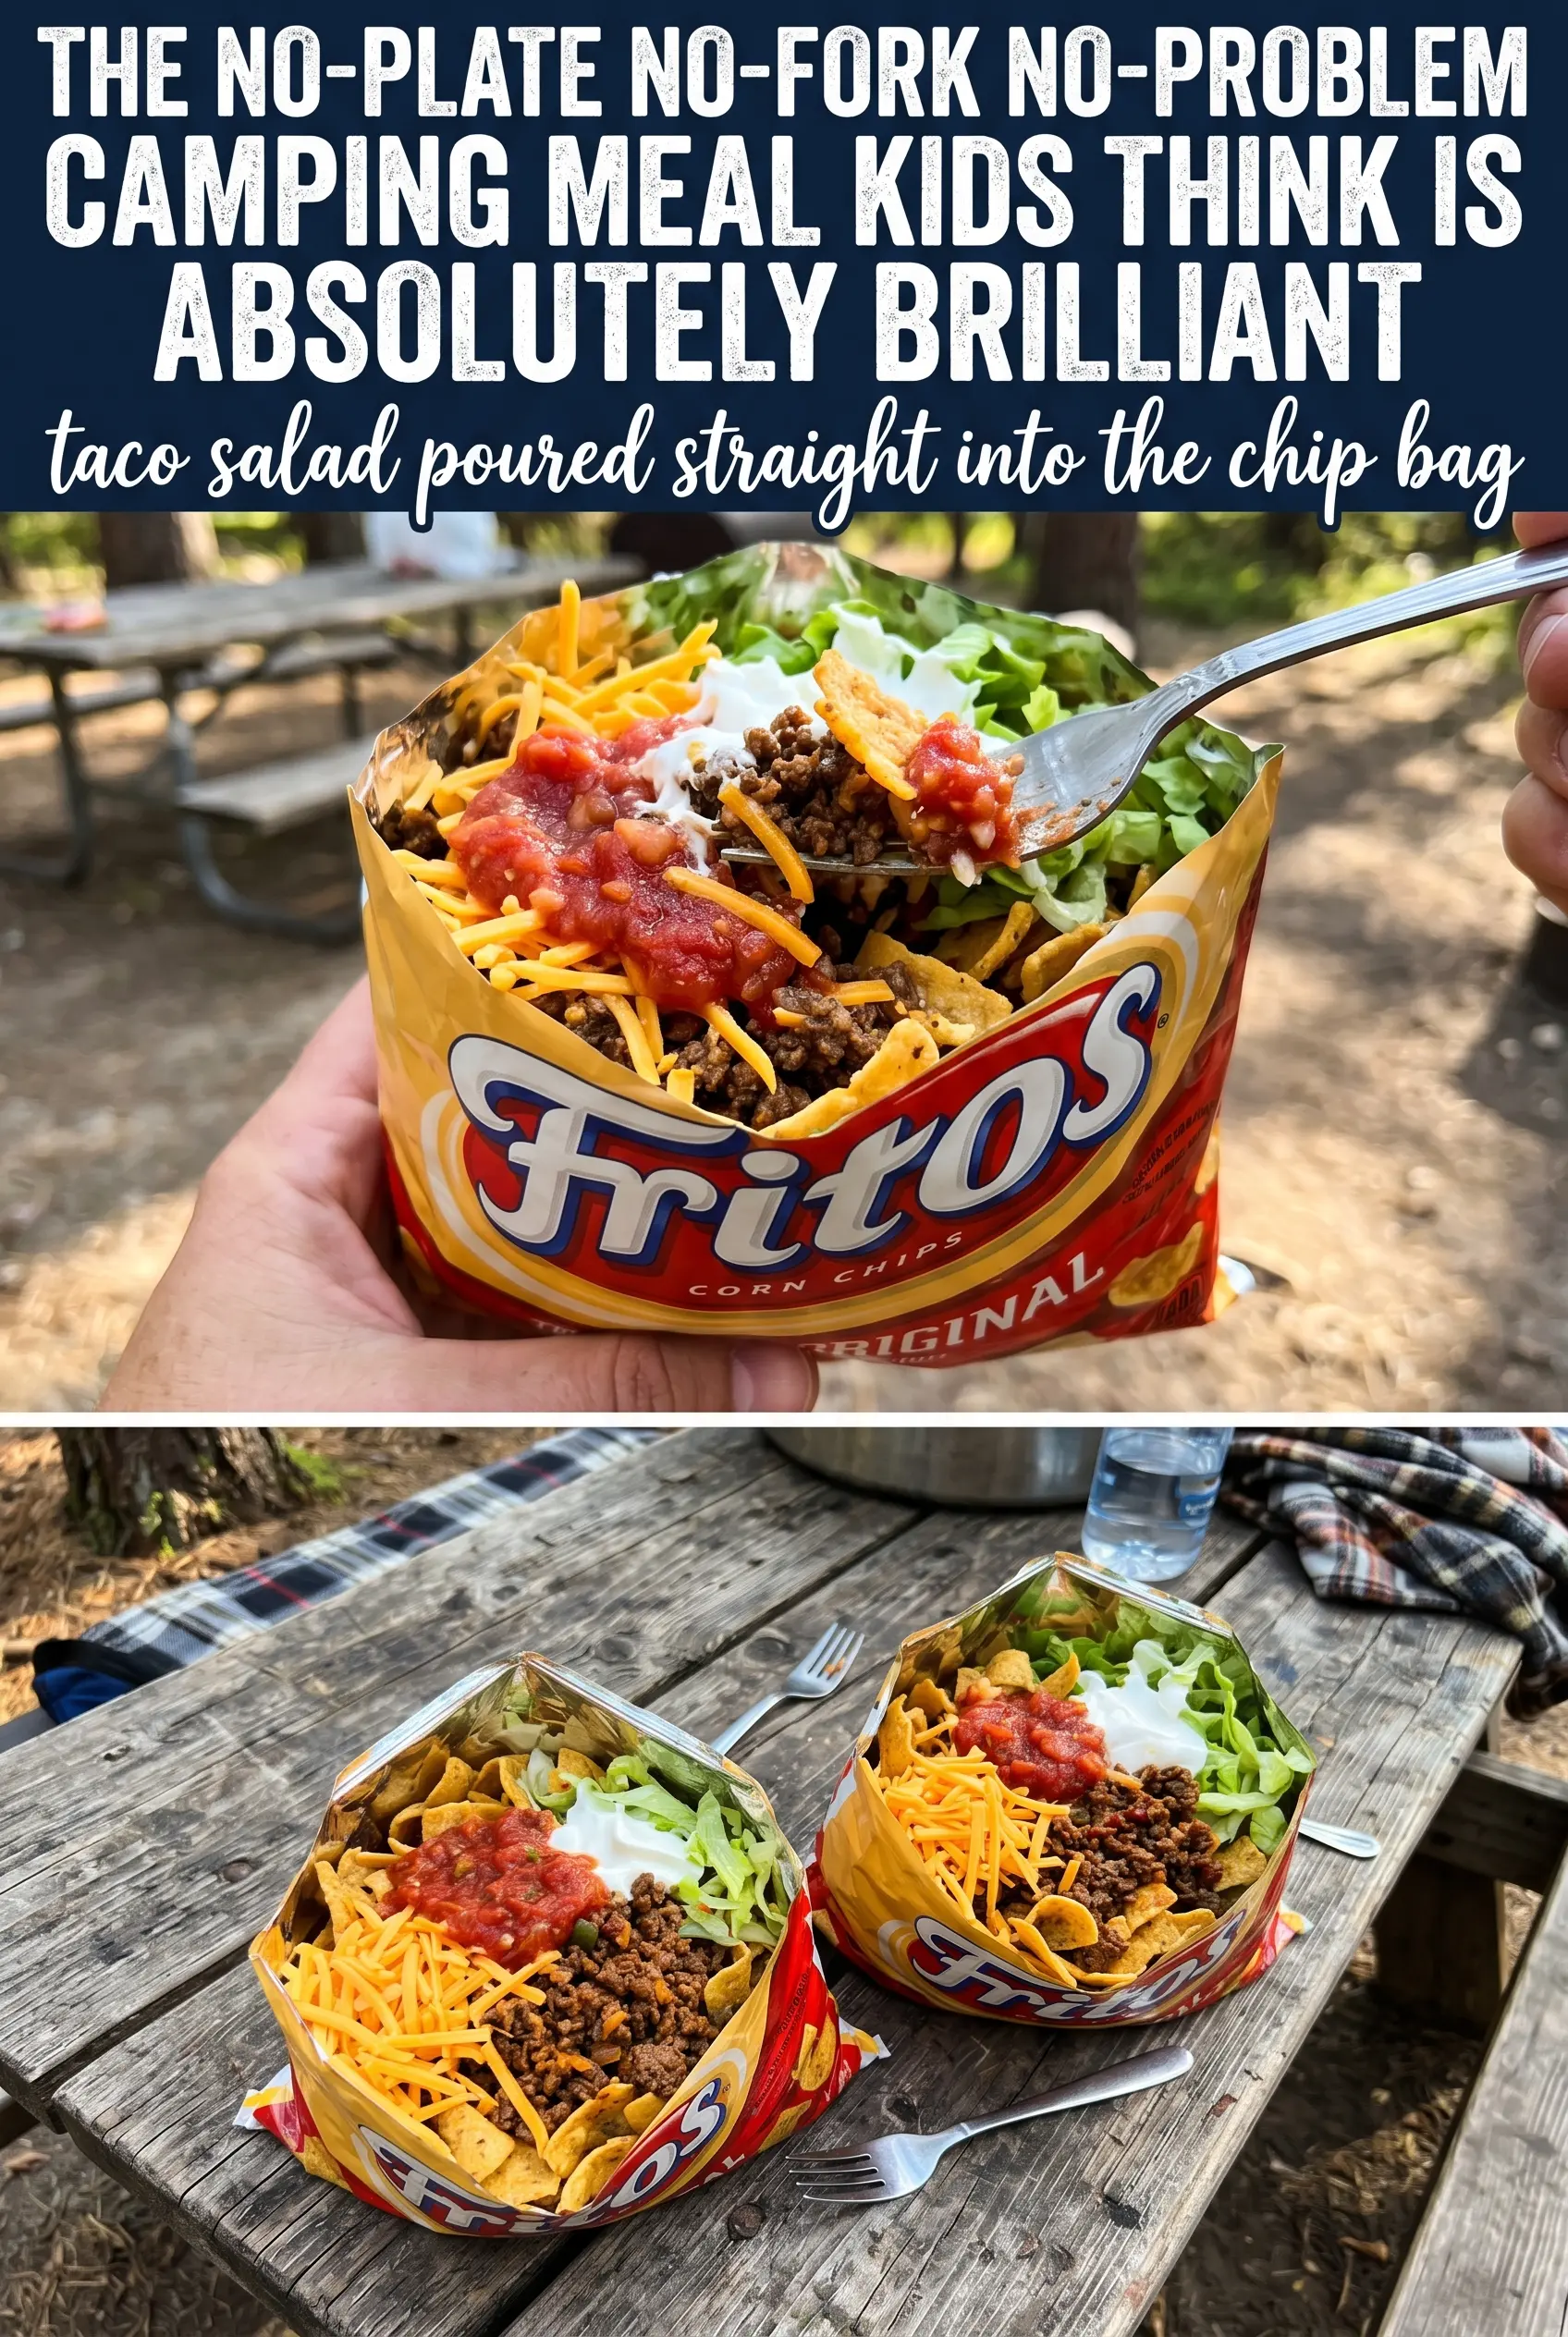
Crunchy chips, seasoned taco meat, cool lettuce, melty cheese, and a spoonful of salsa all land in one handheld bag, and that mix of textures is exactly why taco salad in a bag earns a spot at camping lunches, cookouts, and no-fuss dinners. You get the best part of taco salad without washing a bowl, and the chips stay sturdy enough to eat with a fork right from the bag.
The trick is keeping the hot and cold ingredients in the right order. The taco meat goes in first so the heat softens the cheese just enough, then the lettuce and toppings go on top so the chips don’t turn soggy before everyone sits down. Doritos bring a stronger, salty-sweet finish, while Fritos give you a deeper corn flavor and a little more bite.
Below, I’ve included the small details that keep the bags from tearing, the meat from getting greasy, and the toppings from sliding to the bottom. There’s also a few smart swaps for feeding a crowd, packing this for camping, or making it fit what you’ve got on hand.
The meat stayed juicy, the chips kept their crunch, and everyone loved building their own bag. I used Fritos and the salty corn flavor worked perfectly with the salsa and sour cream.
Save this taco salad in a bag for camping lunches, backyard dinners, and the nights when you want crunchy, hands-on taco flavor without the dishes.
The Part That Keeps the Chips Crunchy Until the Last Bite
The biggest mistake with taco salad in a bag is treating it like a bowl salad and loading everything in at once. Chips start absorbing moisture the second they touch juicy tomatoes, sour cream, and seasoned meat. If the bag sits open too long, the bottom turns soft before anyone gets a fork in it.
Keep the meat hot, but not greasy, and build each bag in layers. Meat first, then lettuce and cheese, then tomatoes and toppings. That order gives you a little insulation from the hot filling while still letting the cheese soften enough to taste like part of the meal instead of a cold topping.
- Doritos or Fritos — Doritos give you a louder, more seasoned bite that reads almost like a built-in taco shell. Fritos are sturdier and hold up a little better if the bags sit for a few minutes. Use plain tortilla chips only if you want a milder result and a more fragile crunch.
- Ground beef — Use lean ground beef if you can. Extra grease collects at the bottom of the bag and makes the chips soggy fast. If your beef runs fatty, drain it well after cooking and before adding the taco seasoning.
- Taco seasoning — This is where the whole dish gets its backbone. A packet works fine, but if you make your own, don’t skimp on cumin and chili powder. The meat should taste boldly seasoned on its own before it goes into the bag.
- Shredded cheese — Pre-shredded cheese is convenient, but freshly shredded melts into the warm meat a little better. If convenience matters more, bagged cheese is still fine here because the salad is served right away.
- Sour cream and salsa — These belong on top, not mixed in early. Thick sour cream holds its shape, and salsa adds brightness, but both will soften the chips fast if they hit the bottom layer first.
What Each Ingredient Is Actually Doing in Taco Salad In A Bag
- Fresh vegetables (vibrant, crisp, quality) — Start with fresh, brightly colored vegetables. Wilted vegetables make everything taste tired.
- Acid (vinegar, lemon juice, or lime) — The acid prevents oxidation and prevents flat taste. It’s essential for brightness.
- Oil (quality matters for flavor) — Good olive oil adds freshness. Cheap oil makes the salad taste flat.
- Salt (enhances all other flavors) — Proper seasoning makes vegetables taste more like themselves. Don’t undersalt.
- Fresh herbs (tender ones added last) — Fresh herbs add complexity and brightness. Add them right before serving.
- Protein or hearty elements (if using) — These should complement without overwhelming the vegetables. Keep the salad light.
- Dressing applied just before serving — Don’t dress early or the vegetables release liquid and wilt. Timing is everything.
- Taste and adjust (check for balance) — The salad should taste bright and assertive. Add more acid or salt if needed.
Building Each Bag Without Turning It Into a Soggy Mess
Cooking the Taco Meat
Cook the beef until it’s no longer pink and the browned bits start to gather at the bottom of the skillet. Drain off the fat before you add the seasoning, because excess grease is the fastest way to wreck the chips. The meat should be juicy, not oily, and it should clump lightly when stirred so it sits neatly in the bag.
Opening the Chip Bags
Cut each bag cleanly across the top or down one side, then gently press the bag open without crushing the chips. If the opening tears too low, the filling spills before it gets to the table. Stand the bags upright in a muffin tin, a shallow bowl, or a folded towel so both hands stay free while you layer.
Layering for the Best Bite
Build in this order: meat, lettuce, cheese, tomatoes, then sour cream, salsa, and olives. That sequence keeps the warm filling lower in the bag and the cold toppings up where they belong. If you stir everything together, the chips lose their structure and the bag turns into a damp pile before the first bite.
Serving Straight From the Bag
Hand out a fork and let people eat from the bag right away. This is not a recipe that improves with waiting. The texture is at its best in the first 10 minutes after assembly, when the chips are still crisp and the cheese hasn’t had time to slide around.
How to Adapt Taco Salad in a Bag for a Crowd, a Campsite, or a Lighter Plate
Use ground turkey for a lighter version
Ground turkey works well if you season it generously and don’t let it dry out. It gives you a leaner filling, though it has a milder flavor than beef, so the taco seasoning does more of the work.
Make it vegetarian with black beans or plant-based crumbles
Black beans or seasoned plant-based crumbles give you a hearty filling without the meat. Beans are softer and creamier, while crumbles mimic the texture of taco beef more closely. Either way, warm the filling first so it doesn’t chill the chips too quickly.
Pack it for camping in separate containers
For camping, cook the meat ahead if you can, then pack the toppings cold in sealed containers and assemble at the table or picnic spot. That keeps the chips crisp and saves space in your cooler.
Storage and Reheating
- Refrigerator: Store the taco meat separately for up to 4 days. Once the bags are assembled, the chips soften fast and the salad doesn’t hold well.
- Freezer: The cooked taco meat freezes well for up to 2 months. Freeze it flat in a sealed bag or container, then thaw in the fridge before reheating.
- Reheating: Warm the meat in a skillet or microwave until hot, then build fresh bags. Don’t reheat the assembled salad, because the chips will go stale and the lettuce will wilt.
Questions I Get Asked About This Recipe
Taco Salad In A Bag
Ingredients
Equipment
Method
- Cook the ground beef in a skillet over a campfire until browned, about 8 to 10 minutes, stirring occasionally so it cooks evenly.
- Season the cooked ground beef with taco seasoning and keep it simmering on the campfire for 2 to 3 minutes, until the mixture looks evenly coated.
- Open each individual Doritos or Fritos bag by cutting along the top or side, then keep it upright so layers stay inside.
- Add a layer of taco meat into each bag first so it forms the base for the salad.
- Add shredded lettuce over the meat as the next layer, spreading it to help every bite include crunch.
- Add shredded cheese over the lettuce so it starts to soften from the warm meat.
- Add diced tomatoes on top, distributing them evenly across the bags.
- Top each bag with sour cream, then watch for a creamy layer that contrasts with the chips.
- Drizzle salsa over the top so it runs slightly down the layers.
- Finish by adding sliced black olives on top, then eat directly from the bag with a fork.