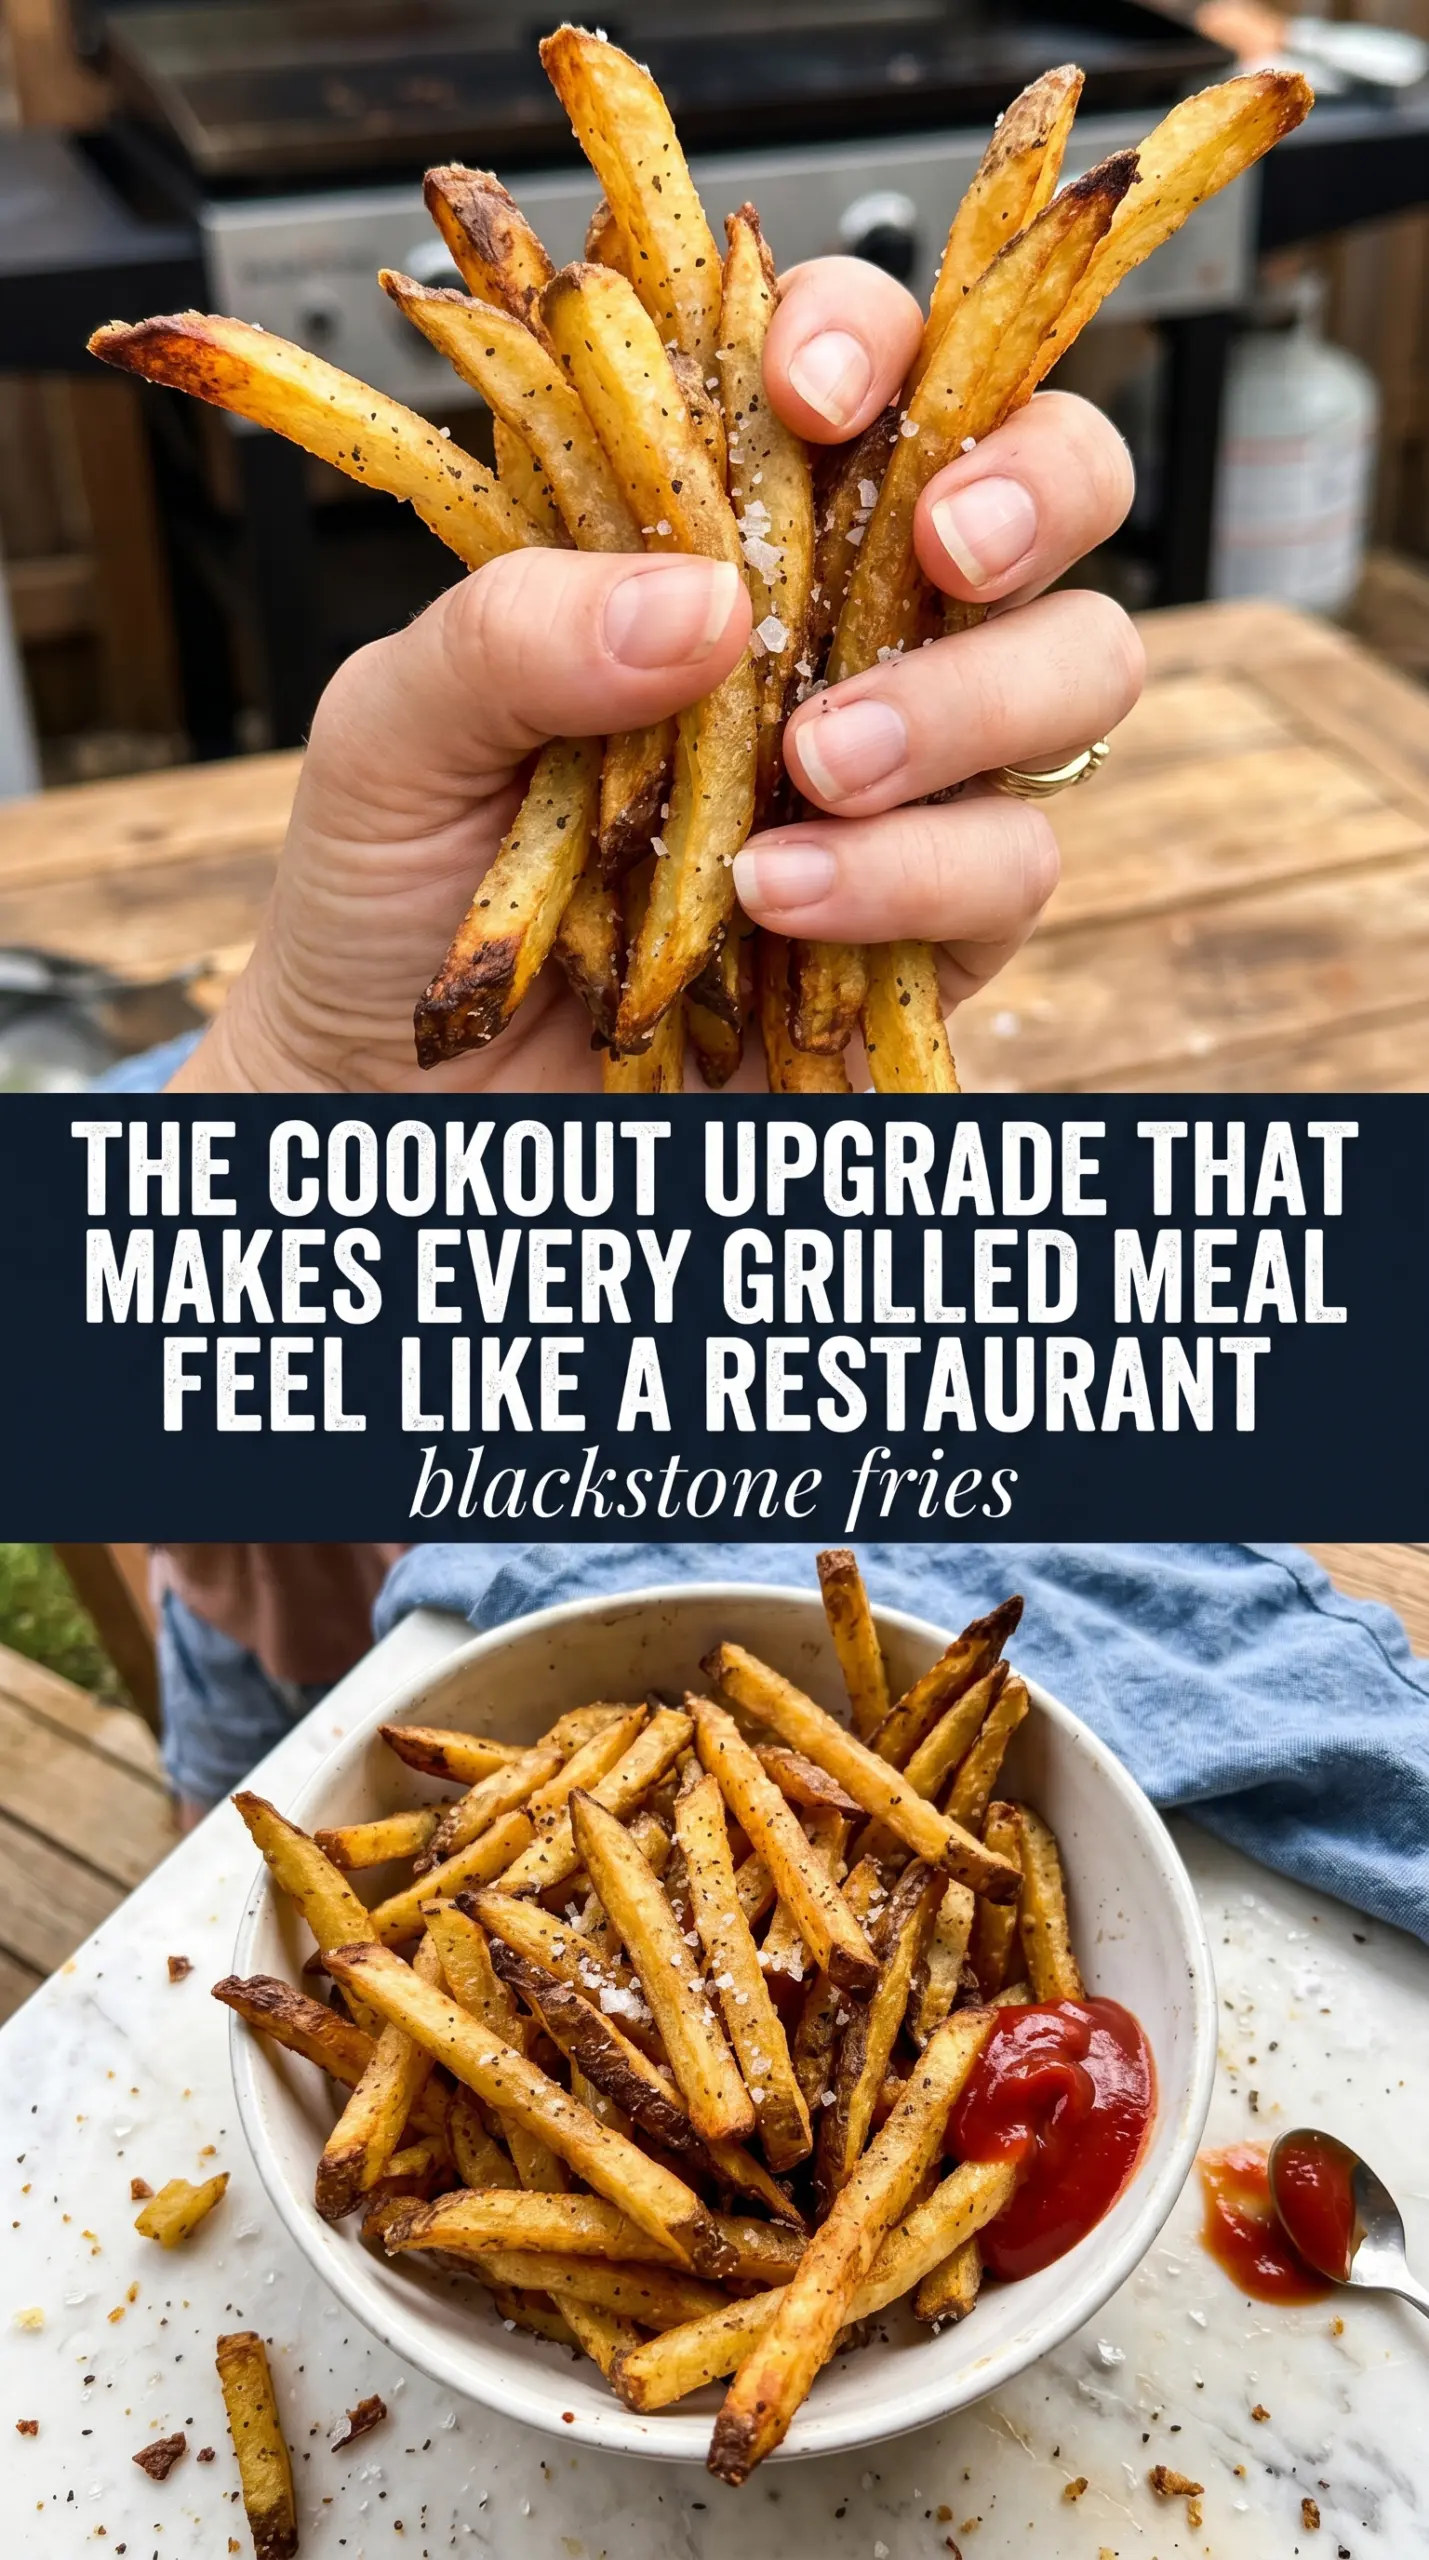
Golden Blackstone fries land with a crackly edge, a fluffy center, and just enough butter on the griddle to give them that cookout-style finish. They don’t taste like oven fries or deep-fried fries. They taste like fries that picked up a little extra flavor from the griddle and stayed crisp long enough to make it to the table hot.
The difference here is heat control and restraint. Russet potatoes need to be cut evenly, soaked briefly, and dried all the way through so they can brown instead of steam. The oil keeps the fries from sticking, and the butter adds flavor, but the butter has to go onto a hot surface with the potatoes following soon after so it doesn’t burn before the fries have a chance to crisp.
Below you’ll find the little details that matter most: how thick to cut the fries, when to season them so the spice actually clings, and how to keep them from turning soft before serving. Once you’ve made them this way, it is hard to go back to bland side-dish fries.
I followed the soak and dry step exactly, and the fries came out crisp on the edges with soft centers. The paprika and garlic powder stuck right away, and they stayed crunchy long enough to serve the whole batch.
Crispy Blackstone fries with smoky seasoning and a buttery griddle finish belong on your next burger night.
The Reason These Fries Crisp on the Griddle Instead of Going Limp
Blackstone fries fail for the same reason stove-top potatoes often do: too much moisture and too much moving around. If the cut potatoes go onto the griddle damp, they steam first and brown later, which gives you soft edges instead of that hard, glassy crunch. The short soak pulls off surface starch so the fries don’t glue themselves down, but the real turning point is drying them completely before they hit the heat.
Another thing that matters here is spacing. A crowded griddle lowers the surface temperature around the fries, and that’s when you lose the crisping window. Give the potatoes a single layer and leave them alone until the first side has set. If they stick at the start, they’re not ready yet; once the crust forms, they’ll release with a clean flip.
What the Potatoes, Fat, and Seasoning Are Each Doing Here
- Russet potatoes — These are the right potato for fries because they have a drier, fluffier interior and enough structure to hold a crisp edge. Waxy potatoes stay denser and can turn greasy on the griddle. Cut them evenly so the thinner pieces don’t burn while the thicker ones are still pale.
- Vegetable oil — This gives you the high-heat frying surface that gets the potatoes moving toward crispness. A neutral oil is fine here because you’re adding flavor with the butter and seasonings. Don’t skip the oil and rely on butter alone; butter by itself browns too fast and can leave the fries patchy.
- Butter — The butter is there for flavor, not for frying power. It gives the fries that rich, diner-style finish, but it needs the oil beside it so it doesn’t scorch. If you want a cleaner finish, use a little less butter; the fries will still crisp, just with less of that savory coating.
- Garlic powder, paprika, and onion powder — These cling best when the fries come off the griddle hot. Seasoning them after cooking keeps the spices from burning and gives you an even coating instead of dusty patches. Paprika brings color, garlic powder brings depth, and onion powder rounds out the saltiness.
Getting the Fries from Raw Potatoes to Crisp Edges Without Burning Them
Cutting and Soaking the Potatoes
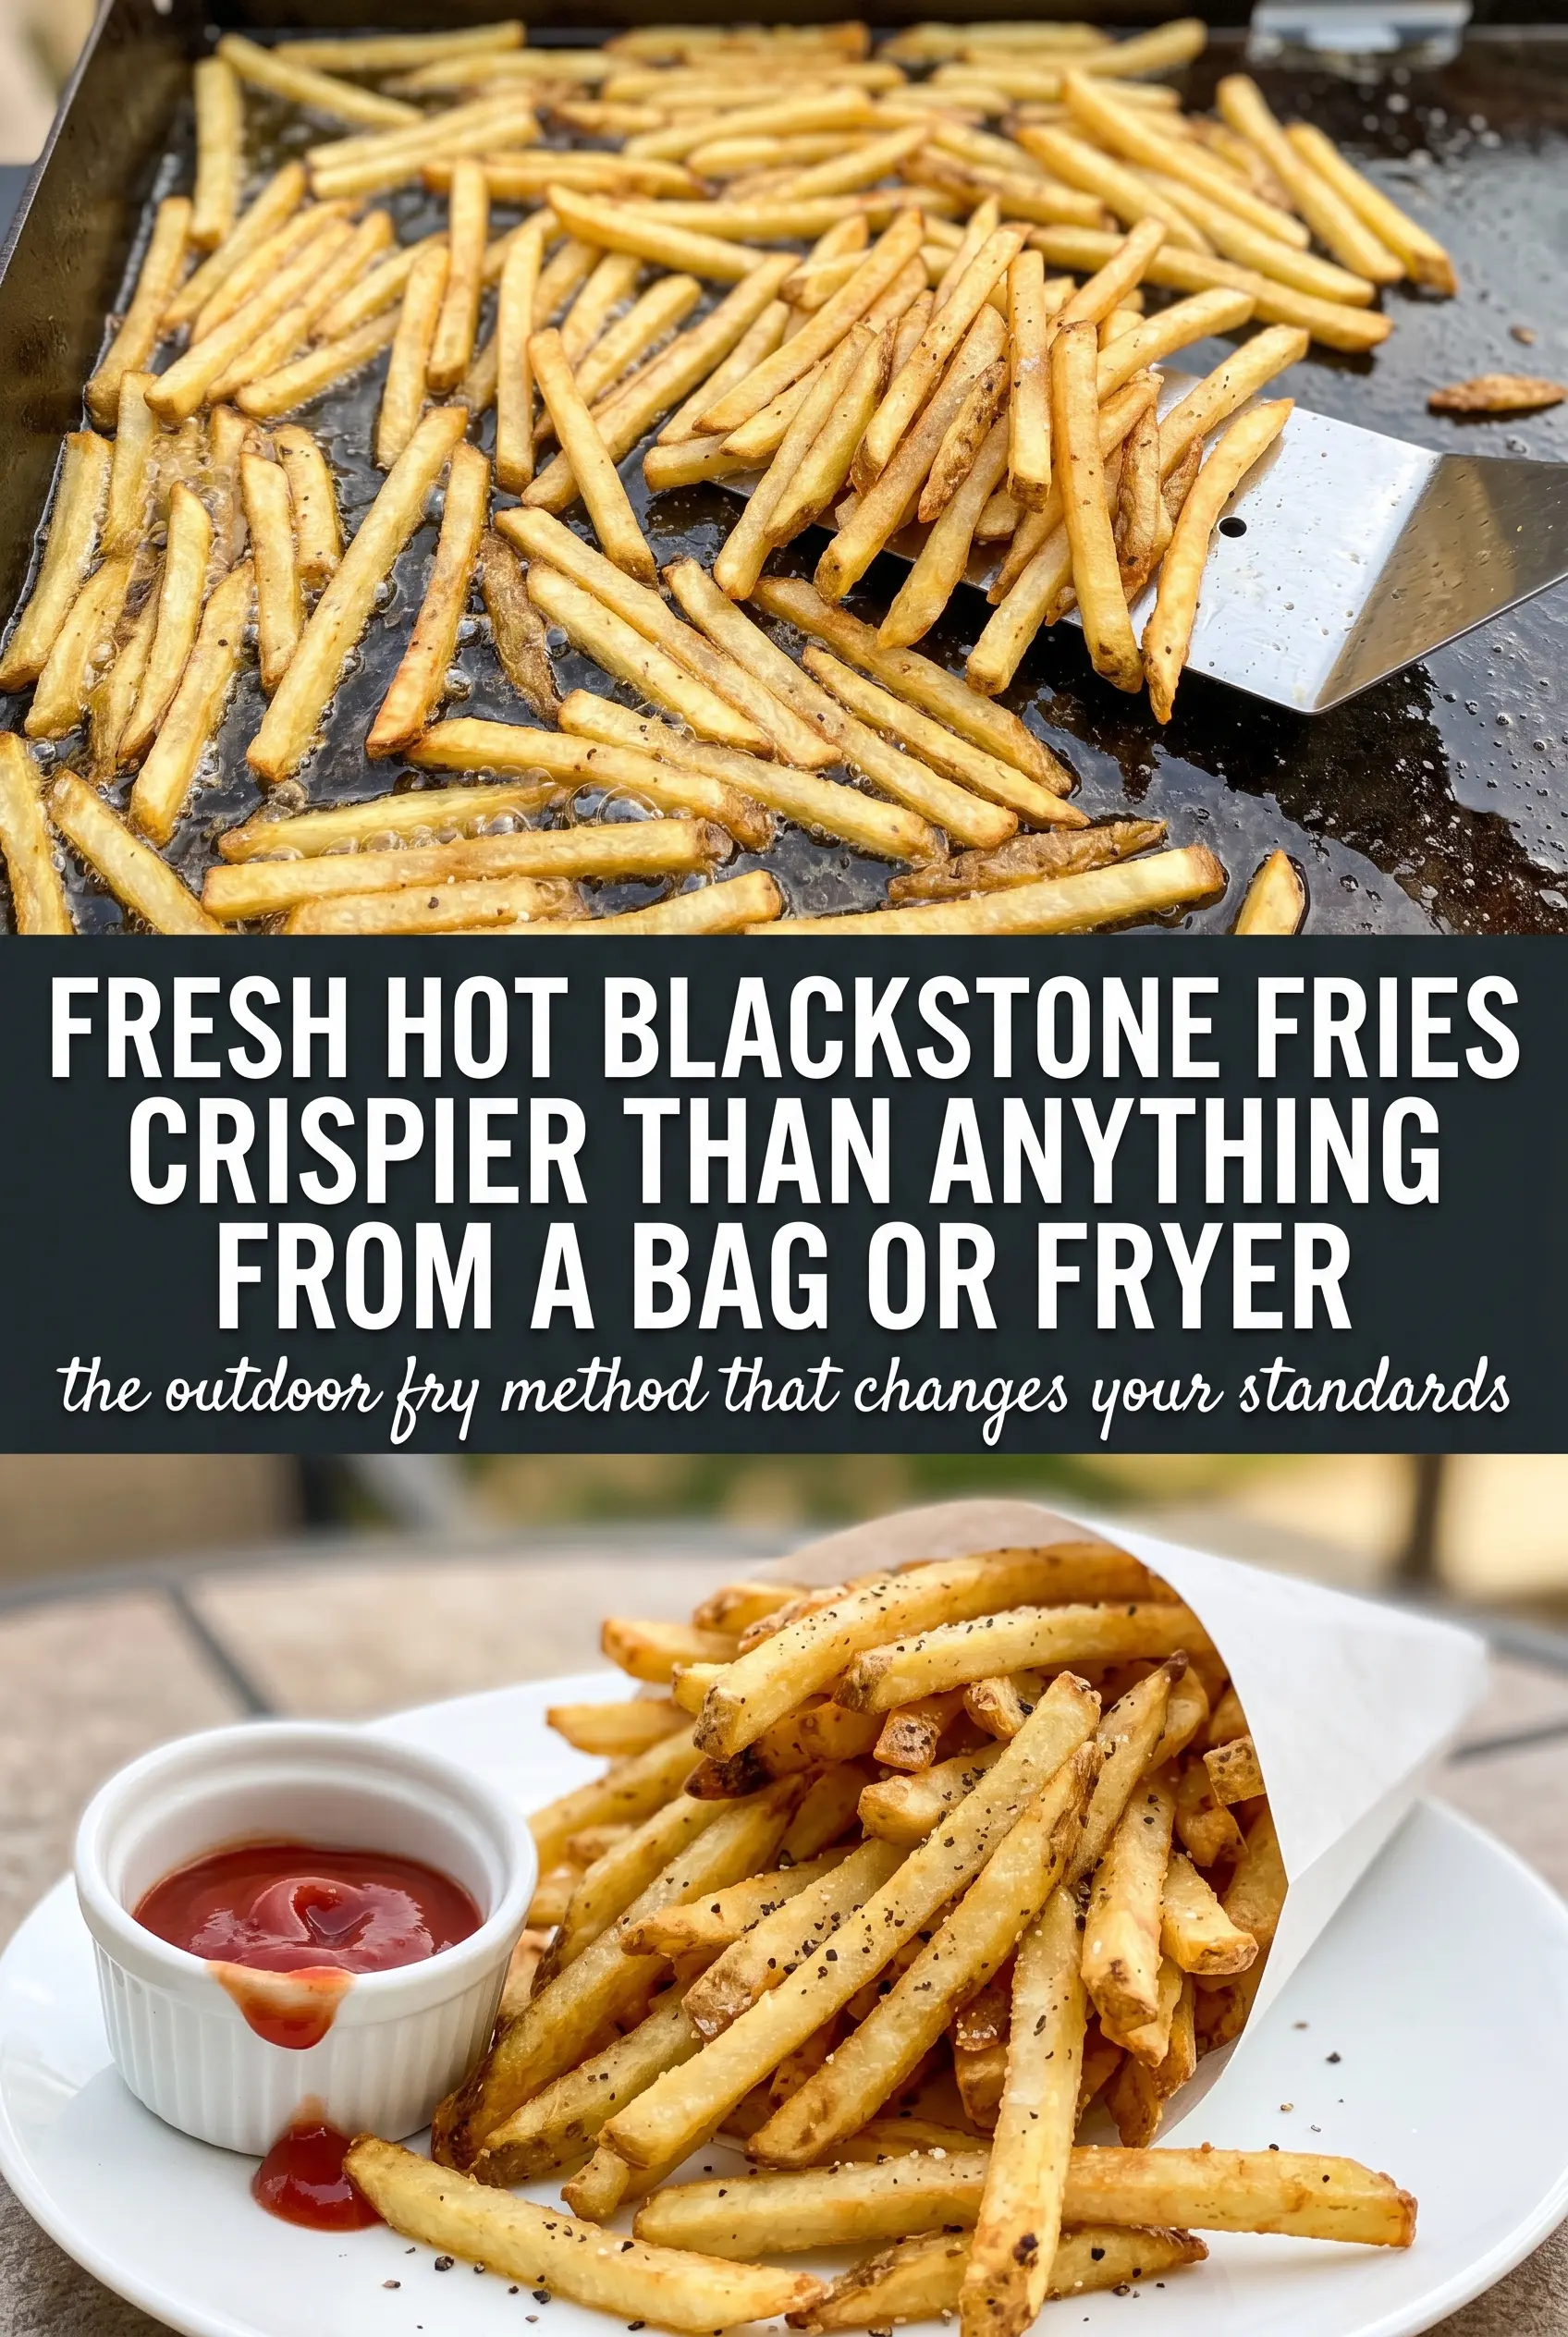
Cut the russets into 1/4-inch fries so they cook at the same pace. If the pieces are too thick, the outside will darken before the center softens; too thin, and they’ll break or overcook fast. Soak them in cold water for 10 minutes, then dry them completely with towels. Any surface water left behind turns into steam the second the fries hit the griddle.
Heating the Griddle and Starting the First Side
Bring the Blackstone to medium-high before the potatoes go on. Add the oil and butter, then spread the fries in one layer across the hot surface. They should sizzle right away, but not smoke aggressively. If the heat is too low, they absorb fat and soften; if it’s too high, the butter can brown before the potatoes get a chance to color evenly.
Flipping at the Right Moment
Leave the fries alone for 8 to 10 minutes on the first side. When the underside is deep golden and lifts without tearing, flip them and let the second side finish. If you try to turn them too early, they’ll stick and lose their crust. Keep the movement minimal here. The less you disturb them, the more surface area stays in contact with the griddle, which is exactly what you want.
Seasoning and Serving Hot
Season the fries immediately after they come off the heat while they’re still glossy with fat. That’s when the garlic powder, paprika, onion powder, salt, and pepper cling best. Finish with chopped parsley for a fresh note and serve them right away with ketchup or any dipping sauce you like. Fries cool fast on a plate, so get them into a basket or serving bowl the moment they’re done.
How to Change the Batch Without Losing the Crisp
Cheesy Garlic Fries
Add finely grated Parmesan right after the fries come off the griddle. The heat will melt it into the seasoning and give you a salty, savory finish, but wait until the fries are done or the cheese will burn on the surface. This works best when you want a richer side for burgers or grilled steak.
Dairy-Free Version
Swap the butter for another tablespoon of vegetable oil or use a dairy-free butter with a high smoke point. You lose a little of the rich, round flavor, but the fries still crisp well because the real work is being done by the hot griddle and dry potatoes. This is the cleanest adjustment if you’re cooking for a dairy-free table.
Spicy Seasoned Fries
Add a pinch of cayenne or chili powder to the seasoning mix. The fries will keep the same texture but pick up more heat and a darker color from the spice blend. Start small, because griddle fries carry seasoning fast and it is easier to add heat than take it away.
Storage and Reheating
- Refrigerator: Store leftovers in an airtight container for up to 3 days. They will soften as they sit, even if they started out crisp.
- Freezer: These freeze poorly after cooking because the texture turns mealy and soft on thawing. If you want to freeze ahead, freeze the cut, soaked, and fully dried potatoes first, then cook from thawed and dried.
- Reheating: Reheat in a hot skillet or back on the griddle over medium-high until the outside wakes back up. The common mistake is using the microwave, which makes the fries limp in minutes.
Answers to the Questions Worth Asking
Blackstone Fries
Ingredients
Equipment
Method
- Cut russet potatoes into 1/4-inch thick fries and soak in cold water for 10 minutes, keeping them fully submerged.
- Drain and pat the fries completely dry so they crisp instead of steaming.
- Heat the Blackstone griddle to medium-high and add vegetable oil and butter.
- Spread the fries in a single layer and cook for 8-10 minutes without moving them, until the bottoms look set and lightly browned.
- Flip the fries and cook another 8-10 minutes until golden and crispy on all sides, with visible steam rising.
- Season immediately with garlic powder, paprika, onion powder, salt, and pepper while the fries are hot so the coating clings.
- Garnish with fresh parsley and serve with ketchup and other dipping sauces.