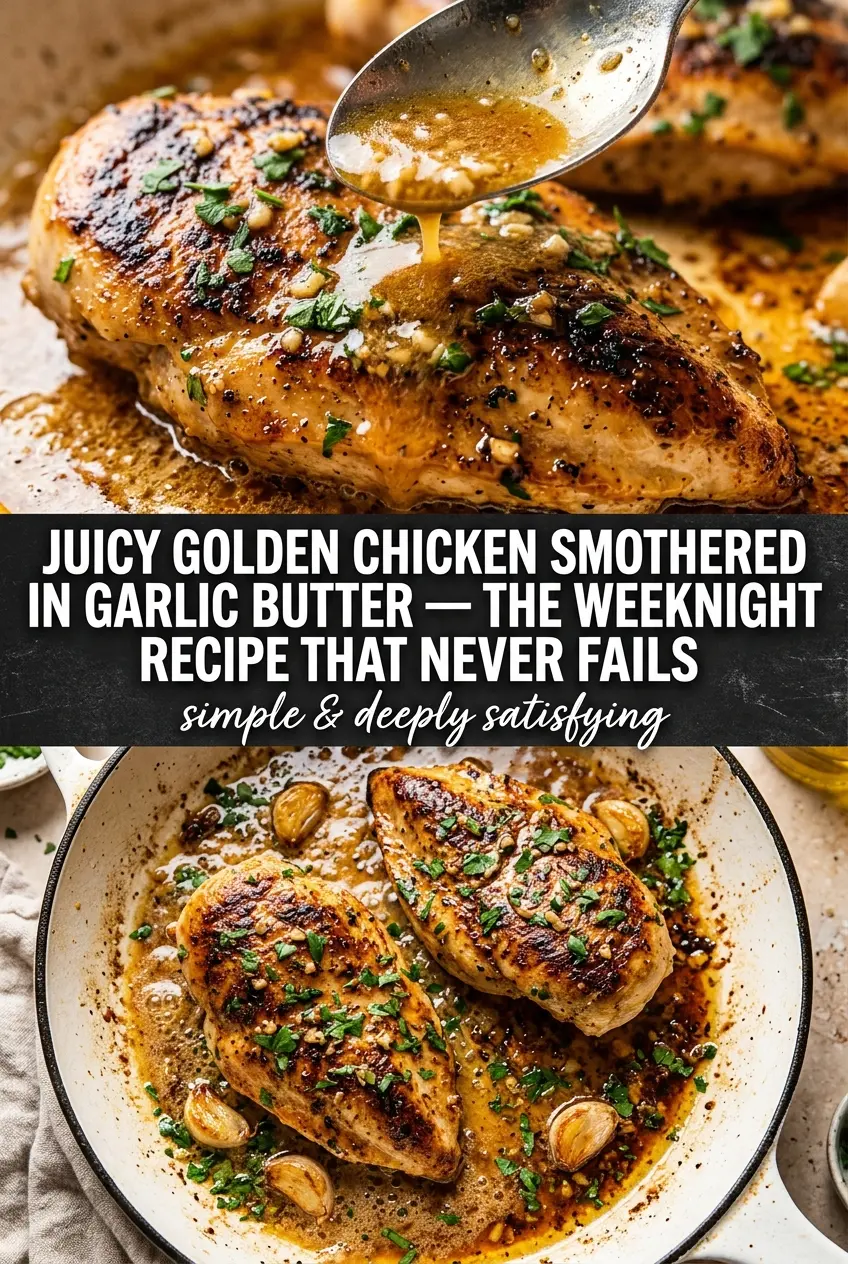
Golden garlic butter chicken hits the plate with crisp-edged seared chicken and a pan sauce that clings instead of sliding off. The garlic stays visible and fragrant, the butter turns the broth into something silky, and a squeeze of lemon keeps the whole skillet from tasting heavy. It’s the kind of dinner that looks like you worked harder than you did.
The trick is keeping the chicken in control from the start. A hot skillet gives you that deep, savory crust before the butter ever goes in, and the sauce builds in the same pan so every browned bit gets used. Garlic cooks just long enough to soften and perfume the butter, but not so long that it turns bitter. That balance is what makes this version taste clean and rich at the same time.
Below you’ll find the exact timing that keeps the chicken juicy, the reason the sauce tightens up so well, and a few useful swaps for when you want to stretch the dish in a different direction.
The chicken got a beautiful crust and the garlic butter sauce came together fast in the same pan. I added the lemon at the end like you said and it kept the sauce from feeling heavy.
Save this garlic butter chicken for the nights when you want a fast skillet dinner with a glossy lemon-garlic pan sauce.
The Sear That Keeps the Chicken Juicy Before the Sauce Ever Starts
The biggest mistake with garlic butter chicken is rushing straight into the sauce before the chicken has a proper crust. That leaves you with pale chicken and a skillet sauce that tastes flat because it never picked up the browned bits from the pan. A hot skillet and a dry surface on the chicken are what give you that savory base.
Chicken breasts can go from done to dry fast, so the goal isn’t just to cook them through. It’s to sear them until the outside is deeply golden, then let the residual heat finish the center without overworking it. If the chicken sticks when you try to turn it, give it another minute. It will release when the crust is set.
- Chicken breasts — Boneless breasts cook quickly and take on the garlic butter sauce well, but they need even thickness. If one end is much thicker, pound it lightly so the whole piece finishes at the same time.
- Butter — This is the backbone of the sauce. Use real butter here; margarine won’t give you the same richness or the way it carries the garlic flavor.
- Chicken broth — This loosens the pan drippings into a sauce instead of just melted butter. A low-sodium broth gives you more control, especially since the pan already has seasoning from the chicken.
- Lemon juice — This is the part that keeps the sauce from feeling heavy. Fresh lemon is best because you need a bright finish, not a sharp canned aftertaste.
- Parsley — It doesn’t just garnish the pan. It adds a fresh green note at the end, which matters because the garlic butter sauce is rich and needs a little lift.
What Each Ingredient Is Actually Doing in Garlic Butter Chicken

- Protein (quality, proper thickness) — Good quality protein tastes better. Even thickness ensures even cooking.
- Seasoning (bold, distributed throughout) — Don’t be shy with salt and pepper. Quality seasoning elevates everything.
- Oil or fat (protective and flavorful) — The fat helps develop crust and carries flavors. Use generously.
- Heat management (appropriate temperature for the protein) — Too high and the outside burns before the inside cooks. Too low and it steams.
- Technique (sear, then finish based on thickness) — Proper technique creates flavor. Sear for crust, then cook through gently.
- Aromatics and seasonings (garlic, herbs, spices) — These add complexity and depth. Distribute them throughout the cooking process.
- Resting time (let it rest before serving) — Resting allows juices to reabsorb. This keeps the protein moist and tender.
- Optional: finishing sauce or glaze — A light sauce adds richness without overwhelming. Apply at the very end.
Building the Garlic Butter Sauce Without Burning the Garlic
Getting the Sear Right
Season the chicken generously before it hits the pan, then sear it in olive oil over medium-high heat until the outside turns deep golden and the center reaches 165°F. Don’t crowd the skillet, or the chicken will steam instead of brown. If the pan looks dry before the chicken is done, resist the urge to add butter early; the first job is color, not sauce.
Softening the Garlic in Butter
Once the chicken is out, lower the heat before adding the butter and minced garlic. Garlic only needs a minute or two to turn fragrant, and it burns fast once the pan is hot and empty. If it starts to brown hard, pull the skillet off the heat and add the broth right away to cool it down.
Pulling the Pan Sauce Together
Pour in the chicken broth and scrape the bottom of the pan with a wooden spoon until the browned bits dissolve. That’s where the flavor is. Let it simmer long enough to reduce slightly and turn glossy, then return the chicken and spoon the sauce over the top so every piece gets coated before serving.
How to Adjust This Skillet Dinner When You Need to
Use chicken thighs for a richer result
Boneless thighs work well if you want more forgiving meat and a deeper savory flavor. They may need a few extra minutes in the skillet, but they stay juicy even if you’re a little late pulling them off the heat. The sauce tastes just as good, maybe even better, because thighs bring more fat to the pan.
Make it dairy-free with olive oil and broth
You can swap the butter for more olive oil, but the sauce will be lighter and less silky. Add a little extra broth and let it reduce a touch longer so it still coats the chicken. You’ll lose some of the buttery finish, but the garlic and lemon still carry the dish.
Add cream for a richer sauce
A splash of cream turns the pan sauce into something fuller and more spoonable. Add it after the broth has simmered and lower the heat so it doesn’t separate. This version is heavier, but it’s a good move when you want the sauce to feel closer to a restaurant-style skillet dinner.
Storage and Reheating
- Refrigerator: Store leftovers in an airtight container for up to 3 days. The sauce may thicken as it chills.
- Freezer: It freezes, but the butter sauce can separate a little when thawed. Freeze in a shallow container for up to 2 months for best texture.
- Reheating: Warm gently in a covered skillet over low heat with a splash of broth. High heat dries out the chicken and makes the garlic taste harsh.
Questions I Get Asked About This Recipe
Garlic Butter Chicken
Ingredients
Equipment
Method
- Season boneless chicken breasts generously with salt and pepper. Make sure both sides are coated so the surface turns golden in the skillet.
- Heat olive oil in a large skillet over medium-high heat, then sear chicken for 6-7 minutes per side until golden and cooked through to 165°F. Move the chicken only once per side so you get a strong browned crust.
- Remove the chicken and set aside, then reduce heat to medium. Let the chicken rest briefly while you build the garlic butter sauce.
- Add butter and minced garlic to the skillet and cook for 1-2 minutes until fragrant. Stir so the garlic pieces toast without browning too hard.
- Add chicken broth and dried thyme, scraping up any browned bits from the pan, then simmer for 2-3 minutes. The sauce should look glossy and slightly reduced.
- Return the chicken to the pan and spoon the sauce over top, then add lemon juice and parsley. Serve immediately while the chicken stays hot and the sauce clings to the surface.