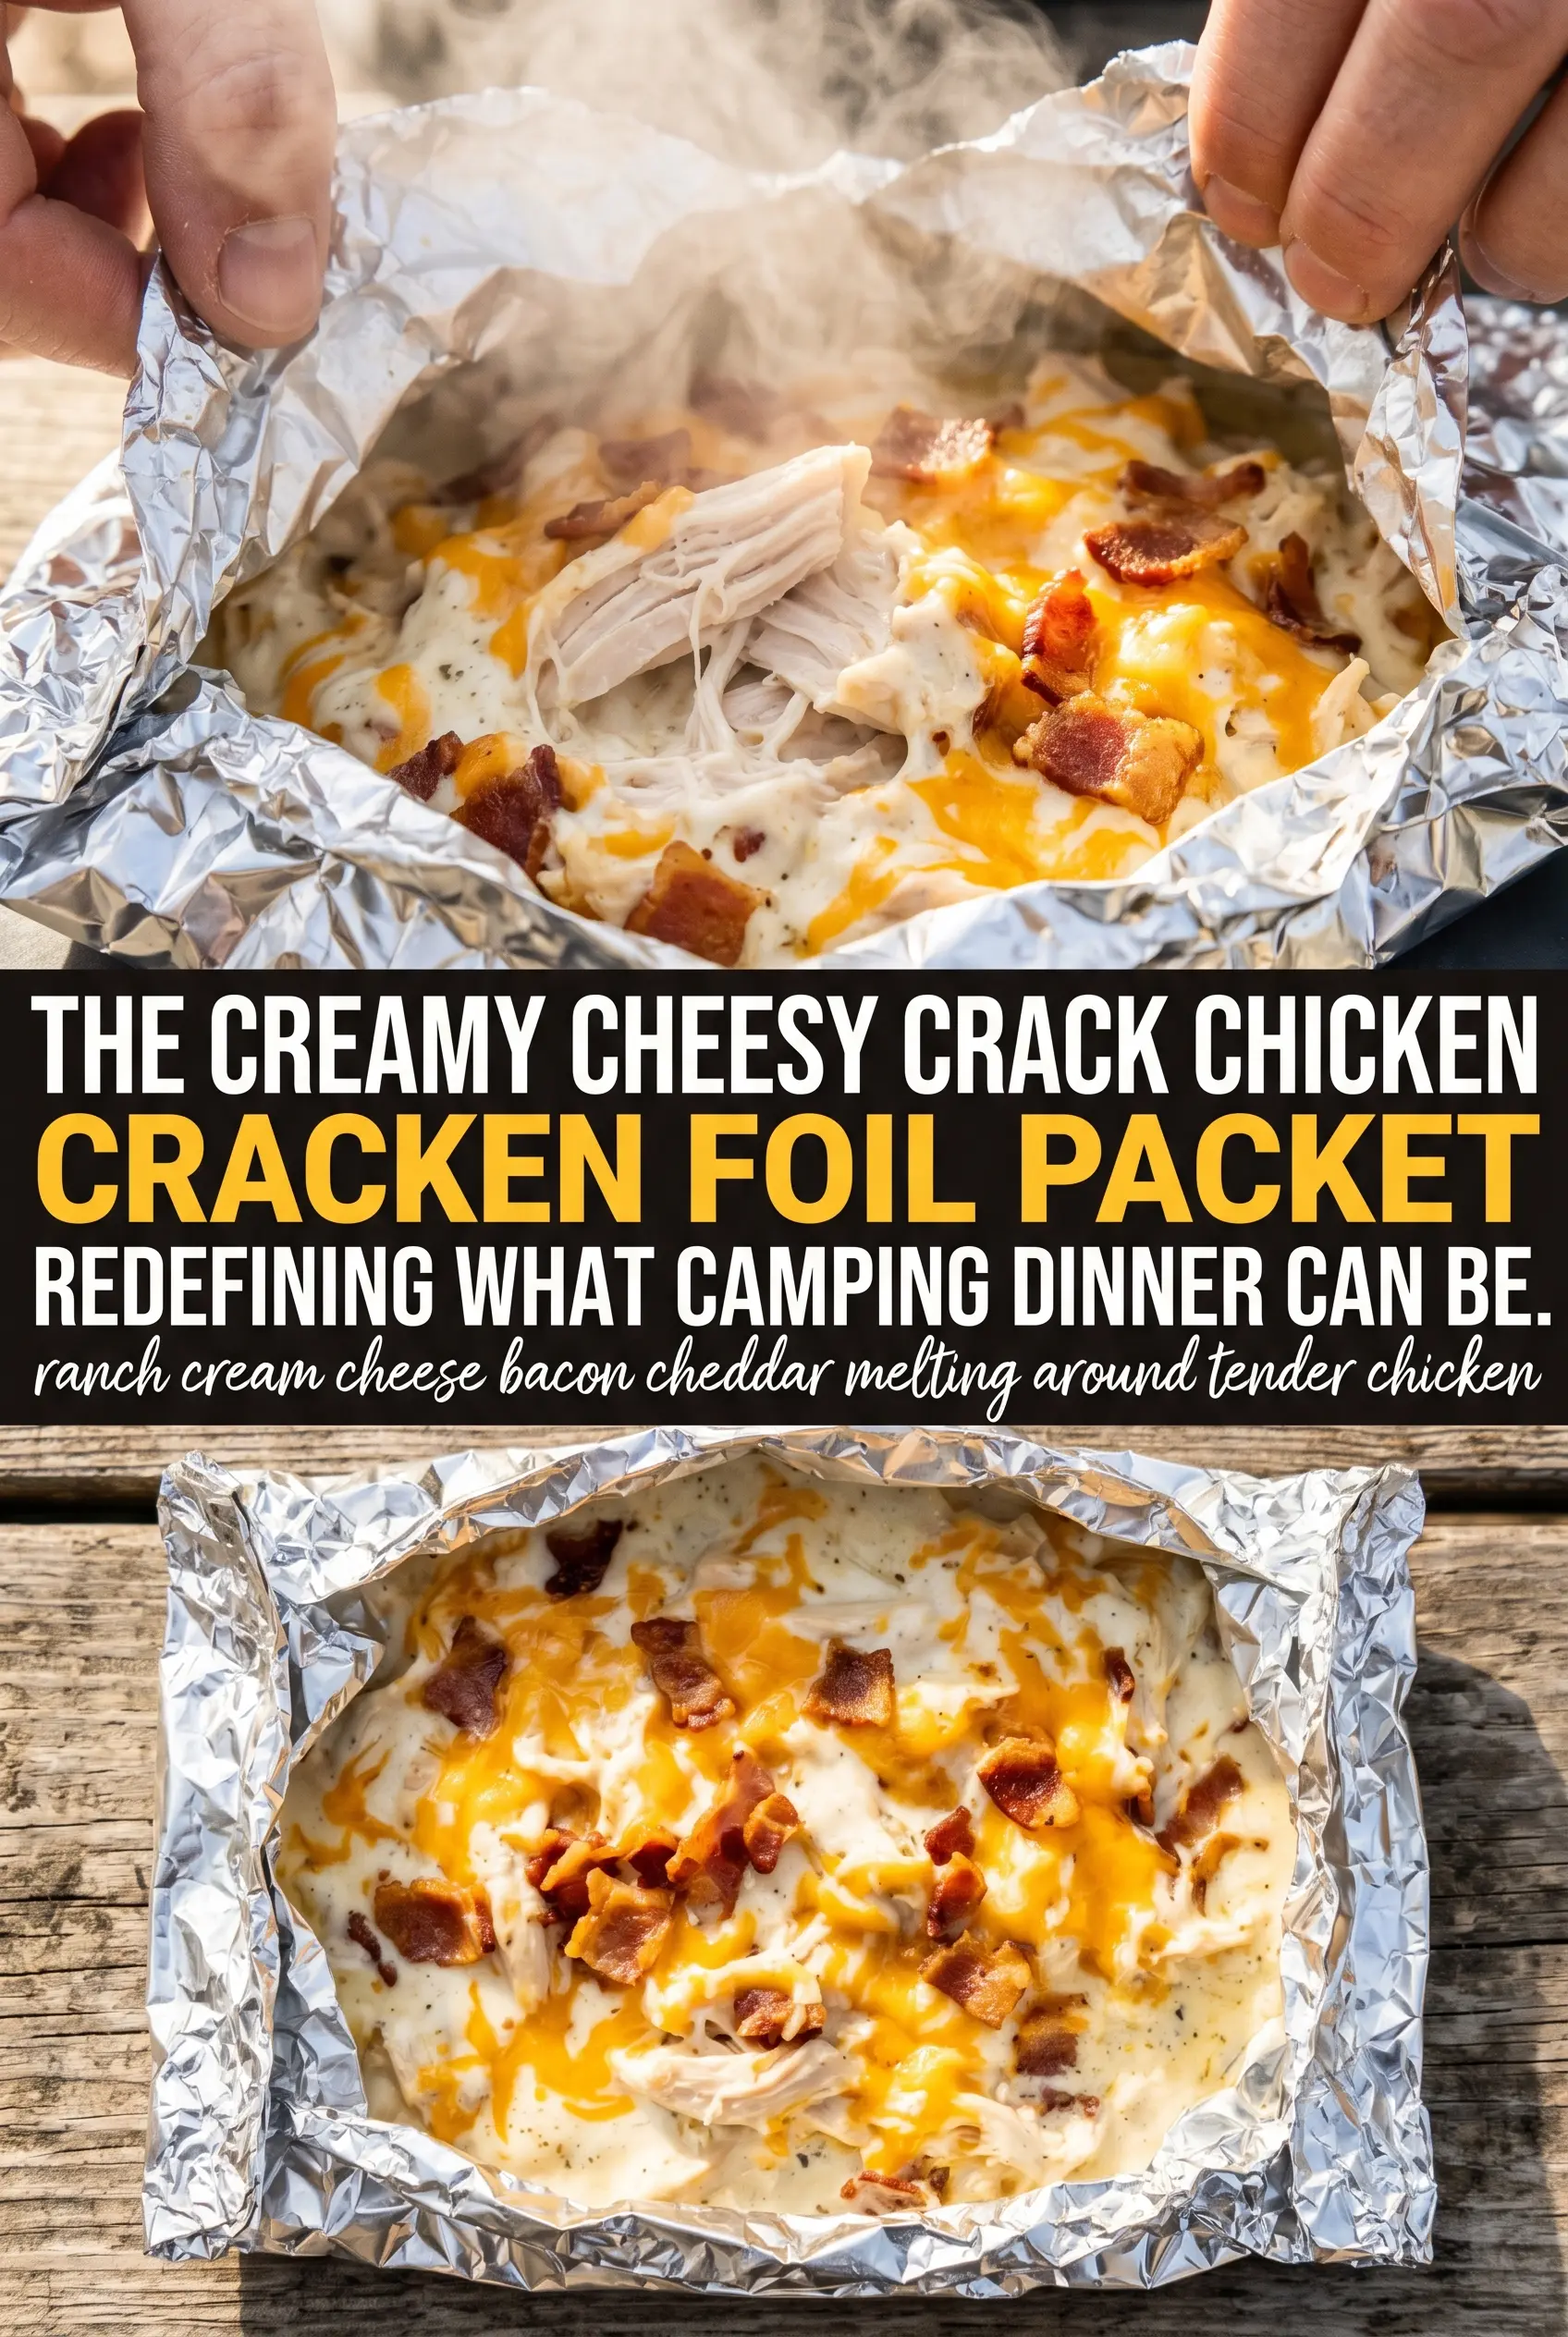
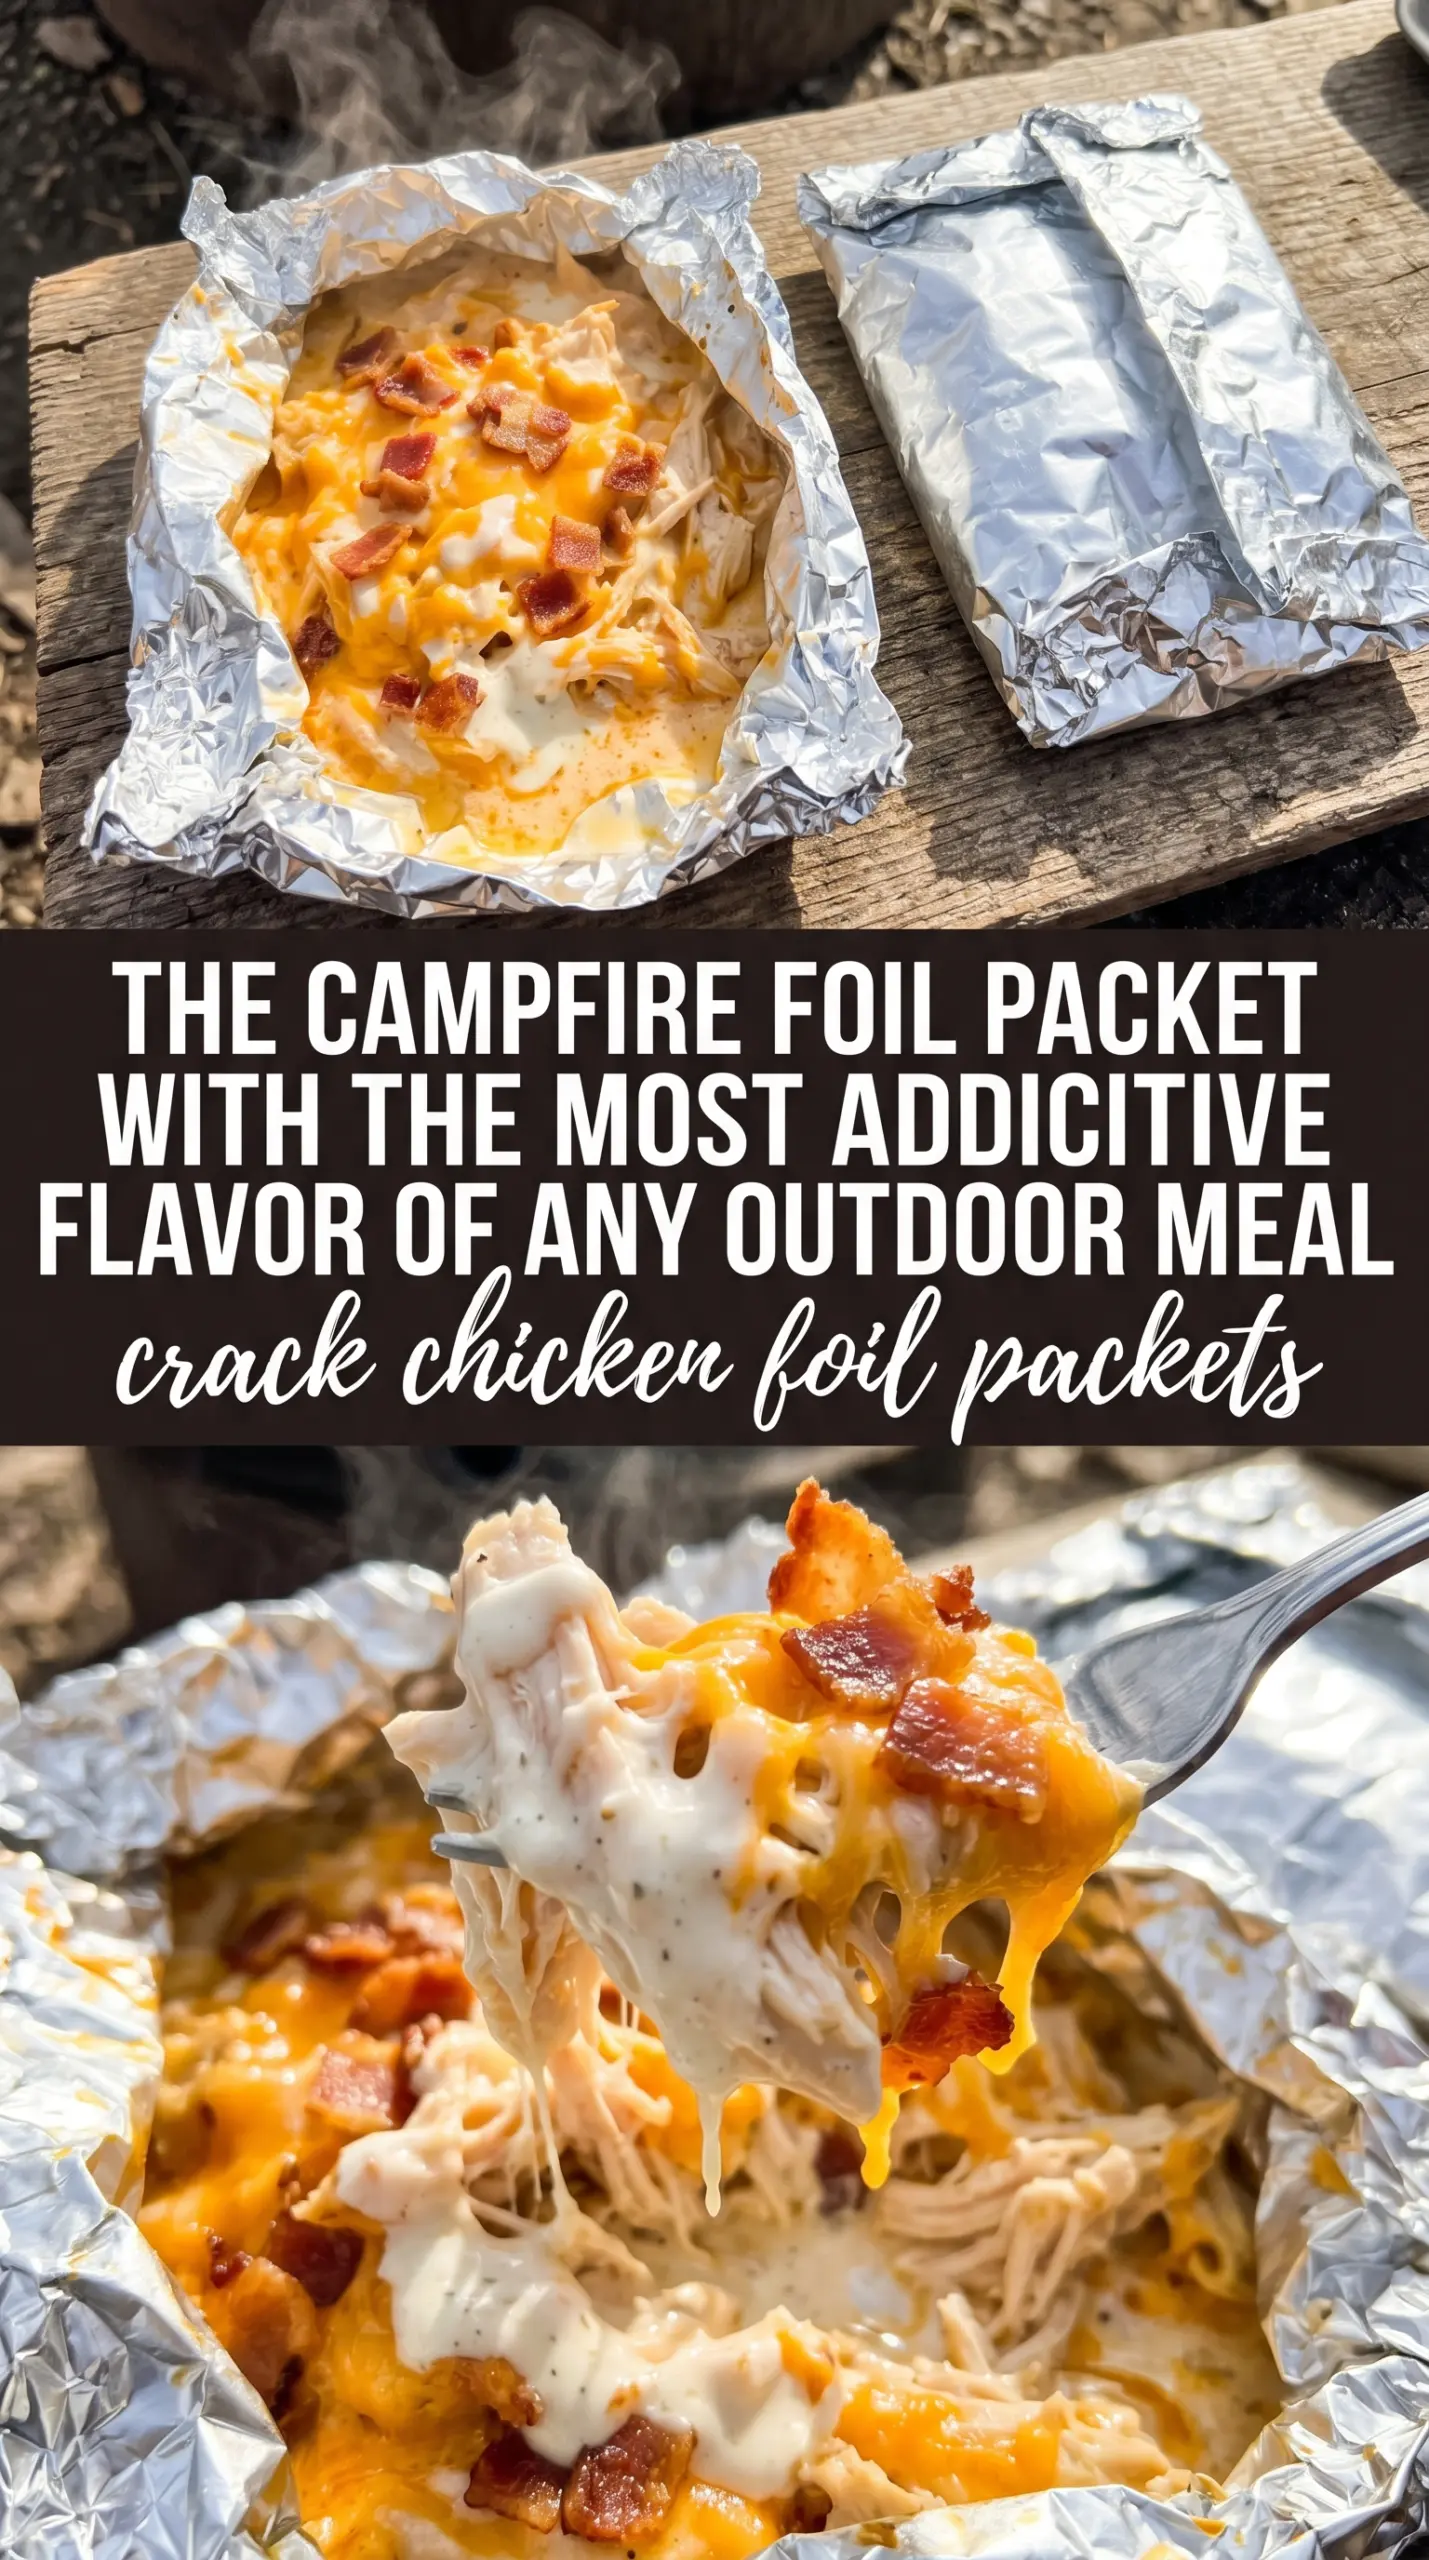
Crack Chicken Foil Packets come off the grill with juicy chicken, smoky bacon, and a creamy ranch sauce that melts right into every bite. The foil does the work here: it traps steam so the chicken stays tender while the cheese and cream cheese turn into a rich, spoonable coating instead of sliding off into the fire.
What makes this version work is the order of the toppings and the sealed packet. The cream cheese cubes soften into the chicken juices, the cheddar melts on top, and the bacon stays crisp enough to keep some texture. If you’ve ever made foil dinners that came out dry or bland, it usually means the packet wasn’t sealed tightly or the heat was too aggressive. This one stays balanced and satisfying.
Below, I’ve included the little details that matter most: how to keep the chicken from overcooking, what to do if you’re making these at a campsite instead of a backyard grill, and the swaps that still keep the packets creamy and comforting.
Love the bacon-ranch chicken tucked into a creamy foil packet? Save it to Pinterest for your next campfire dinner or easy grill night.
The Part That Keeps These Packets Creamy Instead of Dry
Foil packets fail when the chicken is left to cook on top of dry toppings without enough sealed-in moisture. The ranch seasoning and cream cheese solve that problem, but only if the packet is closed tightly enough to trap steam. That steam softens the cheese and helps the chicken cook evenly from edge to center, which is why these packets stay tender instead of turning stringy.
The other thing that matters is heat. Medium heat gives the chicken time to cook through before the bacon and cheese go too far. If the fire is too hot, the bottom of the packet can scorch while the center of the breast is still underdone. Keep the packets on a stable grate and resist the urge to open them early, since every peek lets out the steam that’s doing the real work.
What Each Ingredient Is Doing in the Packet
- Chicken breasts: Boneless breasts are lean, so they benefit from the enclosed steam in the foil. If yours are very thick, pound them to an even thickness so the thinner ends don’t dry out before the center reaches 165°F.
- Ranch seasoning: This brings salt, herbs, and a little tang without needing a separate sauce. A packet works fine here because the bacon, cream cheese, and cheddar add enough richness to carry it.
- Cream cheese: This is what turns the toppings into a sauce instead of a pile of melted dairy. Cube it so it softens faster and distributes more evenly across the chicken.
- Cheddar cheese: Sharp cheddar gives the finished packets a bigger, saltier flavor than mild cheese. Pre-shredded is convenient and works, though freshly shredded melts a little smoother.
- Bacon: Cook it first until it’s crisp, then crumble it over the top. Undercooked bacon turns soft in the packet, and that loss of texture is one of the main things people notice.
- Green onions: These add freshness at the end and keep the dish from tasting heavy. Slice them thin so they wilt just enough in the heat without disappearing.
- Heavy-duty foil: Use the heavy stuff if you’re cooking over a campfire or grill. Thin foil tears easily when you flip or open the packets, and a leak means lost juices and uneven cooking.
Crack Chicken Foil Packets
Ingredients
Equipment
Method
- Place each chicken breast on a sheet of heavy-duty aluminum foil.
- Sprinkle each chicken breast with the ranch seasoning mix.
- Top each chicken breast with crumbled bacon, shredded cheddar cheese, cream cheese cubes, and green onions.
- Fold the foil into sealed packets, making sure the seams are tight to trap steam.
- Place the packets on a campfire grate over medium heat for 20-25 minutes, until the chicken reaches 165°F.
- Carefully open the packets and serve hot, letting the melted cheese and ranch coat the chicken.
Notes
How to Build the Packet So the Chicken Stays Juicy
Laying Out the Base
Set each chicken breast on its own sheet of foil and give it a little space around the edges so you can seal the packet cleanly later. If the chicken is uneven, the thin end will cook first and dry out before the thick part is done, so a quick pound to even thickness pays off. Sprinkle the ranch seasoning over the chicken before the toppings go on; that lets the seasoning hit the meat directly instead of sitting on top of the cheese.
Layering the Toppings
Scatter the bacon, cheddar, cream cheese cubes, and green onions over each breast in that order. The cream cheese needs to be on top of the chicken, not tucked under the bacon, so it can melt down into the meat as the packet heats. If you pile everything in one thick mound, the center takes too long to warm and the edges can overcook, so keep the layer even.
Sealing and Cooking
Fold the foil tightly into sealed packets with the seam up, then place them on a campfire grate over medium heat. Cook for 20 to 25 minutes, checking the thickest piece of chicken for 165°F if you’ve got a thermometer. If the packets are puffing up and the bottom smells scorched, the heat is too high. Pull them to a cooler part of the grate and let the steam finish the job.
Opening Without Losing the Juices
Open the packets carefully and start by peeling back one corner away from your face, because the steam inside is hot enough to burn. The chicken should look opaque and the cheese should be fully melted into a creamy layer around the meat. Serve it straight from the foil if you want the easiest cleanup, or slide it onto plates and spoon every drop of sauce over the top.
Ways to Change the Packets Without Losing the Creamy Finish
Make It Keto-Friendly
This recipe already fits low-carb eating as written, since the cream cheese, bacon, chicken, and cheddar carry the whole dish. Just check the ranch seasoning label for added sugar or starch if you’re being strict. The texture stays rich and creamy without any changes.
Use Chicken Thighs for More Forgiveness
Boneless, skinless thighs work well if you want a juicier result and a little more wiggle room on cook time. They may need a few extra minutes, but they’re less likely to dry out over the fire. The finished packet will taste a little richer because thighs bring more natural fat to the mix.
Swap in Turkey Bacon
Turkey bacon will work, but it won’t bring quite the same smoky depth or crisp texture as regular bacon. Cook it until it’s well browned before crumbling it on top, or it can go soft in the steam. This swap keeps the dish lighter while still giving you that salty bite.
Storage and Reheating
- Refrigerator: Store leftovers in an airtight container for up to 3 days. The sauce thickens as it chills, so expect it to look a little firmer.
- Freezer: These freeze fairly well, though the cream cheese can turn slightly grainy after thawing. Freeze the cooked chicken and sauce in a tightly sealed container for up to 2 months.
- Reheating: Reheat covered in the oven at 325°F until hot, or microwave in short bursts with a splash of water if needed. The biggest mistake is blasting it on high heat, which pushes the cheese into a greasy, separated mess.