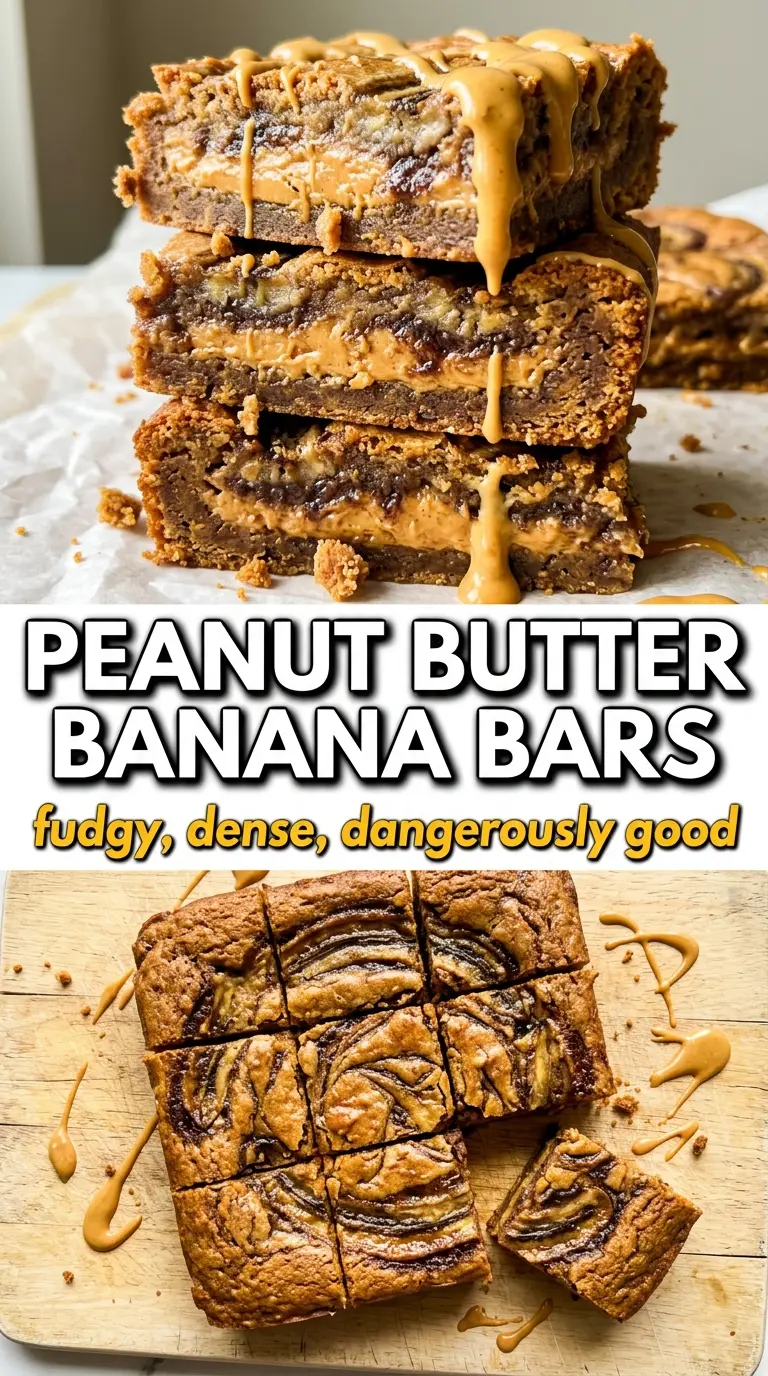
Dense, fudgy peanut butter banana bars hit that sweet spot between snack cake and dessert bar. The bananas keep the crumb soft and moist, the peanut butter brings body and richness, and the oats give the bars enough structure to slice cleanly without turning bouncy or dry. Add a little chocolate on top and they go from everyday pantry bake to the kind of pan that disappears fast.
What makes this version work is the balance. The bananas are mashed smooth so they melt into the batter instead of leaving stringy pockets, and the peanut butter goes in with the wet ingredients so it disperses evenly. Honey or maple syrup adds sweetness without making the bars heavy, while the flour-and-oats mix keeps the texture chewy instead of cake-like. The bars are done when the center still has a few moist crumbs on the toothpick; if you wait for a completely clean pick, they’ll bake past that fudgy middle.
Below, I’ll walk through the little details that matter most here: how ripe the bananas should be, why the batter should look thick before it goes into the pan, and how to get clean slices after the bars cool. Those small choices are what make these peanut butter banana bars turn out tender instead of gummy.
The bars baked up thick and fudgy, and the peanut butter drizzle set just enough to slice clean squares. I used very ripe bananas and the chocolate chips stayed nice and melty in the middle.
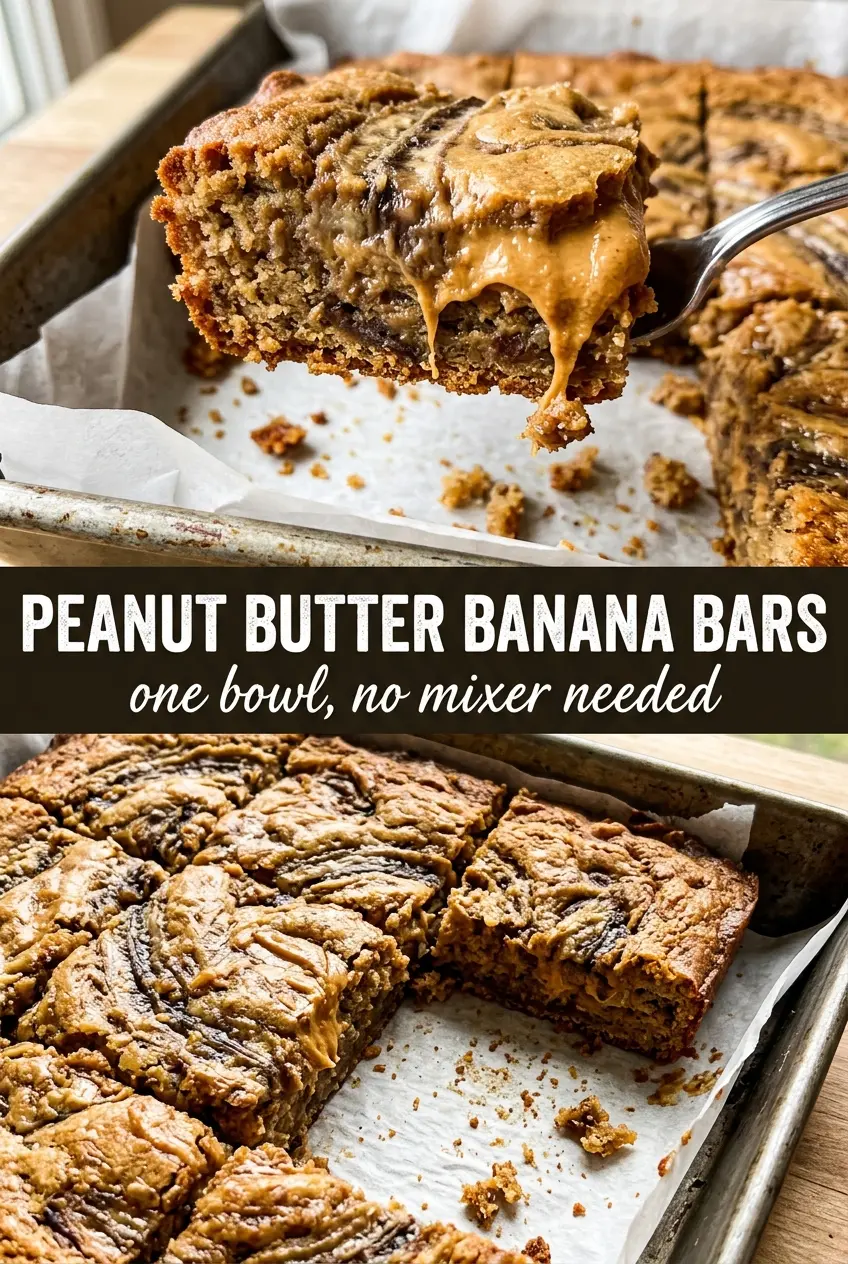
Like these peanut butter banana bars? Save them for the next time you want a fudgy banana bake with chocolate on top and no mixer needed.
The Part That Keeps These Bars Fudgy Instead of Dry
The biggest mistake with banana bars is baking them like quick bread. Bars need a little more structure than banana bread, but they still collapse into something dry if the batter gets overmixed or the oven runs too long. Here, the oats and flour work together to hold the bars up while the bananas keep the center soft.
The other thing that matters is the pan. An 8×8 pan gives you thicker, more dessert-like bars, while a 9×13 pan makes them thinner and a little more snackable. Both work, but the baking time changes, and pulling them when the center has moist crumbs is what keeps that dense, brownie-adjacent texture.
- Bananas — Use ripe bananas with plenty of brown spots. They mash smooth, sweeten the batter naturally, and give the bars their soft, fudgy crumb. Under-ripe bananas won’t blend as well and the bars taste flatter.
- Peanut butter — Creamy peanut butter gives the bars body and that unmistakable rich, salty backbone. Natural peanut butter works, but stir it well first so the oil is fully incorporated; otherwise the batter can separate.
- Honey or maple syrup — Either one works here. Honey gives a slightly deeper, rounder sweetness, while maple syrup reads a little lighter. Both help keep the bars moist, so I wouldn’t swap in granulated sugar unless you’re changing the whole recipe structure.
- Rolled oats — These add chew and help the bars slice cleanly. Quick oats can work in a pinch, but the texture gets softer and less substantial.
- Chocolate chips — Fold them in at the end so they stay in little pockets instead of disappearing into the batter. Mini chips spread more evenly; regular chips give you bigger chocolate hits.
What Each Ingredient Is Actually Doing in This Recipe
- Primary ingredient (the star) — Quality matters most. Choose the best you can find.
- Cooking medium (oil, butter, or broth) — This carries flavors and prevents dryness.
- Seasonings (salt, pepper, spices, herbs) — Layer flavors so nothing overpowers. Build depth gradually.
- Aromatics (garlic, onion, herbs) — Cook with fat to bloom flavors. Become the foundation.
- Supporting ingredients — Complement the main ingredient without overpowering it.
- Sauce or liquid (if applicable) — Brings flavors together. Balance richness with acid.
- Acid (lemon, vinegar, wine, or other) — Brightens and prevents flat-tasting results.
- Final finish (garnish, glaze, or sauce) — Prevents one-dimensional taste and adds visual appeal.
Building the Batter So the Middle Stays Soft
Mashing and Mixing the Wet Ingredients
Mash the bananas until they’re completely smooth before anything else goes in. Lumps leave wet pockets in the finished bars, and those pockets can make the center bake unevenly. Whisk in the peanut butter, honey or maple syrup, eggs, and vanilla until the mixture looks glossy and unified. If the peanut butter is cold and stiff, warm it just enough to stir easily so it blends instead of clumping.
Bringing in the Dry Ingredients
Add the oats, flour, baking powder, cinnamon, and salt, then stir only until the flour disappears. Overmixing tightens the batter and makes the bars bready instead of tender. Fold in the chocolate chips last so they stay distributed without streaking the batter. The finished mixture should be thick and scoopable, more like muffin batter than pourable cake batter.
Baking to the Right Center
Spread the batter evenly into the lined pan and smooth the top so it bakes uniformly. Pull the bars when the edges look set and the center still gives a little when pressed; a toothpick should come out with a few moist crumbs, not wet batter. If the top is browning fast before the middle is done, the pan is likely running hot, so tent it loosely with foil for the last few minutes. Let the bars cool all the way in the pan before slicing or they’ll crumble.
Make Them More Dessert-Like
Bake the bars in an 8×8 pan and use the full chocolate drizzle on top. The thicker cut gives you a denser, fudgier square that eats more like a brownie bar and holds up well for a plated dessert.
Gluten-Free Swap That Still Holds Together
Use certified gluten-free oats and replace the all-purpose flour with a 1:1 gluten-free baking blend. The texture will be a touch more delicate, but the bars still slice well if you let them cool completely before cutting.
Dairy-Free Version
These bars are naturally dairy-free as written if your chocolate chips are dairy-free. That makes the peanut butter drizzle a great finish, since you get the same glossy look without needing any butter or cream.
Chocolate Swirl Finish
Melt extra chocolate chips and drizzle them over the cooled bars instead of peanut butter, or do both for a stronger peanut butter cup effect. The bars taste richer this way, but they also read more like a dessert than a grab-and-go snack.
Storage and Reheating
- Refrigerator: Store in an airtight container for up to 5 days. The bars firm up a bit in the fridge, which makes them even easier to pack or stack.
- Freezer: They freeze well. Wrap individual bars tightly and freeze for up to 2 months, then thaw at room temperature or overnight in the fridge.
- Reheating: These bars don’t need reheating, but if you want the chocolate slightly melty, warm one bar in the microwave for 8 to 10 seconds. Any longer and the texture gets soft instead of fudgy.
Questions I Get Asked About This Recipe
Peanut Butter Banana Bars
Ingredients
Equipment
Method
- Preheat oven to 350°F and line an 8x8 or 9x13 baking pan with parchment paper, leaving overhang for easy lifting.
- Mash bananas completely smooth, then whisk in creamy peanut butter, honey or maple syrup, eggs, and vanilla extract until the batter looks glossy and fully combined.
- Stir in rolled oats, all-purpose flour, baking powder, cinnamon, and salt until just combined, then fold in chocolate chips with a few gentle turns.
- Spread batter evenly into the prepared pan and smooth the top so it bakes flat and level.
- Bake at 350°F for 22–25 minutes, until edges are set and a toothpick inserted in the center comes out with just a few moist crumbs (not wet batter).
- Cool completely in the pan until the center firms up and the bars hold their shape when lifted.
- Drizzle with melted peanut butter or chocolate over the cooled bars in a zigzag pattern, letting it look glossy before slicing.
- Slice into bars using the parchment overhang so the swirls stay intact and the texture looks fudgy.