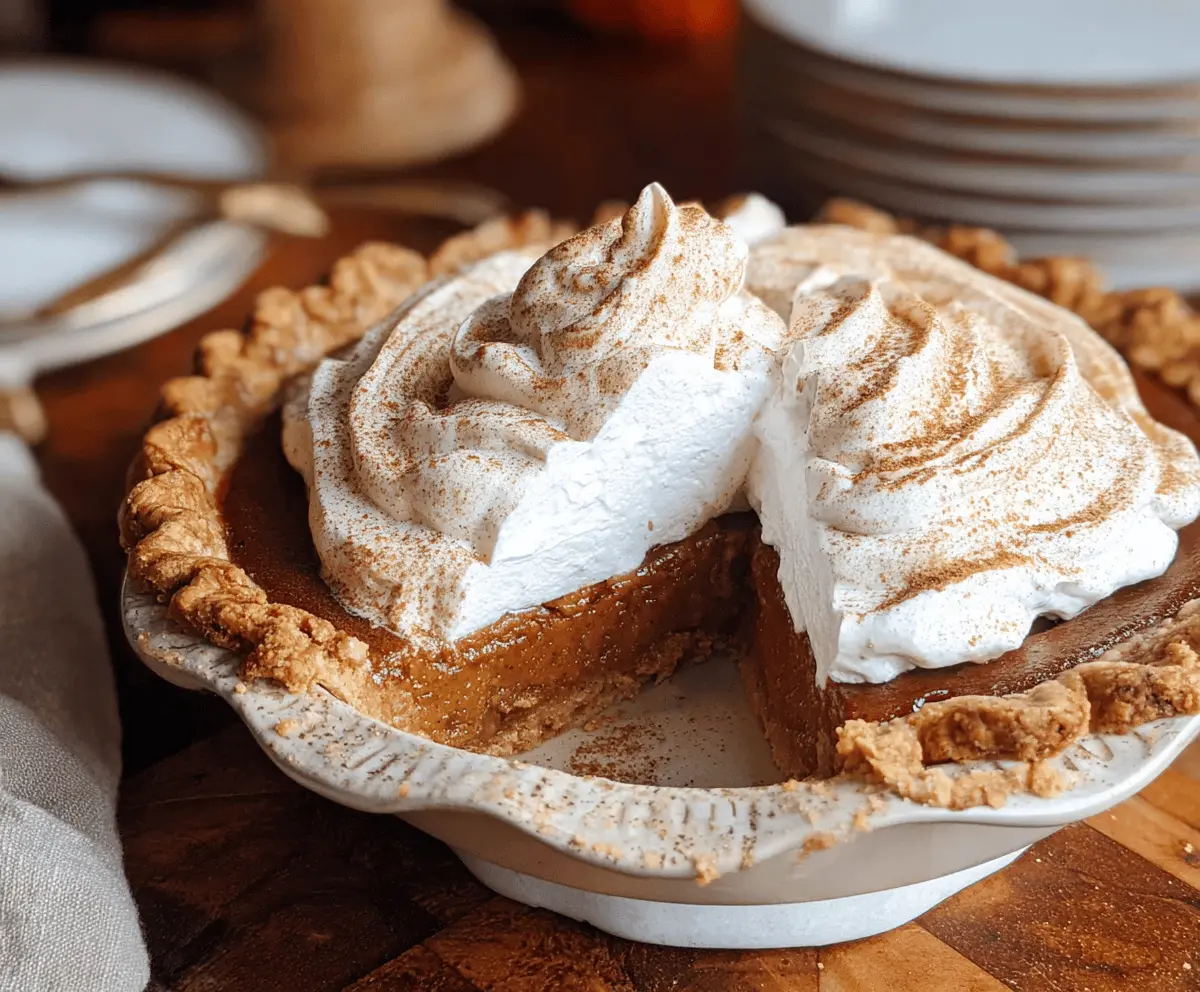
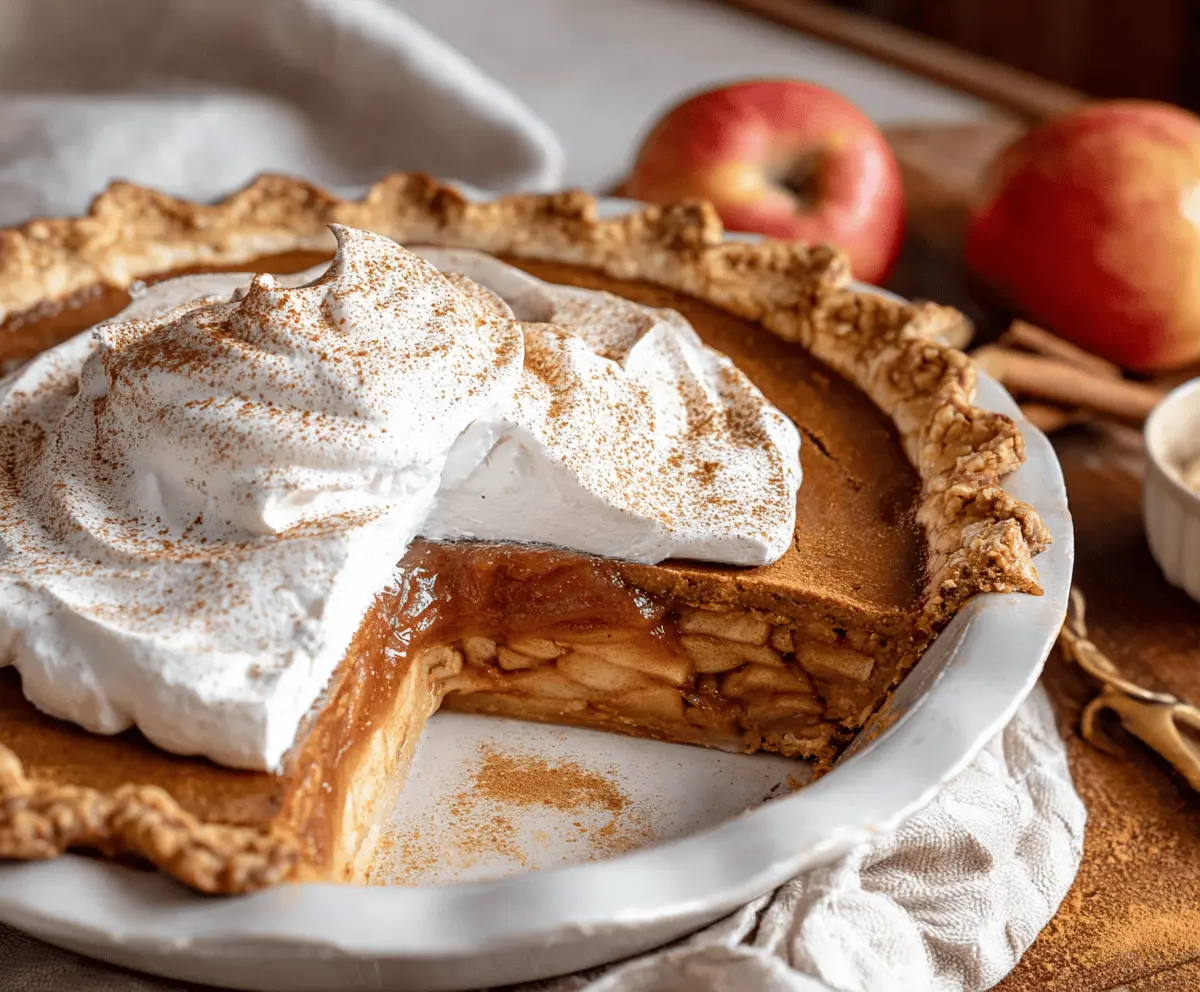
This Apple Butter Pie is a sweet and cozy dessert that combines silky apple butter with a buttery crust. Topped with fluffy cinnamon whipped cream, it’s perfect for sharing!
Honestly, the cinnamon whipped cream feels like a warm hug on a chilly day. I love serving it at family gatherings—everyone always asks for seconds (and I don’t blame them!).
Key Ingredients & Substitutions
Apple Butter: This is the star of the pie! You can find it in stores or easily make your own by cooking down apples with spices and sugar. If you need a substitute, try using homemade applesauce mixed with a bit of cinnamon and sugar to get that rich flavor.
Butter: Unsalted butter is best for controlling the saltiness in your crust. If you’re dairy-free, try using coconut oil or a plant-based butter as a great alternative.
Heavy Cream: For that rich filling and whipped topping, heavy cream is key. If you’re looking for a lighter option, you can substitute it with full-fat coconut milk for a dairy-free version!
Cinnamon: The warm spice adds a lovely flavor to both the filling and the whipped cream. If you want to switch things up, a bit of pumpkin pie spice can add another layer of warmth.
What’s the Best Way to Make a Flaky Pie Crust?
Creating a flaky pie crust can be a challenge, but it’s all about the temperature and technique! Here are some essential tips:
- Keep ingredients cold: Use cold butter and ice water to prevent the fat from melting until baking. This creates those lovely flaky layers.
- Don’t overwork the dough: Mix until just combined. Overworking will lead to tough crusts. A little bit of flour on your hands can help with this.
- Chill the dough: After forming it, chill the dough for at least 30 minutes. This helps it relax and prevents shrinkage while baking.
These simple steps will help you achieve the perfect pie crust for your Apple Butter Pie! Enjoy the process and happy baking!
Apple Butter Pie With Cinnamon Whipped Cream
Ingredients You’ll Need:
For the Pie Crust:
- 1 1/4 cups all-purpose flour
- 1/2 teaspoon salt
- 1/2 cup unsalted butter, cold and cut into cubes
- 3-4 tablespoons ice water
For the Apple Butter Filling:
- 1 1/2 cups apple butter (store-bought or homemade)
- 3 large eggs
- 1/4 cup granulated sugar
- 1/4 cup brown sugar, packed
- 1/4 cup heavy cream
- 1 teaspoon vanilla extract
- 1 teaspoon ground cinnamon
- 1/4 teaspoon ground nutmeg
- Pinch of salt
For the Cinnamon Whipped Cream:
- 1 cup heavy whipping cream, chilled
- 2 tablespoons powdered sugar
- 1 teaspoon ground cinnamon
- 1/2 teaspoon vanilla extract
How Much Time Will You Need?
This delicious Apple Butter Pie will take about 20 minutes of prep time and 1 hour to bake, plus some chilling time for the whipped cream. Overall, plan for about 2 hours, including cooling time. Perfect for a cozy dessert after dinner!
Step-by-Step Instructions:
1. Make the Pie Crust:
In a large bowl, start by whisking together the flour and salt. Then, using a pastry blender or your fingers, cut in the cold butter until the mixture looks like coarse crumbs. Gradually add the ice water, one tablespoon at a time, mixing with a fork until the dough holds together. Form the dough into a disk, wrap it in plastic wrap, and chill in the fridge for at least 30 minutes.
2. Prepare the Oven and Pie Shell:
Next, preheat your oven to 375°F (190°C). On a lightly floured surface, roll out the chilled dough to fit a 9-inch pie pan. Transfer the dough to the pie pan, trimming and crimping the edges. Prick the bottom with a fork to let steam escape, then place a piece of parchment paper or foil inside the crust and fill with pie weights or dried beans. Bake for 15 minutes, remove the weights and parchment, then bake for another 5 minutes until lightly golden. Set the crust aside to cool.
3. Make the Filling:
In a medium bowl, whisk together the apple butter, eggs, granulated sugar, brown sugar, heavy cream, vanilla extract, ground cinnamon, nutmeg, and a pinch of salt until smooth. This pumpkin-like filling is full of cozy flavors!
4. Bake the Pie:
Carefully pour the apple butter mixture into the prepared pie crust. Bake at 375°F (190°C) for 35-45 minutes or until the filling is set and a knife inserted in the center comes out clean. Allow the pie to cool completely on a wire rack.
5. Make the Cinnamon Whipped Cream:
In a chilled bowl, combine the heavy whipping cream, powdered sugar, cinnamon, and vanilla extract. Beat with an electric mixer until stiff peaks form. This whipped cream is simply dreamy!
6. Assemble and Serve:
Once the pie is completely cooled, generously spread or pipe the cinnamon whipped cream on top. To finish it off, sprinkle a bit of cinnamon over the whipped cream for a lovely garnish. Slice up your pie and enjoy the warmth and comfort it brings!
Enjoy your cozy Apple Butter Pie topped with fluffy cinnamon whipped cream!
Can I Use Store-Bought Apple Butter?
Absolutely! Store-bought apple butter is convenient and still results in a delicious pie. Just make sure to choose a high-quality brand without any added preservatives for the best flavor.
Can I Use a Different Type of Sugar?
Yes! You can substitute the granulated and brown sugar with coconut sugar or even maple syrup for a different flavor. If using liquid sweeteners like maple syrup, you may need to adjust the other liquids in the filling slightly.
How Do I Store Leftover Pie?
Store any leftover apple butter pie in an airtight container in the refrigerator for up to 3-4 days. To keep the whipped cream fresh, store it separately and add it just before serving.
Can I Freeze This Pie?
Yes, you can freeze the pie before baking! Wrap it tightly with plastic wrap and then with aluminum foil. When ready to bake, thaw it in the refrigerator overnight and then bake as directed. For best results, whip the cream fresh right before serving.