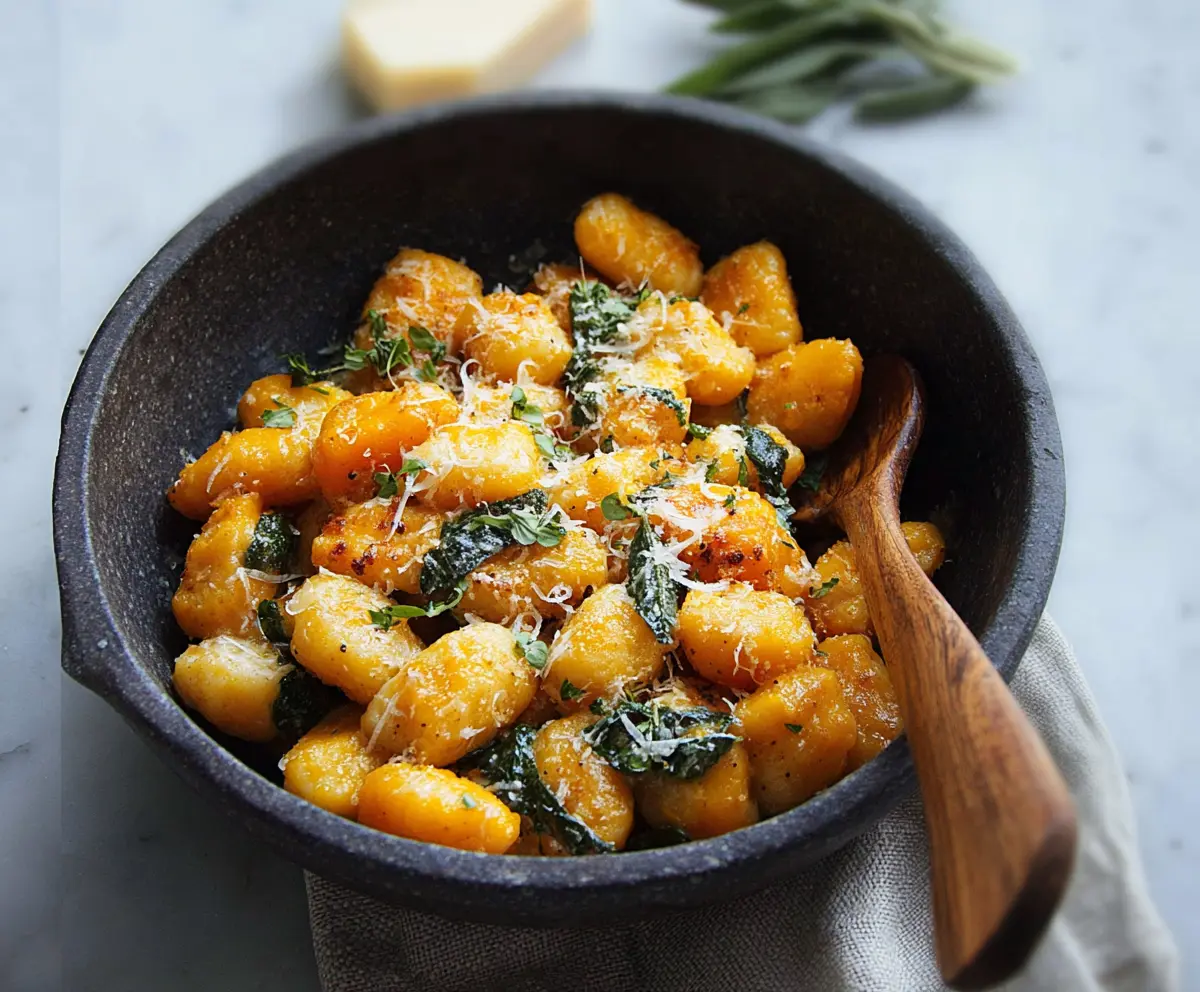
This butternut squash gnocchi is a cozy dish that celebrates the sweet flavors of fall. Soft, pillowy dumplings are made with tender squash and a sprinkle of spices!
Making gnocchi is like playing with your food—how fun is that? I love serving it with a sprinkle of cheese and some sage butter to bring out all the yummy tastes!
Key Ingredients & Substitutions
Butternut Squash: This is the star of the dish! Its natural sweetness adds flavor. If you can’t find it, pumpkin or sweet potatoes can work too. Just make sure they’re cooked until soft.
Ricotta Cheese: This adds creaminess to the dough. If you’re looking for a lighter option, cottage cheese can be a great substitute; just blend it smooth first. Dairy-free? Try tofu blended until smooth.
All-Purpose Flour: You’ll need enough to shape the dough. For gluten-free options, almond flour or a gluten-free flour blend may work, but adjust the amount as needed since they behave differently in dough.
Sage: Fresh sage gives a lovely flavor, but if fresh isn’t available, dried sage can substitute (use half the amount). Thyme or rosemary are also good choices!
How Do You Make Gnocchi Soft and Fluffy?
The key to soft gnocchi lies in the dough’s texture. Avoid overworking it; mix until just combined. If the dough feels too sticky, sprinkle in more flour gradually. It’s meant to be soft but should hold its shape without sticking to your hands.
- Start by roasting the butternut squash for maximum flavor.
- Let the squash cool before mashing. This helps moisture escape.
- When adding flour, do it gradually. You want a light touch, so the dough remains soft.
- Ensure your water is at a rolling boil before adding the gnocchi—this helps them cook evenly and float properly.
Remember, practice makes perfect! Making gnocchi takes a little time, but the delicious results are worth it. Happy cooking!
Butternut Squash Gnocchi
Ingredients You’ll Need:
- 1 medium butternut squash (about 2 to 2.5 pounds)
- 1 ½ to 2 cups all-purpose flour, plus more for dusting
- 1 cup ricotta cheese
- 1 large egg
- ½ teaspoon salt
- ¼ teaspoon ground nutmeg
- Freshly ground black pepper, to taste
- 4 tablespoons unsalted butter
- A handful of fresh sage leaves
- ¼ cup grated Parmesan cheese, plus extra for serving
- Fresh thyme or parsley, finely chopped, for garnish (optional)
How Much Time Will You Need?
This exciting dish takes about 1 hour of prep time and 15 minutes for cooking. With the roasting of the squash and the shaping of the gnocchi, you’ll spend a little time getting everything together. But the result? Totally worth it! Make sure to set aside some extra time for letting it cool, too.
Step-by-Step Instructions:
1. Roast the Butternut Squash:
First, preheat your oven to 400°F (200°C). Cut the butternut squash in half lengthwise and scoop out the seeds. Place the halves cut-side down on a baking sheet lined with parchment paper. Roast for about 45 minutes, or until tender. You can check its readiness by piercing it with a fork—it should go in easily!
2. Prepare the Squash:
After roasting, let the squash cool down a bit. Then, scoop out the flesh into a bowl and mash it with a fork or potato masher until it’s nice and smooth. Allow this to cool completely before continuing.
3. Mix the Dough:
In the bowl with the mashed squash, add the ricotta cheese, egg, salt, nutmeg, and black pepper. Mix it all together until well combined. Gradually sprinkle in 1 ½ cups of flour, stirring gently. You’re looking for a soft dough, so add more flour as needed if it feels too sticky—but be careful not to add too much!
4. Shape the Gnocchi:
Flour your working surface lightly. Divide the dough into 4 smaller portions. Roll each portion into a long rope about ½ inch thick. Cut each rope into 1-inch pieces to form your gnocchi. If you want, you can gently press each piece over the tines of a fork to create a nice texture for sauce to cling to later.
5. Cook the Gnocchi:
In a large pot, bring salted water to a boil. Drop in the gnocchi in batches, stirring gently so they don’t stick together. Once they float to the surface (which takes about 2 to 3 minutes), scoop them out with a slotted spoon and let them drain.
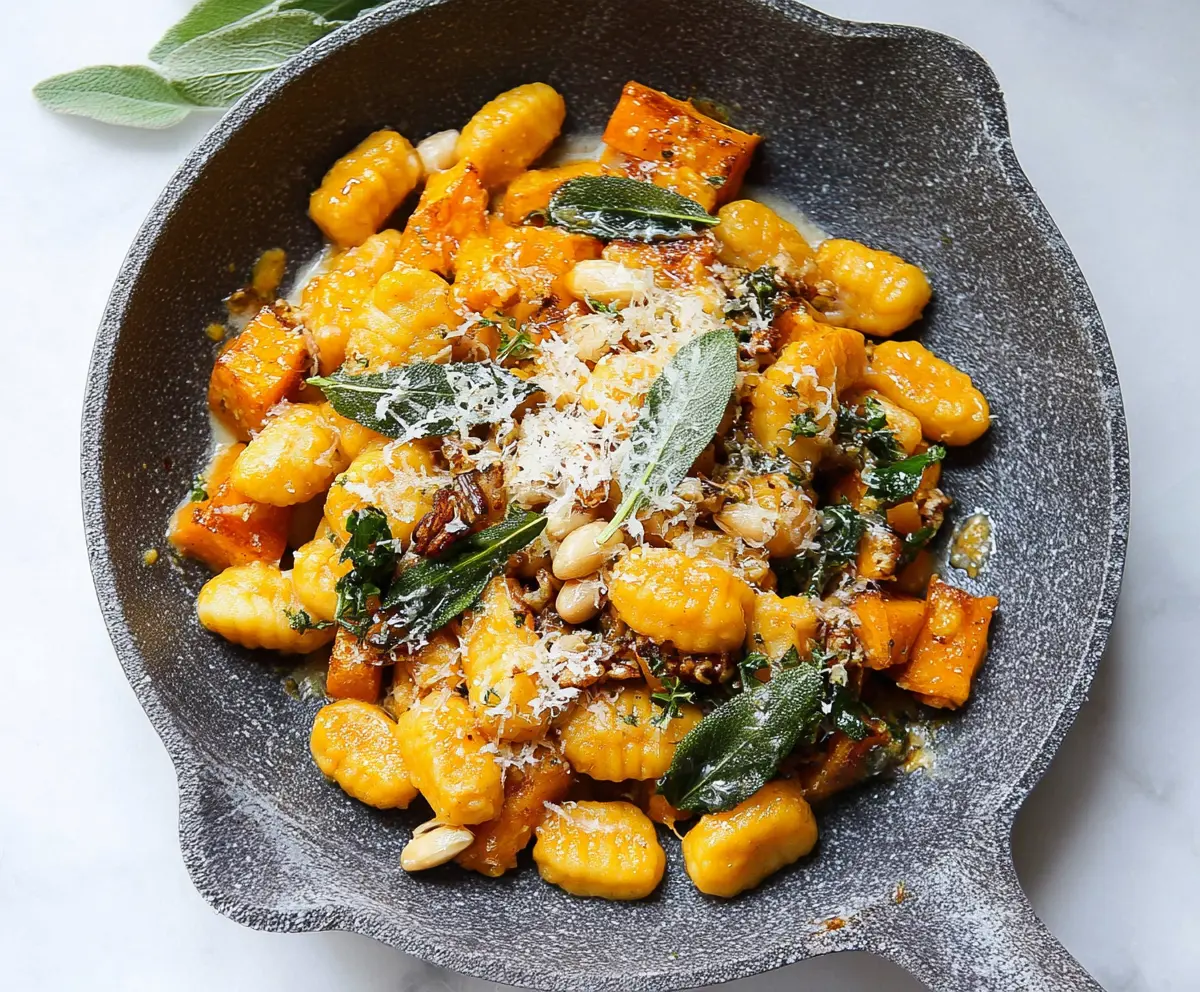
6. Make the Sage Butter:
In a big skillet, melt the butter over medium heat. Add in the fresh sage leaves and cook for about 2 to 3 minutes, until the butter begins to brown and the sage turns crispy—this adds a lovely flavor!
7. Sauté the Gnocchi:
Now, add the cooked gnocchi to the skillet. Gently sauté them for about 3 to 4 minutes, allowing them to get a nice golden crust.
8. Serve and Enjoy:
Remove from heat and sprinkle with grated Parmesan cheese. If you like, add some fresh thyme or parsley for garnish. Serve immediately, with extra Parmesan on the side. Enjoy your delicious pillowy butternut squash gnocchi with that wonderful sage butter!
Can I Use Frozen Butternut Squash Instead of Fresh?
Yes, you can! Just be sure to thaw it completely before mashing. You may need to reduce the amount of flour slightly since frozen squash can be more watery than fresh.
How Do I Store Leftover Gnocchi?
Store any leftover gnocchi in an airtight container in the fridge for up to 3 days. You can also freeze uncooked gnocchi by placing them in a single layer on a baking sheet until frozen, then transferring them to a freezer bag or container.
What Should I Do if My Dough is Too Sticky?
If your dough feels too sticky, add more flour a little at a time until it reaches a manageable consistency. Be cautious not to over-flour, as this can make your gnocchi dense.
Can I Make Gnocchi Ahead of Time?
Absolutely! You can prepare the gnocchi earlier in the day and keep them in the fridge or even freeze them. If refrigerated, make sure to dust them with flour to prevent sticking. Just cook them straight from the fridge or freezer, adding an extra minute to the cooking time if frozen.