
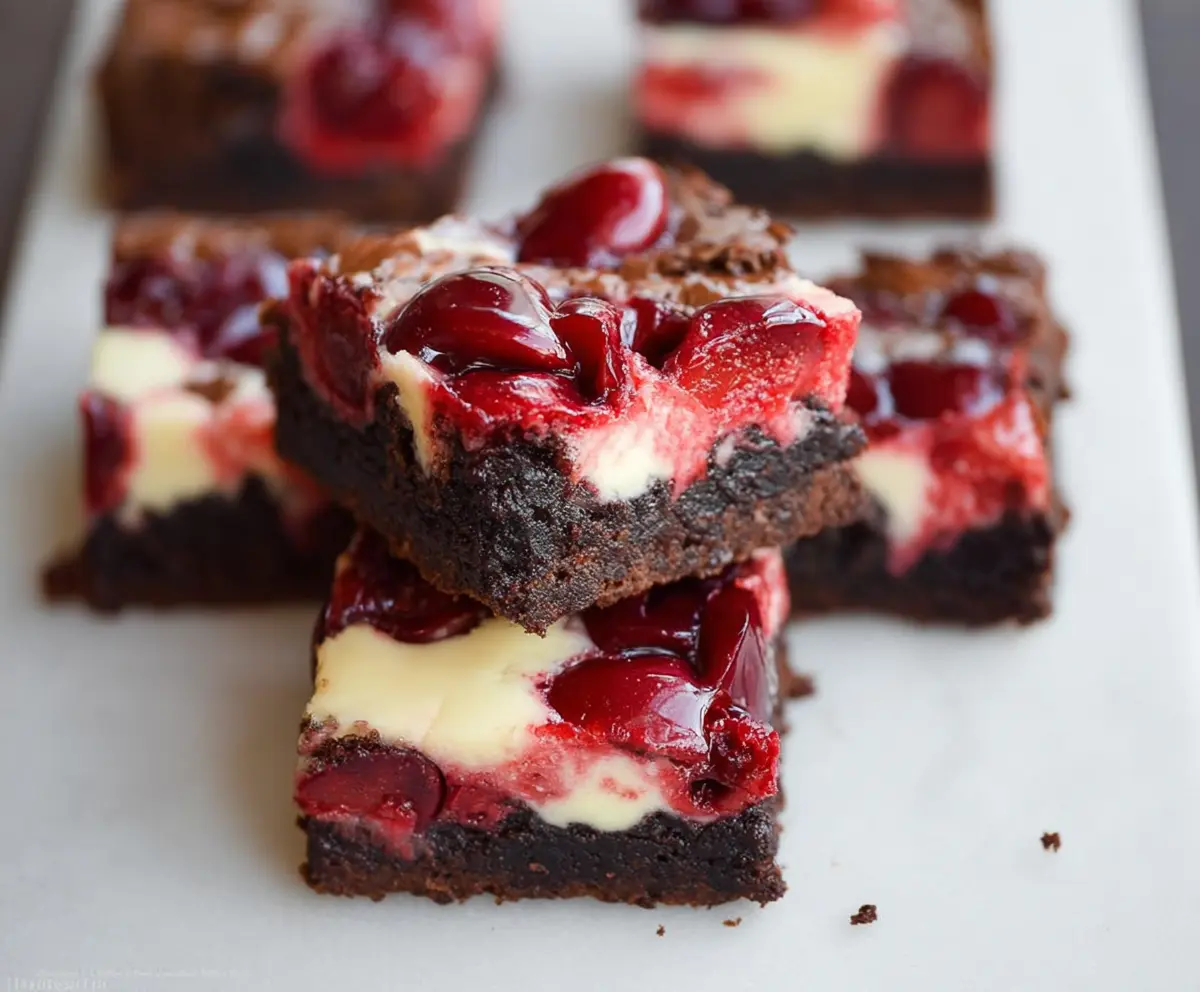
These cherry cheesecake brownies are a wonderful treat! With a rich, fudgy brownie base topped with creamy cheesecake and sweet cherries, they’re a perfect mix of flavors.
Honestly, it feels like a dessert party in your mouth! I love cutting them into small squares to share, but let’s be real, I usually keep a few for myself. 🍒🍫
Key Ingredients & Substitutions
Unsalted Butter: This helps create a rich brownie base. If you don’t have unsalted butter, you can substitute it with salted butter, but reduce the added salt in the recipe.
Granulated Sugar: This sweetens both the brownie and cheesecake layers. You can replace it with brown sugar for a deeper flavor or a sugar alternative like coconut sugar.
Cocoa Powder: Unsweetened cocoa gives the brownies a rich chocolate taste. If you need a substitution, Dutch-process cocoa can work, but it can alter the color and flavor slightly.
Cream Cheese: This is key for the cheesecake layer. If you’re looking for a lower-fat version, use Neufchâtel cheese, or for a non-dairy option, cream cheese made from cashews works great!
Cherries: Fresh cherries are wonderful, but if they’re out of season, you can use frozen cherries or canned cherries (drained). Just remember to adjust the sugar if the cherries are sweetened.
How Do You Get the Best Swirl Effect in Cheesecake Brownies?
Swirling the cheesecake layer with the brownie batter takes a little practice, but it’s a fun step! To get that perfect marbled look:
- Spread the cheesecake mixture evenly but gently over the brownie batter.
- Use a knife or skewer to create a swirl pattern. Just draw the knife through both layers, being careful not to mix them fully.
- Be patient! You want to see the cheesecake peeking through the brownie without blending them too much.
Take your time with this step, and you’ll have beautiful brownies that not only taste amazing but look impressive too!
Cherry Cheesecake Brownies
Ingredients You’ll Need:
For the Brownie Layer:
- 1/2 cup (115g) unsalted butter, melted
- 1 cup (200g) granulated sugar
- 2 large eggs
- 1 tsp vanilla extract
- 1/3 cup (40g) unsweetened cocoa powder
- 1/2 cup (65g) all-purpose flour
- 1/4 tsp salt
- 1/4 tsp baking powder
For the Cheesecake Layer:
- 8 oz (225g) cream cheese, softened
- 1/4 cup (50g) granulated sugar
- 1 large egg
- 1/2 tsp vanilla extract
For the Cherry Topping:
- 1 cup fresh or canned cherries, pitted and halved
- 1 tbsp cornstarch (if using fresh cherries)
- 2 tbsp sugar (if using fresh cherries)
How Much Time Will You Need?
This delicious dessert requires about 15 minutes of prep time and 35-40 minutes of baking time, plus at least 2 hours for chilling. In total, you’re looking at around 3 hours for everything, which includes letting the brownies cool and set before enjoying. Worth the wait, I promise!
Step-by-Step Instructions:
1. Preheat the Oven:
Start by preheating your oven to 350°F (175°C). Line an 8×8 inch baking pan with parchment paper or lightly grease it. This makes it easy to remove the brownies later!
2. Make the Brownie Batter:
In a medium bowl, mix together the melted butter, sugar, eggs, and vanilla extract until everything is nice and smooth. No lumps allowed!
3. Combine Dry Ingredients:
In a separate bowl, sift together the cocoa powder, flour, salt, and baking powder. This will help ensure everything is mixed evenly.
4. Mix Everything Together:
Slowly add the dry ingredients into the wet mixture, stirring until just combined. It’s okay if there are a few small lumps — you don’t want to overmix!
5. Pour Into the Pan:
Pour the brownie batter into your prepared baking pan, spreading it evenly out to the edges.
6. Prepare the Cheesecake Layer:
In a bowl, beat the softened cream cheese until it’s smooth and creamy. Add in the sugar, egg, and vanilla extract, mixing until fully combined.
7. Spread the Cheesecake Mixture:
Carefully spread the cheesecake layer over the brownie batter in the pan. Try to keep it nice and even!
8. Add the Cherry Topping:
If using fresh cherries, toss them with cornstarch and sugar to help thicken any juices during baking. Distribute the cherries evenly over the cheesecake layer.
9. Create a Swirl:
Using a knife or skewer, gently swirl the cheesecake and cherries into the brownie batter. This will give you a beautiful marbled effect!
10. Bake:
Place the pan in the preheated oven and bake for 35-40 minutes. To test doneness, insert a toothpick into the center; it should come out with moist crumbs, not wet batter.
11. Cooling Time:
Once baked, allow the brownies to cool completely in the pan on a wire rack. Patience is key! Once cooled, refrigerate for at least 2 hours to let the layers set properly.
12. Serve and Enjoy!
After chilling, cut the brownies into squares and serve. Enjoy these delightful cherry cheesecake brownies that combine fudgy chocolate, creamy cheesecake, and bright cherry flavor! You’re going to love them!
Can I Use Different Fruits Instead of Cherries?
Absolutely! You can substitute cherries with other fruits like blueberries, raspberries, or strawberries. Just make sure to adjust the sugar based on the sweetness of the fruit you choose.
Can I Use a Different Type of Sugar?
Yes! You can replace granulated sugar with brown sugar for a richer flavor or use a sugar substitute like coconut sugar or Stevia, but keep in mind that this may slightly affect the texture and sweetness.
How Should I Store Leftover Brownies?
Store any leftovers in an airtight container in the refrigerator for up to 4 days. You can also freeze them by wrapping individual pieces tightly in plastic wrap and then placing them in a freezer-safe bag for up to 3 months.
Can I Make These Brownies Gluten-Free?
Yes! To make the brownies gluten-free, substitute the all-purpose flour with a 1:1 gluten-free flour blend. Make sure your baking powder is also gluten-free!