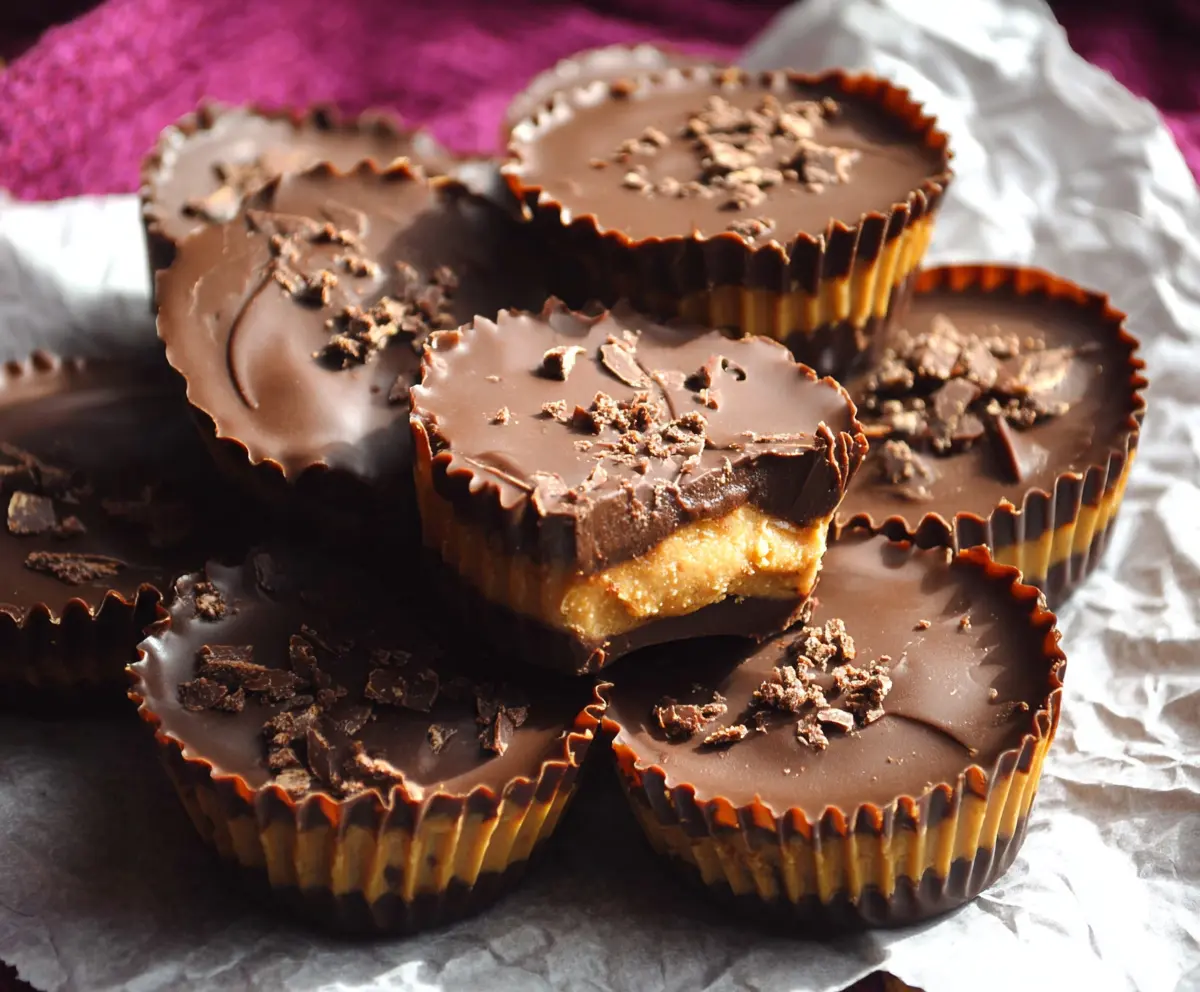
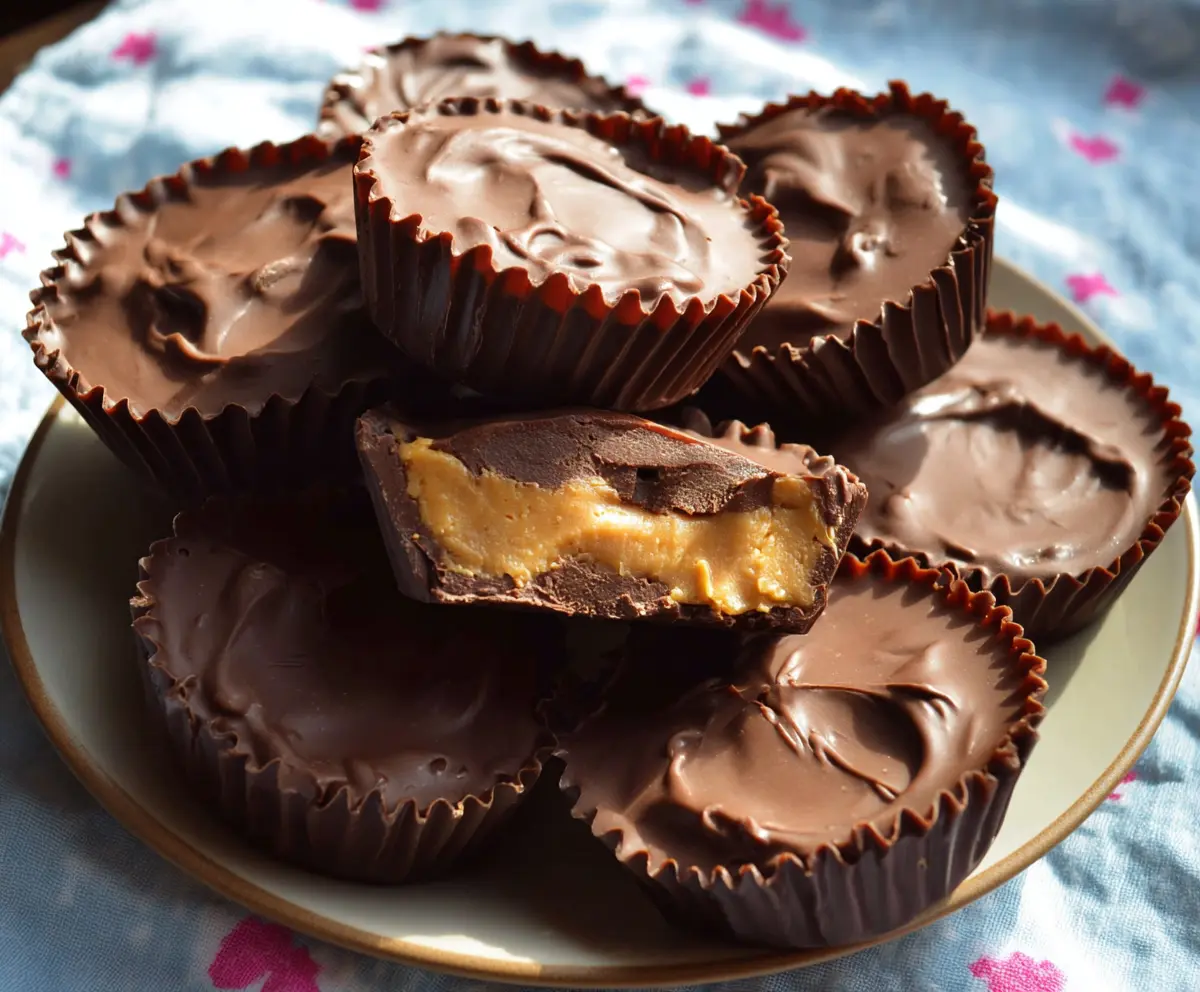
These Chocolate Peanut Butter Cups are a tasty treat! Imagine creamy peanut butter wrapped in rich chocolate—what’s not to love? They’re like a little hug for your taste buds!
Making these is super fun, especially when you sneak a few bites before they set! I love to pop them in the fridge for a cool, sweet snack later—perfect for satisfying cravings!
Key Ingredients & Substitutions
Pear butter: Creamy peanut butter is key for a smooth filling. If you have allergies or prefer another nut, try almond butter or sunflower seed butter instead. They give a yummy twist!
Powdered sugar: This adds sweetness and helps bind the mixture. If you need a less sweet option, consider using honey or maple syrup, but this may change the texture slightly.
Unsalted butter: It gives a richer flavor, but if you’re dairy-free, coconut oil or a dairy-free butter substitute works well too!
Chocolate chips: Semi-sweet chocolate is classic, but dark chocolate or even milk chocolate can switch it up to your taste! You can also use vegan chocolate for a non-dairy option.
Coconut oil: Optional, but it helps the chocolate melt smoothly. If you don’t have it, just melt the chocolate without it; it’ll still work out great!
How Do I Get the Chocolate to Melt Smoothly?
Melt chocolate carefully to avoid burning, as overheated chocolate can clump. Use the microwave method for ease:
- Place chocolate in a microwave-safe bowl.
- Heat in 30-second bursts, stirring well between each, until melted.
- If using coconut oil, stir it in after partially melting the chocolate for a smoother consistency.
Always let melted chocolate sit for a moment before pouring over the peanut butter; this prevents it from melting the filling below!
How to Make Delicious Chocolate Peanut Butter Cups
Ingredients You’ll Need:
- 1 cup creamy peanut butter
- 1/4 cup powdered sugar
- 1/4 cup unsalted butter, softened
- 2 cups semi-sweet chocolate chips
- 1 tablespoon coconut oil (optional, for smoother melting)
- A pinch of salt
- Optional: chopped chocolate or cocoa nibs for garnish
How Much Time Will You Need?
This recipe takes about 15 minutes of prep time and about 30 minutes for chilling. In total, you’ll need around 45 minutes to make and have these delicious chocolate peanut butter cups ready to enjoy!
Step-by-Step Instructions:
1. Prepare Your Tin:
Start by lining a muffin tin or a baking tray with mini cupcake liners. This makes it easy to remove the cups after they’re set, and it looks cute too!
2. Make the Peanut Butter Filling:
In a medium bowl, combine the creamy peanut butter, powdered sugar, softened butter, and a pinch of salt. Mix everything together until you have a smooth and creamy mixture. It should be well combined—this is the yummy center of your cups!
3. Melt the Chocolate:
Take 1 cup of the chocolate chips and melt them in a microwave-safe bowl. You can add the coconut oil now if you want a smoother texture. Heat it in the microwave for 30 seconds at a time, stirring well between each session until the chocolate is completely smooth.
4. Start Layering:
Spoon about a teaspoon of the melted chocolate into the bottom of each cupcake liner. Spread it a little to ensure it covers the bottom. Then pop the tin into the freezer for about 10 minutes to let the chocolate harden.
5. Add the Peanut Butter Layer:
Once your chocolate is set, take the muffin tin out of the freezer. Add about a tablespoon of your peanut butter mixture on top of each chocolate layer. Lightly press it down so it sticks well.
6. Melt the Remaining Chocolate:
Melt the last 1 cup of chocolate chips the same way as before, ensuring it’s nice and smooth.
7. Cover with Chocolate:
Pour the melted chocolate over the peanut butter layer in each cup, making sure it covers it completely. This will seal in that delicious peanut butter goodness!
8. Garnish If You Want!
If you’re feeling fancy, sprinkle some chopped chocolate or cocoa nibs on top of the chocolate layer for a little extra texture and flavor.
9. Chill and Set:
Put the entire muffin tin back in the refrigerator or freezer until the cups are fully set, which should take about 20-30 minutes. Just a heads up, they’re super tempting, but let them chill!
10. Enjoy Your Treat:
Once set, you can enjoy your homemade chocolate peanut butter cups chilled or at room temperature. They’re perfect for sharing (or not!) and store well in the refrigerator for those sweet cravings later on!
Can I Use Natural Peanut Butter Instead of Creamy Peanut Butter?
Yes, you can! Just keep in mind that natural peanut butter may be a bit more oily, so you might need to adjust the amount of powdered sugar to achieve the right consistency. Stir it well before using for the best results!
How Should I Store Leftovers?
Store your chocolate peanut butter cups in an airtight container in the refrigerator for up to a week. They can also be frozen for longer storage; just ensure they’re separated with parchment paper to prevent sticking!
What Can I Substitute for Unsalted Butter?
If you don’t have unsalted butter on hand, you can use salted butter, but reduce the pinch of salt in the filling. Alternatively, coconut oil works great as a dairy-free substitute!
How Can I Make These Vegan?
To make vegan chocolate peanut butter cups, simply use a plant-based butter substitute and replace the chocolate chips with dairy-free chocolate chips. You can also opt for maple syrup instead of powdered sugar for a natural sweetener!