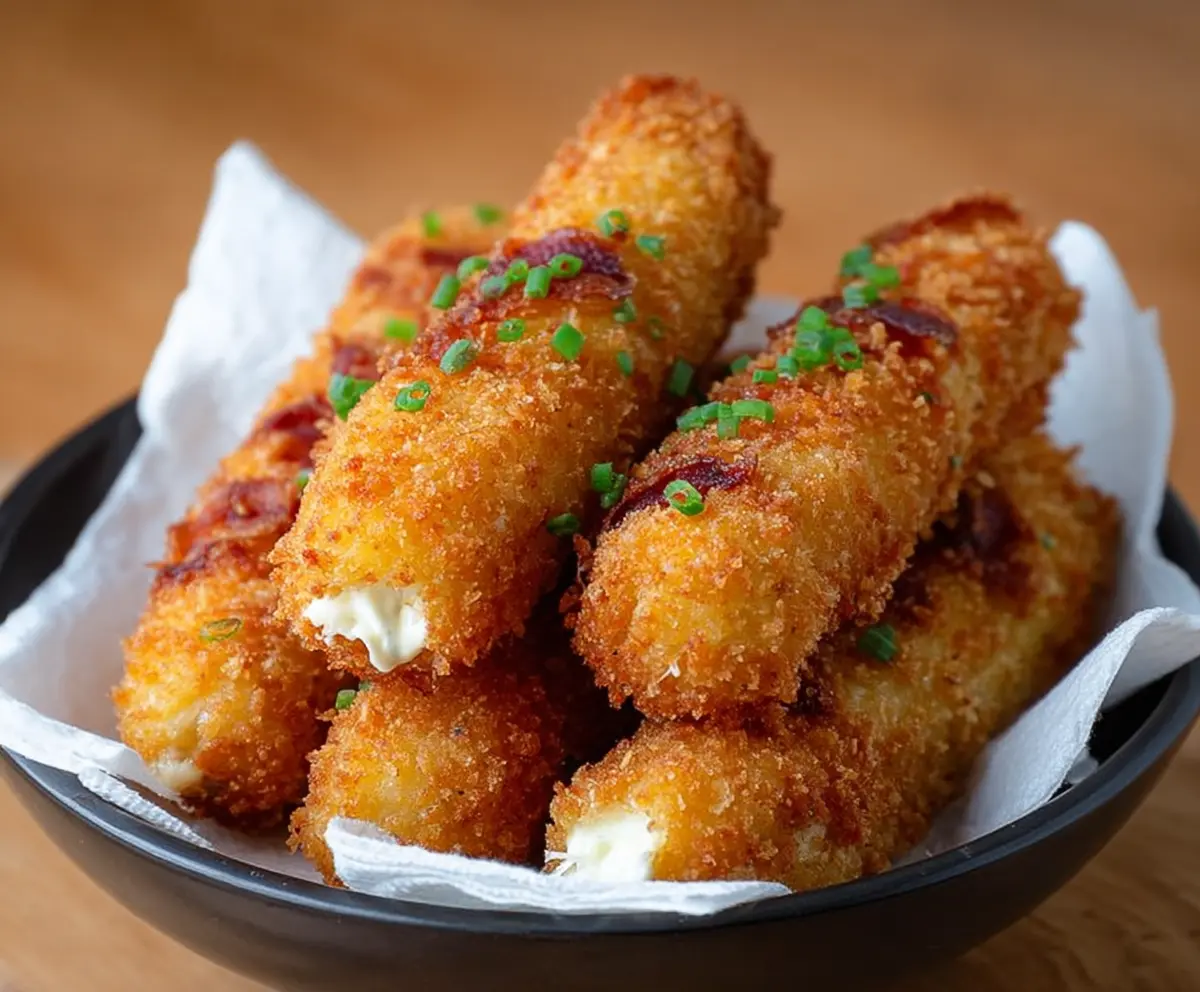
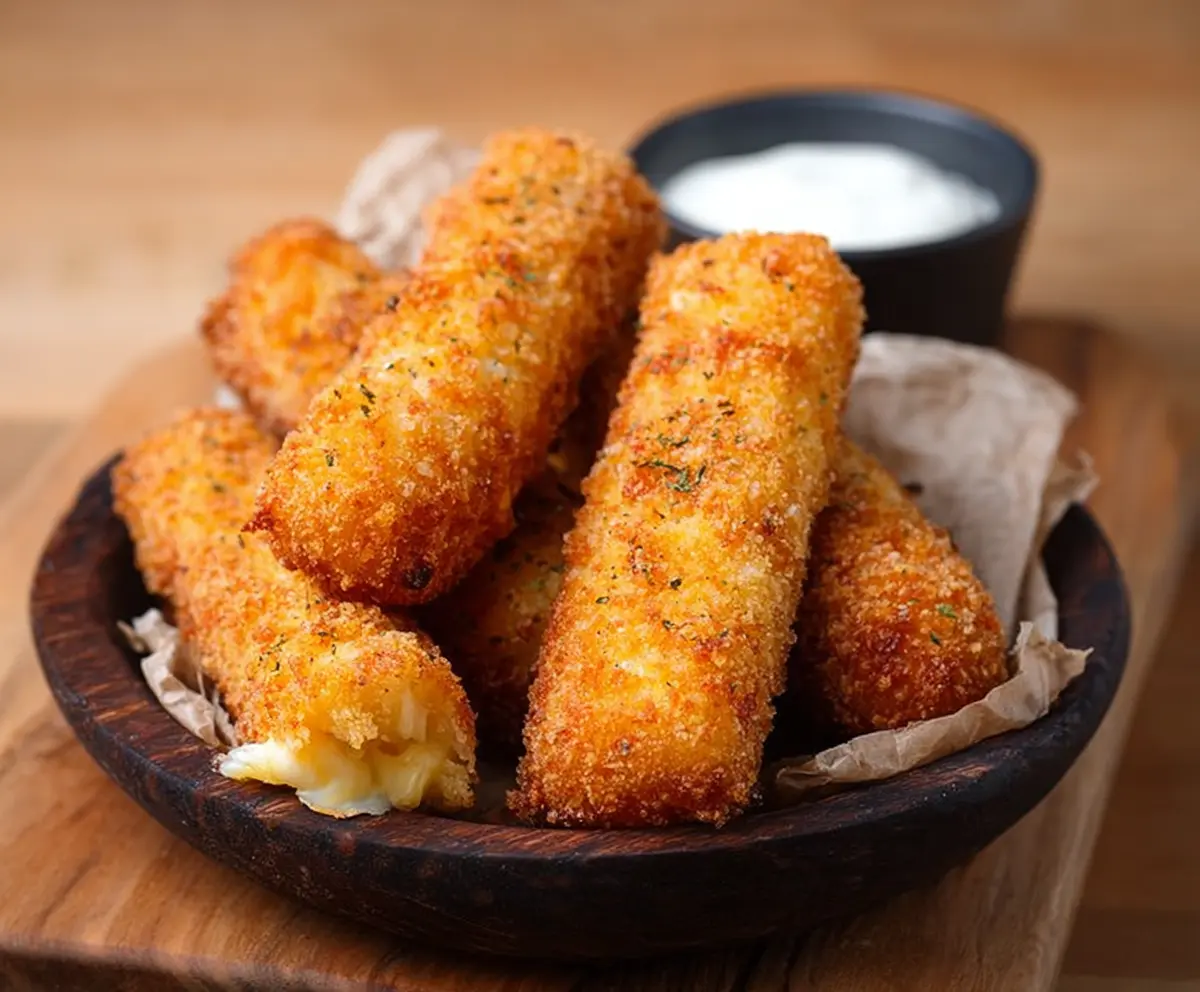
These Crispy Loaded Potato Cheese Sticks are a fun snack! With creamy cheese and tasty potatoes, they’re crunchy on the outside and soft on the inside—perfect for sharing!
If you’re like me, you can’t resist cheesy goodness. I love dipping these sticks in ketchup or ranch—it’s a real treat! What about you? What’s your favorite dip? 😋
Key Ingredients & Substitutions
Potatoes: Use large Russet potatoes for the best texture. If you’re short on time, you can opt for pre-peeled and cubed potatoes found in stores for convenience.
Cheddar Cheese: Shredded cheddar is my favorite, but feel free to mix it up with mozzarella, gouda, or any cheese you enjoy. It’s best to use a good melting cheese.
Cream Cheese: This adds creaminess. If you’re looking for a lighter option, you can substitute with Greek yogurt; it will change the flavor slightly but still be delicious!
Bacon: Optional but adds great flavor! For a vegetarian option, you could use cooked mushrooms or leave it out altogether.
Panko Breadcrumbs: Panko gives extra crunch. If you don’t have panko, regular breadcrumbs will work too, but the texture will be a bit different. You can also make your own by toasting bread and crushing it!
What’s the Best Way to Fry These Crispy Sticks Without Making a Mess?
Frying can be tricky, but with some simple tips, you’ll get it right! First, make sure your oil is hot enough, about 350°F (175°C). Use a thermometer if you have one to check this.
- Keep the frying in batches to avoid overcrowding, which can lower the oil temperature. Fry 4-5 sticks at a time.
- Watch the sticks closely! They only need about 3-4 minutes until they’re golden brown.
- Once done, immediately drain on paper towels to get rid of any excess oil for a less greasy finish.
These tips will help you achieve perfectly crispy potato cheese sticks every time! Enjoy making them!
How to Make Crispy Loaded Potato Cheese Sticks
Ingredients You’ll Need:
For the Potato Mixture:
- 4 large potatoes, peeled and cubed
- 1 cup shredded cheddar cheese (or a cheese blend)
- 1/2 cup cream cheese, softened
- 1/4 cup cooked and crumbled bacon (optional)
- 2 green onions, finely chopped (plus extra for garnish)
- 1 tsp garlic powder
- 1 tsp onion powder
- Salt and pepper to taste
For Coating and Frying:
- 2 cups panko breadcrumbs
- 2 large eggs, beaten
- Vegetable oil for frying
How Much Time Will You Need?
This recipe will take about 30 minutes in total. This includes about 15 minutes for prepping and boiling the potatoes, and another 15 minutes for mixing, shaping, coating, and frying the potato cheese sticks. Super quick and absolutely delicious!
Step-by-Step Instructions:
1. Boil the Potatoes:
Start by boiling the peeled and cubed potatoes in a pot of salted water. Cook them until they are tender, which should take around 15 minutes. Once they’re done, drain the potatoes and mash them until they are nice and smooth. Set them aside to cool a bit.
2. Mix the Filling:
In a large mixing bowl, combine your cooled mashed potatoes with the shredded cheddar cheese, softened cream cheese, crumbled bacon (if you’re using it), chopped green onions, garlic powder, onion powder, and a pinch of salt and pepper. Mix everything together well until it’s fully combined and creamy.
3. Shape the Sticks:
Take a small handful of the potato mixture and roll it into a stick shape—about 3-4 inches long and an inch thick. Keep repeating this process until you’ve used up all the mixture.
4. Prepare a Breading Station:
Set up three separate bowls: one with flour (this step is optional, but it helps the egg stick), one with your beaten eggs, and one with panko breadcrumbs. This will be your breading assembly line!
5. Coat the Potato Sticks:
Now it’s time to coat each potato stick! First, roll it in the flour, then dip it into the egg, and finally coat it generously with panko breadcrumbs. If you want extra crunch, you can repeat the egg and breadcrumb step for even more crispy goodness.
6. Fry the Sticks:
Heat some vegetable oil in a deep frying pan or pot until it reaches about 350°F (175°C). Carefully fry the potato sticks in batches. Keep an eye on them and fry until they turn golden brown and crispy, which should take about 3-4 minutes for each batch.
7. Drain the Excess Oil:
Once fried, use a slotted spoon to take the potato sticks out and place them on paper towels to drain any extra oil. This will help keep them from being too greasy!
8. Garnish and Serve:
To finish, sprinkle some finely chopped green onions on top for garnish. Serve these delicious crispy loaded potato cheese sticks hot with your favorite dipping sauce, like ranch or spicy ketchup. Enjoy!
These tasty sticks make a fantastic appetizer or snack, with a melted cheesy center and a crunchy coating that everyone will love!
Can I Use Different Types of Cheese?
Absolutely! While cheddar is delicious, feel free to experiment with a cheese blend, mozzarella, or even pepper jack for a little kick. Just ensure the cheese you choose melts well to keep that gooey center!
What Should I Do if the Potato Mixture is Too Wet?
If your potato mixture feels too wet or sticky, you can add a little more panko breadcrumbs or a spoonful of flour to help bind it together. Just make sure to mix well to incorporate any additions!
How Can I Make These Sticks Ahead of Time?
You can prepare the potato mixture and shape the sticks in advance. Store them in the refrigerator for up to 24 hours before frying. If you want to freeze them, place them on a baking sheet to freeze individually before transferring to a bag; fry them directly from the freezer without thawing.
What Dipping Sauces Pair Well with These Sticks?
These crispy potato cheese sticks are delicious with a variety of sauces! Ranch dressing and spicy ketchup are popular choices, but you can also try garlic aioli, sour cream, or even a tangy barbecue sauce for extra flavor!