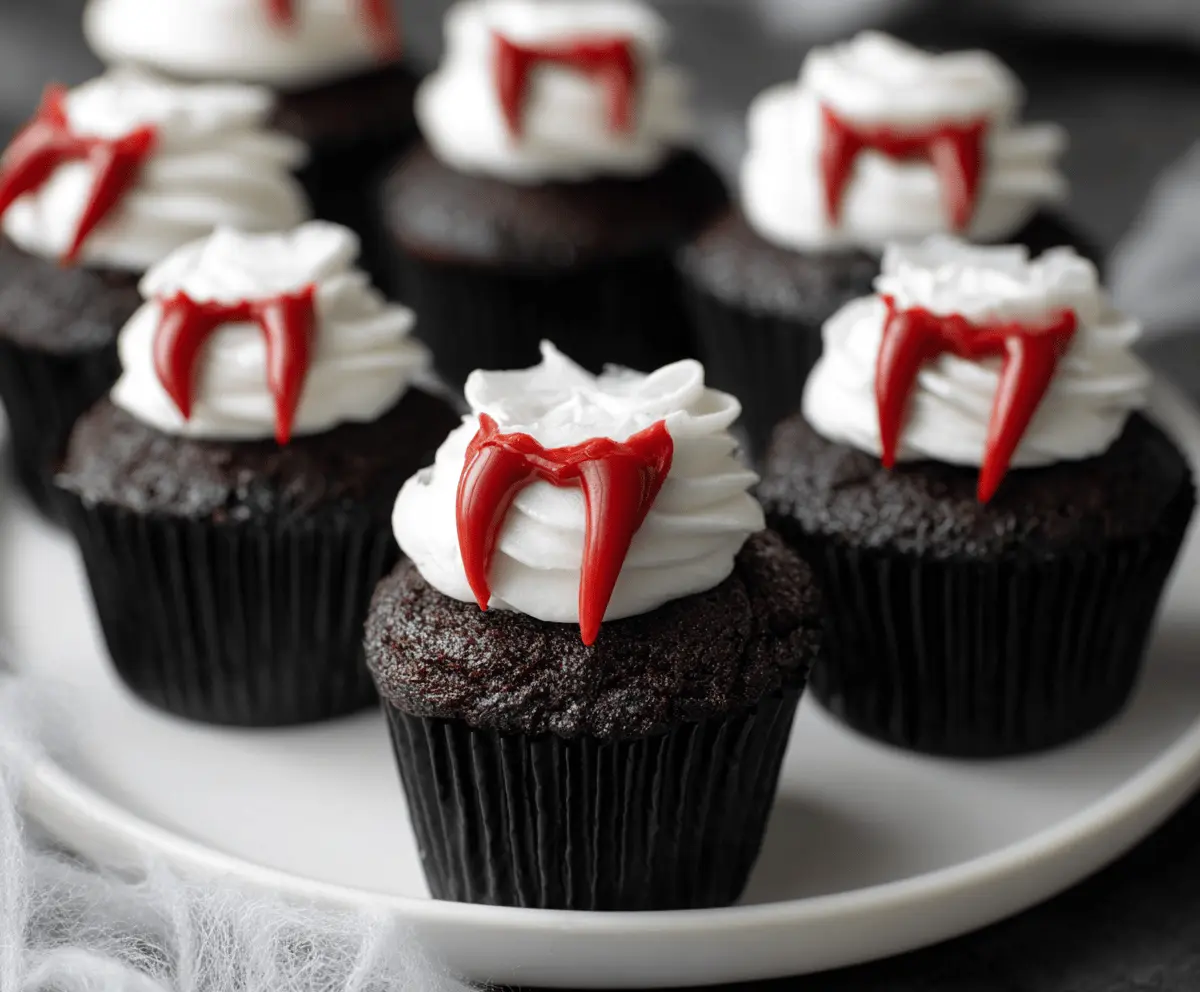
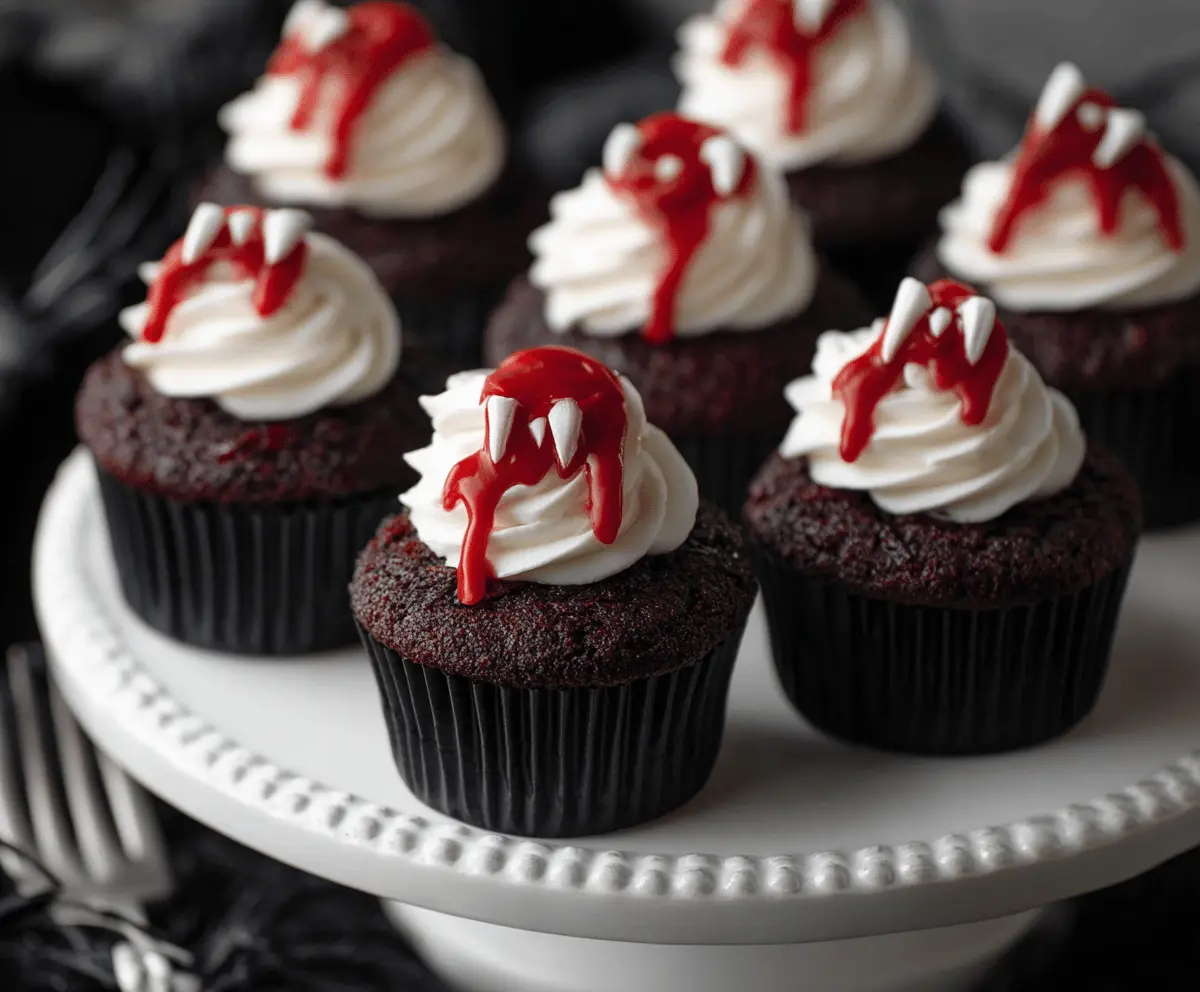
These spooky Halloween Vampire Bite Cupcakes are perfect for your Halloween party! With a chocolatey base and creamy frosting, they look messy and fun, just like a vampire’s snack!
I love how easy they are to make—just bake, frost, and add some red gel for the “blood.” You’ll be laughing as you watch everyone try to take a bite without getting messy! 🧛♂️
Key Ingredients & Substitutions
All-purpose flour: This is the base for the cupcakes. If you’re looking for a gluten-free option, you can swap it with a 1:1 gluten-free flour blend, which works quite well!
Cocoa powder: Unsweetened cocoa powder gives the cupcakes a rich chocolate flavor. You can substitute with Dutch-processed cocoa for a milder taste, if you like.
Buttermilk: Buttermilk adds moisture and tenderness to the cupcakes. If you don’t have it, a mix of regular milk and vinegar (as mentioned) makes a great substitute!
Candy fangs: I love using candy melts for the teeth effect, but if you want something a bit healthier, almond slivers work too! You can even create fun shapes with white chocolate if you’re feeling creative!
How Do You Make the Perfect Vanilla Buttercream Frosting?
Getting the right consistency for buttercream frosting is key. Beat your softened butter until pale and creamy, which helps to incorporate air. Then, add powdered sugar gradually, mixing well in between to avoid a sugary cloud!
- Start with low speed to mix in sugar, then beat on high until fluffy.
- Adjust with heavy cream or milk until you get a spreadable consistency. This should be smooth and not too stiff.
- Taste as you go! You can add more vanilla for flavor or extra sugar for sweetness based on your preference.
With these simple tips, your frosting will be perfect for piping and spreading on your cupcakes!
Halloween Vampire Bite Cupcakes
Ingredients You’ll Need:
For The Cupcakes:
- 1 cup all-purpose flour
- 1/2 cup unsweetened cocoa powder
- 1 teaspoon baking powder
- 1/2 teaspoon baking soda
- 1/4 teaspoon salt
- 3/4 cup granulated sugar
- 1/2 cup buttermilk (or make your own with 1/2 cup milk + 1/2 teaspoon vinegar)
- 1/4 cup vegetable oil
- 1 large egg
- 1 teaspoon vanilla extract
- 1/2 cup hot water
For The Vanilla Buttercream Frosting:
- 1 cup unsalted butter, softened
- 3-4 cups powdered sugar
- 2 teaspoons vanilla extract
- 2-4 tablespoons heavy cream or milk
For Decoration:
- Red gel icing or red food coloring mixed with corn syrup (for “blood”)
- Candy fangs (white candy melts or small white almond slivers shaped like vampire teeth)
How Much Time Will You Need?
This recipe will take about 25 minutes to prepare and 18-22 minutes to bake. You’ll want to set aside some time for the cupcakes to cool completely before frosting them, which could take an additional 30 minutes. Overall, you’ll be ready to serve these spooky treats in about 1.5 hours!
Step-by-Step Instructions:
1. Preheat and Prepare:
First, preheat your oven to 350°F (175°C). Line a muffin tin with cupcake liners to get ready for your spooky treats!
2. Mix Dry Ingredients:
In a large bowl, sift together the flour, cocoa powder, baking powder, baking soda, and salt. This helps create a fluffy texture for your cupcakes!
3. Mix Wet Ingredients:
In another bowl, whisk together the granulated sugar, buttermilk, vegetable oil, egg, and vanilla extract until it’s all nice and smooth.
4. Combine Wet and Dry Mixtures:
Gradually add the wet mixture to the dry ingredients, stirring gently until just combined. Be careful not to over-mix!
5. Add Hot Water:
Now, slowly pour in the hot water while mixing. The batter will be thin, but that’s normal!
6. Portion the Batter:
Divide the batter evenly into the cupcake liners, filling each about 2/3 full. This gives them room to rise!
7. Bake:
Place the muffin tin in the oven and bake for 18-22 minutes. They’ll be done when a toothpick inserted in the center comes out clean.
8. Cool the Cupcakes:
Once they’re baked, remove the cupcakes from the oven and let them cool completely on a wire rack. This is important for fluffy frosting!
9. Make the Vanilla Buttercream Frosting:
While the cupcakes cool, beat the softened butter in a bowl until creamy. Gradually add the powdered sugar, mixing well as you go. Add in the cream and vanilla until fluffy and smooth. Taste and adjust sweetness if desired!
10. Frost the Cupcakes:
Once the cupcakes are cool, pipe swirls of the buttercream frosting on top using a star tip. Get creative with your shapes!
11. Decorate with Candy Fangs:
Position two candy fang pieces on one side of the frosting swirl to mimic a vampire’s bite!
12. Create the “Blood” Effect:
Drip the red gel icing or the red food coloring and corn syrup mixture around the frosting to simulate dripping blood. This adds a fun and spooky touch!
13. Serve and Enjoy:
Now it’s time to enjoy your spooky creations! Serve these Halloween Vampire Bite Cupcakes at your next party and watch them disappear!
This recipe yields about 12-14 rich, chocolatey cupcakes with creamy frosting, perfect for any Halloween celebration! 🎃🧛♂️
Can I Use Gluten-Free Flour for These Cupcakes?
Absolutely! You can substitute all-purpose flour with a 1:1 gluten-free flour blend. Just make sure to check that the blend contains xanthan gum for the best texture!
How Should I Store Leftover Cupcakes?
Store leftover cupcakes in an airtight container at room temperature for up to 3 days. If storing longer, consider refrigerating them or freezing the unfrosted cupcakes to keep them fresh.
What Can I Use Instead of Buttermilk?
If you don’t have buttermilk, don’t worry! You can easily make your own by mixing 1/2 cup of milk with 1/2 teaspoon of vinegar and letting it sit for about 5 minutes. This works great as a substitute!
Can I Prepare the Cupcake Batter in Advance?
Yes, you can prepare the cupcake batter in advance and store it in the fridge for a few hours. Just remember to bring it back to room temperature before baking for even results!