
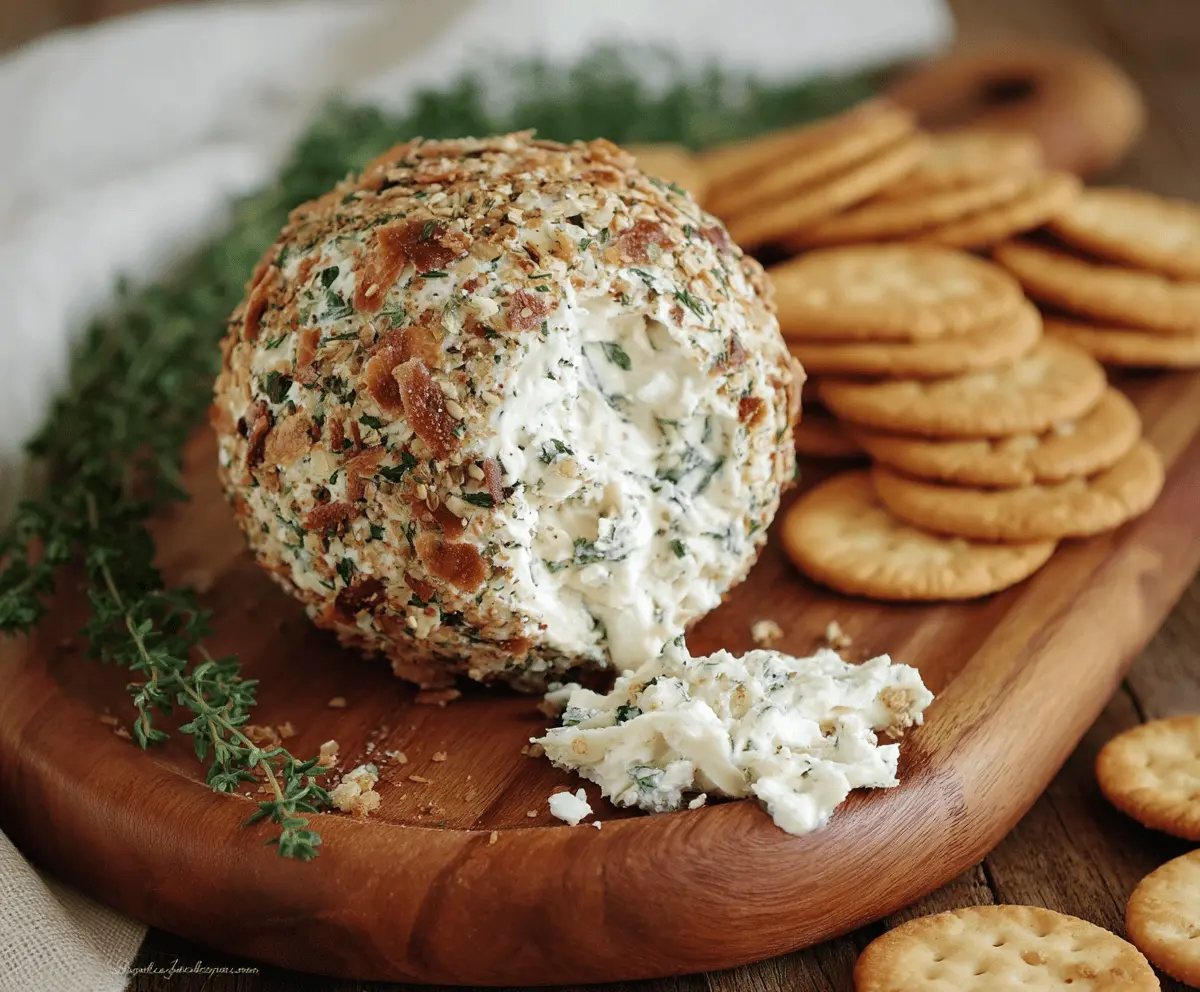
This Herb and Garlic Cheese Ball is a tasty party treat! It’s creamy, cheesy, and packed with flavorful herbs and garlic. Perfect for spreading on crackers!
When I serve this, it disappears in no time. I always have to make a double batch, because trust me, everyone loves it! 🎉
Making this cheese ball is so easy! I just mix the ingredients, shape it, and chill it a bit. Then, I enjoy it with friends while relaxing. Yum!
Key Ingredients & Substitutions
Cream Cheese: This is the base for the cheese ball and gives it that creamy texture. If you’re looking for a lighter option, you can use Neufchâtel cheese instead, which has a lower fat content.
Cheddar Cheese: Sharp white cheddar adds depth to the flavor. For a milder taste, feel free to use regular cheddar or even a blend of cheeses like Monterey Jack.
Goat Cheese: Using goat cheese makes the cheese ball extra creamy and adds a tangy flavor. If you’re not a fan of goat cheese, you can skip it or replace it with more cream cheese.
Herbs: Fresh herbs add brightness. You can substitute with dried herbs if fresh aren’t available, but reduce the quantity since dried herbs are more potent.
Nuts: Pecans or walnuts give a nice crunch. If you have nut allergies, you could roll the cheese ball in breadcrumbs or seeds like pumpkin or sunflower seeds instead.
How Can I Make Sure the Cheese Ball Holds Its Shape?
Shaping the cheese ball is a key step. Here’s how to do it perfectly:
- Mix all the ingredients thoroughly in a bowl to ensure even flavor and consistency.
- When you form the ball, use your hands and press firmly to compact the mixture. If it’s too soft, chill for 30 minutes before shaping.
- Roll the ball on a clean surface or wrap it in plastic wrap to help form a round shape.
- Chill the cheese ball for at least 2 hours to allow it to firm up, making it easier to slice or spread later.
By following these steps, your cheese ball will not only taste great but also look fantastic when you serve it!
Herb And Garlic Cheese Ball
Ingredients You’ll Need:
For the Cheese Ball:
- 8 oz cream cheese, softened
- 4 oz goat cheese or cream cheese, softened (optional for extra creaminess)
- 1 cup sharp white cheddar cheese, shredded
- 2 teaspoons garlic powder or 2 cloves garlic, minced
- 2 tablespoons fresh parsley, finely chopped
- 1 tablespoon fresh dill, finely chopped
- 1 tablespoon fresh chives, finely chopped
- 1 teaspoon fresh rosemary, finely chopped (plus some sprigs for garnish)
- Salt and pepper to taste
For the Coating:
- 1/2 cup chopped pecans or walnuts (toasted)
- 1/4 cup dried cranberries or bacon bits (optional, adds a little sweetness or smoky flavor)
For Serving:
- Crackers, for serving
- Sliced baguette, for spreading (optional)
Time Necessary for Preparation:
This delight will take about 15 minutes to prepare, plus a chill time of at least 2 hours in the refrigerator to let the flavors blend and the cheese ball firm up. Overall, you’re looking at about 2 hours and 15 minutes before it’s ready to enjoy!
Step-by-Step Instructions:
1. Mix the Cheeses:
In a large bowl, combine the softened cream cheese and goat cheese (if using). Then, sprinkle in the shredded sharp white cheddar cheese. Mix everything together with a spatula or fork until it’s nice and smooth and creamy—this will be the base of your cheese ball!
2. Add the Flavors:
Now it’s time to add flavor! Stir in the garlic (either garlic powder or minced), chopped parsley, dill, chives, and rosemary. Don’t forget to sprinkle in a bit of salt and pepper. Mix everything together so that the herbs and garlic are evenly spread throughout the cheese mixture.
3. Shape the Cheese Ball:
Once everything is well mixed, it’s time to shape your cheese ball. Use your hands (or plastic wrap) to form the cheese mixture into a ball shape. Make sure it’s compact so it holds together nicely!
4. Coat the Cheese Ball:
On a plate or shallow dish, spread out the chopped toasted pecans (and dried cranberries or bacon bits if you’re using them). Roll the cheese ball in this mixture, pressing gently so the nuts stick to the surface. This will give your cheese ball a crunchy, flavorful exterior!
5. Chill Out:
Wrap the cheese ball tightly in plastic wrap and pop it in the refrigerator. Let it chill for at least 2 hours, or overnight if you want to prepare it in advance. Chilling helps the flavors meld and makes it easier to slice and serve.
6. Ready to Serve!
When you’re ready to serve your cheese ball, take it out of the fridge and unwrap it. Place it on a wooden board or plate, and garnish with a few fresh rosemary sprigs for a pretty touch. Serve with a variety of crackers or sliced baguette for spreading.
Enjoy your flavorful Herb and Garlic Cheese Ball as a perfect appetizer for any gathering! Everyone will love it!
Can I Use Different Types of Cheese?
Absolutely! While cream cheese is the base for this cheese ball, you can mix in other cheeses like feta, blue cheese, or even a flavored cheese spread for a unique twist. Just keep in mind that different cheeses will alter the flavor profile a bit.
How Can I Make This Recipe Dairy-Free?
For a dairy-free version, you can use vegan cream cheese and nutritional yeast for a cheesy flavor. Additionally, make sure to choose plant-based cheeses that you enjoy. Just remember to check the labels for any other allergens!
What’s the Best Way to Store Leftovers?
Store any leftovers in an airtight container in the fridge for up to 3-4 days. If you find that the cheese ball is a bit too soft after refrigeration, you can let it chill in the freezer for about 30 minutes before serving again.
Can I Make This Cheese Ball Spicier?
Definitely! To kick up the heat, add some crushed red pepper flakes or a dash of hot sauce to the cheese mixture. You can also include finely chopped jalapeños for that extra spicy kick. Just adjust based on your heat preference!