Summer is here, and for me, that means one thing: homemade ice cream! There’s nothing quite like a cold, creamy scoop on a warm day, and making it yourself is easier than you might think.
I’ve gathered three of my absolute favorite ice cream recipes for you today, perfect for cooling down and enjoying a sweet treat. You’ll find a classic fruit flavor, a timeless combination, and a fun, fluffy option.
Jump to Recipe:
- 1. Homemade Cherry Vanilla Ice Cream Recipe
- 2. Homemade Strawberry Ice Cream
- 3. Marshmallow Ice Cream
Homemade Cherry Vanilla Ice Cream Recipe
This creamy cherry vanilla ice cream is a pure delight. You’ll love the sweet cherries mixed with classic vanilla notes in every spoonful.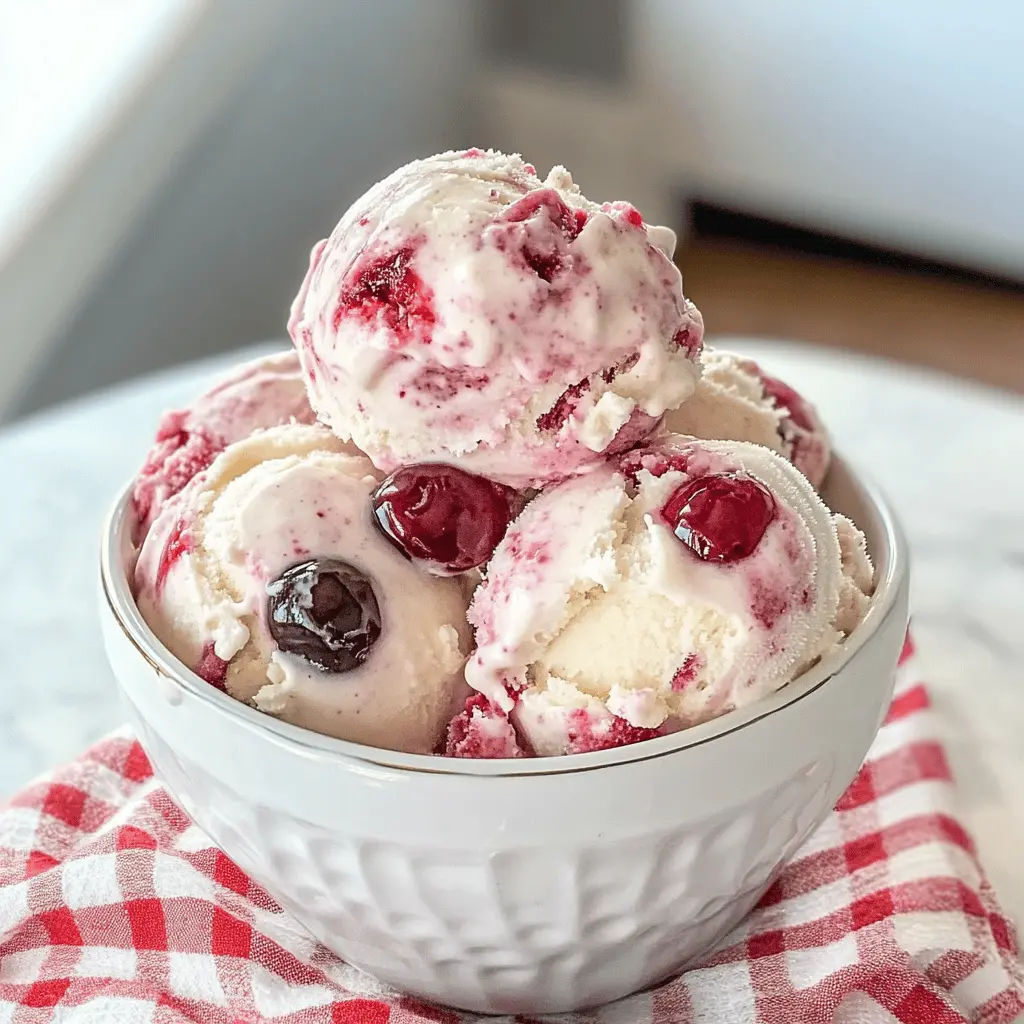
Key Ingredients & Tips for Cherry Vanilla Ice Cream
- Fresh Cherries: Use ripe, pitted fresh cherries for the best flavor. You can also use good quality frozen cherries, just thaw them first.
- Vanilla Extract: Good quality vanilla makes a big difference in this ice cream. Don’t skimp on a nice pure vanilla extract.
What You Need for Cherry Vanilla Ice Cream
- 2 cups heavy cream
- 1 cup whole milk
- 3/4 cup granulated sugar
- 1 tablespoon pure vanilla extract
- 1.5 cups fresh cherries, pitted and chopped
⏱️ Time: 25 min prep + freezing🍽️ Yields: 1.5 quarts
How to Make Cherry Vanilla Ice Cream
Step 1: Prepare the Cherries
Wash and pit all your fresh cherries, then chop them into small, bite-sized pieces. Set them aside for now.
Step 2: Make the Ice Cream Base
In a large bowl, whisk together the heavy cream, whole milk, granulated sugar, and pure vanilla extract until the sugar has completely dissolved. Make sure the mixture is smooth.
Step 3: Churn and Freeze
Pour your cream mixture into your ice cream maker and churn according to the manufacturer’s directions. During the last 5 minutes of churning, add the chopped cherries. Transfer the finished ice cream to a freezer-safe container and freeze for at least 4 hours, or until firm.
📝 Final Note
For a stronger cherry flavor, you can gently heat the chopped cherries with a tablespoon of sugar and a splash of water, then cool completely before adding.
Homemade Strawberry Ice Cream
Nothing says summer quite like fresh strawberry ice cream. This recipe captures the bright, fruity taste of strawberries perfectly.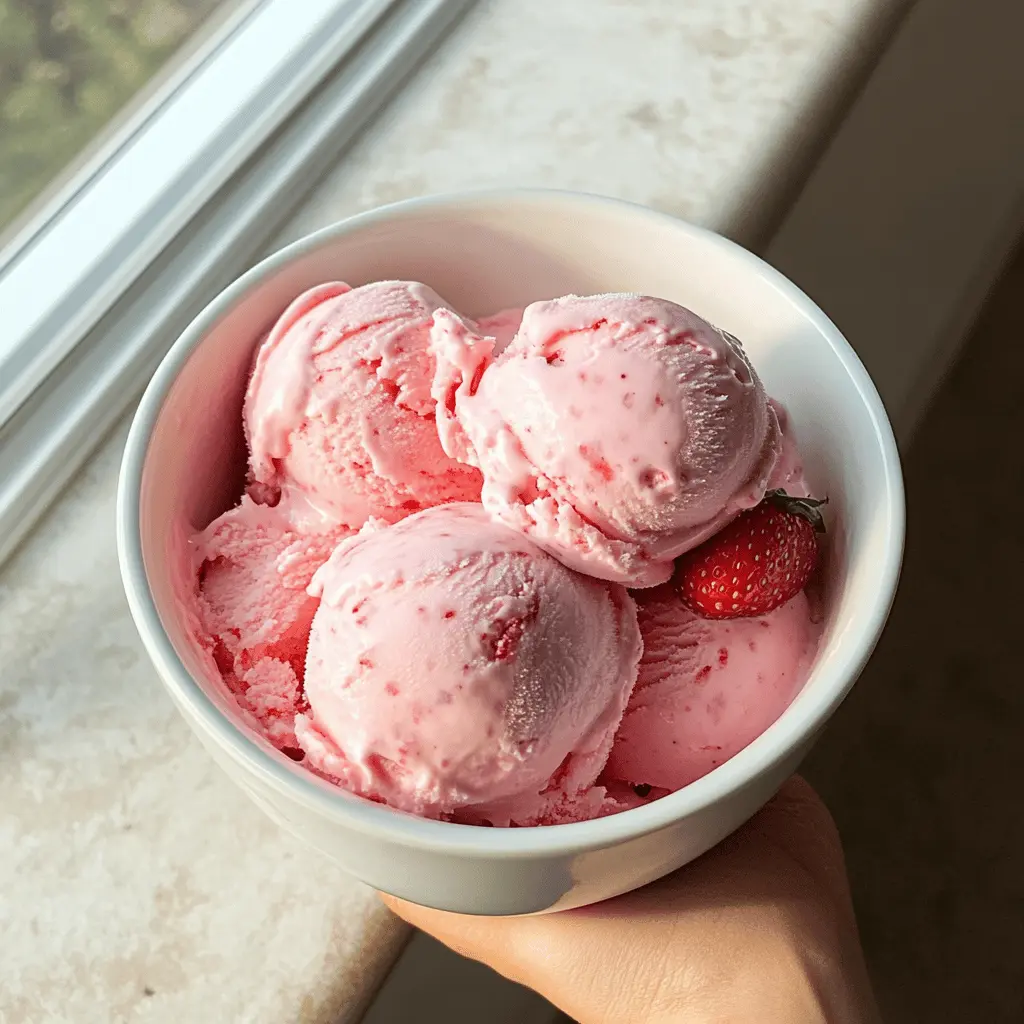
Key Ingredients & Tips for Strawberry Ice Cream
- Ripe Strawberries: Choose the ripest, sweetest strawberries you can find. Their natural sugars will make your ice cream taste amazing.
- Macerating Strawberries: Letting sliced strawberries sit with a little sugar helps draw out their juices and sweetens them up even more before blending.
What You Need for Strawberry Ice Cream
- 2 cups fresh strawberries, hulled and sliced
- 1/4 cup granulated sugar (for strawberries)
- 1 tablespoon lemon juice
- 2 cups heavy cream
- 1 cup whole milk
- 1/2 cup granulated sugar (for base)
⏱️ Time: 30 min prep + freezing🍽️ Yields: 1.5 quarts
How to Make Strawberry Ice Cream
Step 1: Prep Strawberries
Wash, hull, and slice your fresh strawberries. In a medium bowl, combine the sliced strawberries with 1/4 cup of sugar and the lemon juice. Let this sit for 30 minutes, stirring occasionally, to let the flavors blend.
Step 2: Create Strawberry Puree
Transfer about half of the macerated strawberries to a blender or food processor and pulse until you have a chunky puree. Keep the other half of the strawberries sliced for texture.
Step 3: Mix and Churn
In a large bowl, whisk together the heavy cream, whole milk, and 1/2 cup sugar until the sugar is dissolved. Stir in the strawberry puree and the remaining sliced strawberries. Pour the mixture into your ice cream maker and churn according to its instructions. Once churned, transfer to a freezer-safe container and freeze until firm, about 3-4 hours.
📝 Final Note
For a smoother ice cream, you can puree all the strawberries. If you love bits of fruit, keep more of the strawberries sliced instead of pureeing them all.
Marshmallow Ice Cream
Get ready for a treat with this fun marshmallow ice cream. It’s creamy, sweet, and packed with fluffy marshmallow goodness.
Key Ingredients & Tips for Marshmallow Ice Cream
- Good Quality Marshmallows: Use fresh, soft mini marshmallows for the best texture when they are mixed into your ice cream.
- Chill Your Base: Chilling your ice cream base well before churning helps it freeze faster and results in a smoother, creamier ice cream.
What You Need for Marshmallow Ice Cream
- 2 cups heavy cream
- 1 cup whole milk
- 3/4 cup granulated sugar
- 1 teaspoon pure vanilla extract
- 1.5 cups mini marshmallows
⏱️ Time: 15 min prep + freezing🍽️ Yields: 1.25 quarts
How to Make Marshmallow Ice Cream
Step 1: Make the Ice Cream Base
In a large bowl, whisk together the heavy cream, whole milk, granulated sugar, and pure vanilla extract. Continue whisking until the sugar has fully dissolved and the mixture is smooth.
Step 2: Chill the Base
Cover the bowl with plastic wrap and chill the cream mixture in the refrigerator for at least 2 hours. Chilling it overnight is even better, as a cold base makes for creamier ice cream.
Step 3: Churn and Add Marshmallows
Pour the chilled base into your ice cream maker and churn according to the manufacturer’s instructions. During the last 5-10 minutes of churning, add the mini marshmallows. Once churning is complete, transfer the ice cream to a freezer-safe container and freeze for at least 3-4 hours, or until firm.
📝 Final Note
For an extra treat, you can gently swirl in some chocolate fudge or caramel sauce during the last few minutes of churning, right before adding the marshmallows.