I love making cookies, and today I want to share some wonderful raspberry cookie recipes with you. Raspberries add such a bright, sweet, and sometimes tangy flavor to baked goods. They are perfect for a snack, a dessert, or just a little something sweet with your coffee.
You’ll find different styles here, from classic favorites to something a bit lighter. I hope you enjoy baking these as much as I do!
Jump to Recipe:
- 1. Italian Raspberry Thumbprint Cookies
- 2. Lemonade Raspberry Cookies
- 3. Low Carb Raspberry Cheesecake Cookies
Classic Italian Raspberry Thumbprint Cookies
These classic cookies are a joy to make and eat. They feature a soft, buttery dough with a sweet raspberry jam center that really stands out.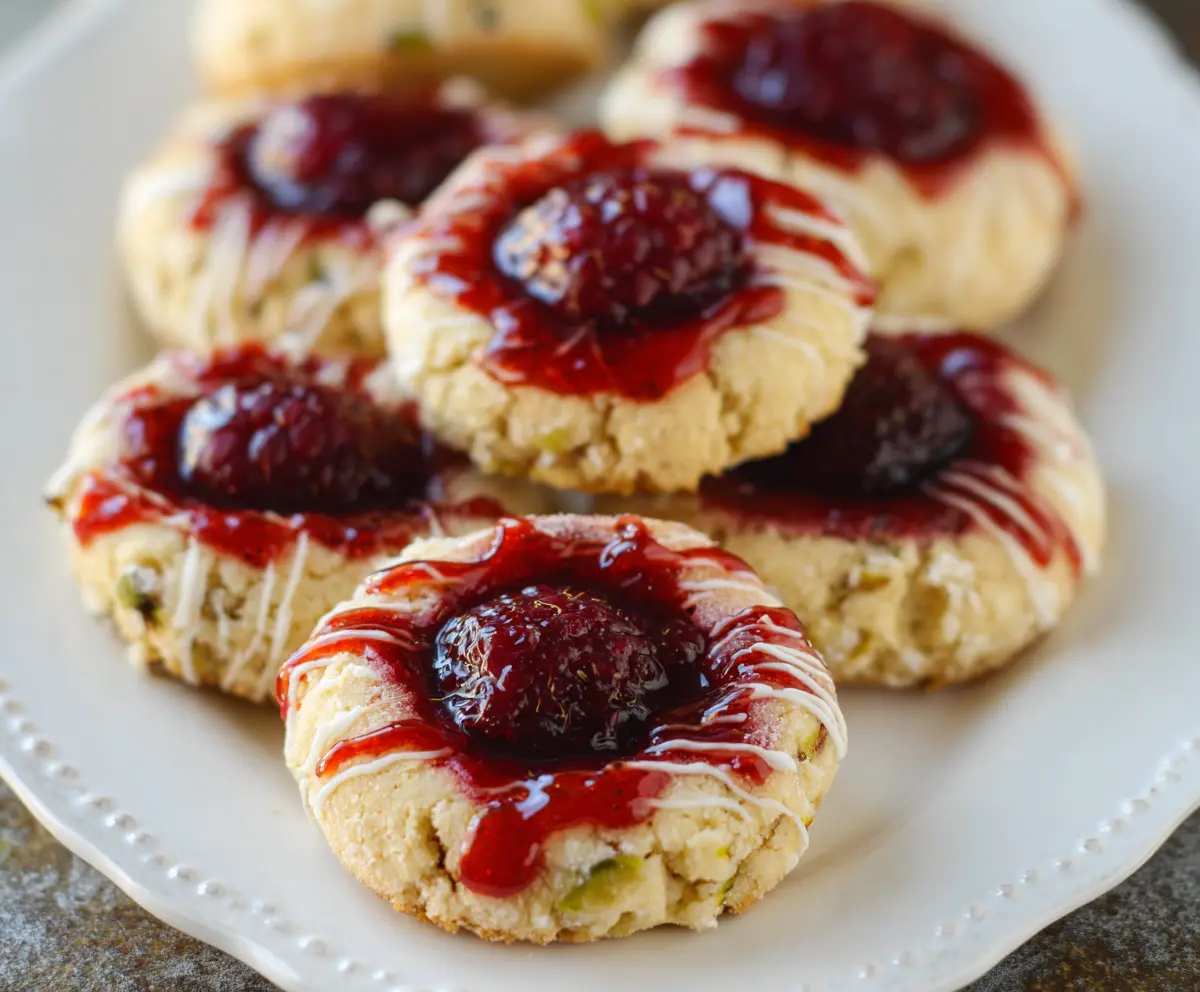
Key Ingredients & Tips for Great Thumbprints
- Softened Butter: Make sure your butter is at room temperature. This helps create a smooth, creamy dough for perfect cookies.
- Good Raspberry Jam: Use a high-quality raspberry jam for the best taste. You can also use other berry jams if you like.
What You Need for Raspberry Thumbprints
- 1 cup unsalted butter, softened
- ½ cup granulated sugar
- 1 large egg yolk
- 1 teaspoon vanilla extract
- 2 cups all-purpose flour
- ½ cup raspberry jam
- Powdered sugar for dusting (optional)
⏱️ Time: 35 minutes🍽️ Yields: 24 cookies
How to Make Italian Raspberry Thumbprint Cookies
Step 1: Make the Dough
Preheat your oven to 375°F (190°C). In a large bowl, beat the softened butter and granulated sugar together until they are light and fluffy. Add the egg yolk and vanilla extract, mixing until everything is combined. Gradually add the flour, mixing on low speed until a soft dough forms.
Step 2: Shape and Fill
Roll the dough into small balls, about 1 inch in size. Place them on a baking sheet lined with parchment paper. Use your thumb or the back of a small spoon to make an indentation in the center of each cookie. Fill each indentation with about ½ teaspoon of raspberry jam.
Step 3: Bake and Cool
Bake the cookies for 10-12 minutes, or until the edges are lightly golden. Let them cool on the baking sheet for a few minutes before moving them to a wire rack to cool completely. You can dust them with powdered sugar once they are cool, if you like.
📝 Final Note
These cookies keep well in an airtight container at room temperature for up to 3-4 days. They are a wonderful treat to share!
Zesty Lemonade Raspberry Cookies
If you enjoy a bright, refreshing taste, you will love these lemonade raspberry cookies. The lemon and raspberry combination is so cheerful and perfect for any day.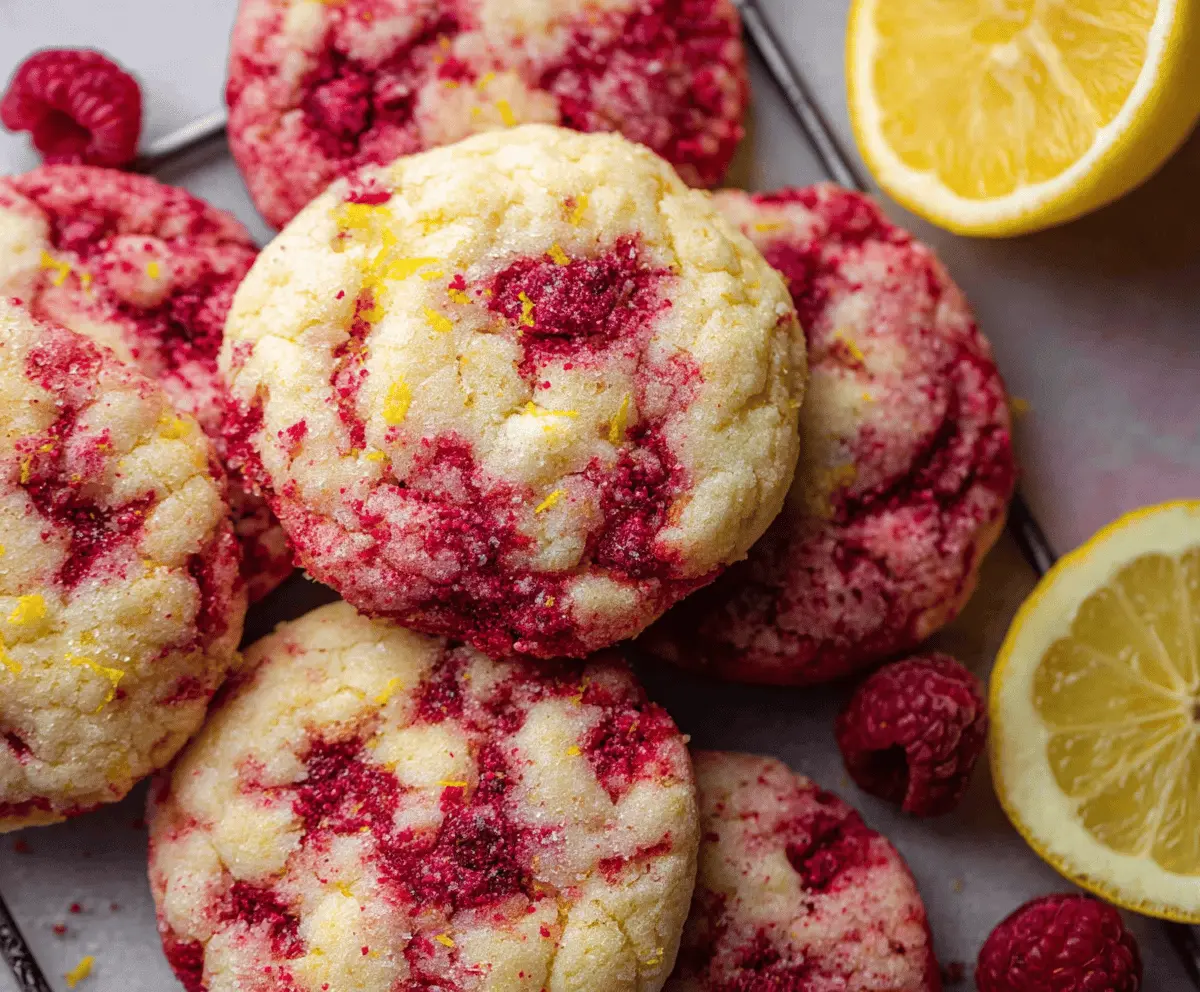
Key Ingredients & Tips for Zesty Cookies
- Fresh Lemon Zest: The zest holds a lot of the lemon flavor. Don’t skip it! It really makes these cookies sing.
- Gentle Raspberry Fold: When adding the fresh raspberries, fold them in gently to avoid crushing them too much. This helps keep their shape and juiciness.
What You Need for Lemonade Raspberry Cookies
- ½ cup unsalted butter, softened
- ¾ cup granulated sugar
- 1 large egg
- 1 tablespoon fresh lemon juice
- 1 teaspoon lemon zest
- 1 ½ cups all-purpose flour
- ½ teaspoon baking powder
- ¼ teaspoon salt
- ¾ cup fresh raspberries
⏱️ Time: 25 minutes🍽️ Yields: 18 cookies
How to Make Lemonade Raspberry Cookies
Step 1: Mix Wet Ingredients
Preheat your oven to 350°F (175°C). In a medium bowl, cream together the softened butter and granulated sugar until they are light. Beat in the egg, lemon juice, and lemon zest until everything is smooth and well combined.
Step 2: Combine Dry and Wet
In a separate bowl, whisk together the flour, baking powder, and salt. Gradually add the dry ingredients to the wet ingredients, mixing until just combined. Be careful not to overmix. Gently fold in the fresh raspberries until they are evenly distributed throughout the dough.
Step 3: Bake Until Golden
Drop spoonfuls of cookie dough onto a baking sheet lined with parchment paper, leaving some space between each cookie. Bake for 10-12 minutes, or until the edges are lightly golden. Let them cool on the baking sheet for a few minutes before transferring them to a wire rack to cool completely.
📝 Final Note
For an extra burst of lemon, you can drizzle a simple lemon glaze (powdered sugar mixed with lemon juice) over the cooled cookies.
Low Carb Raspberry Cheesecake Cookies
If you are looking for a lower carb option that still tastes rich and satisfying, these cheesecake cookies are for you. They have a creamy texture and lovely raspberry flavor.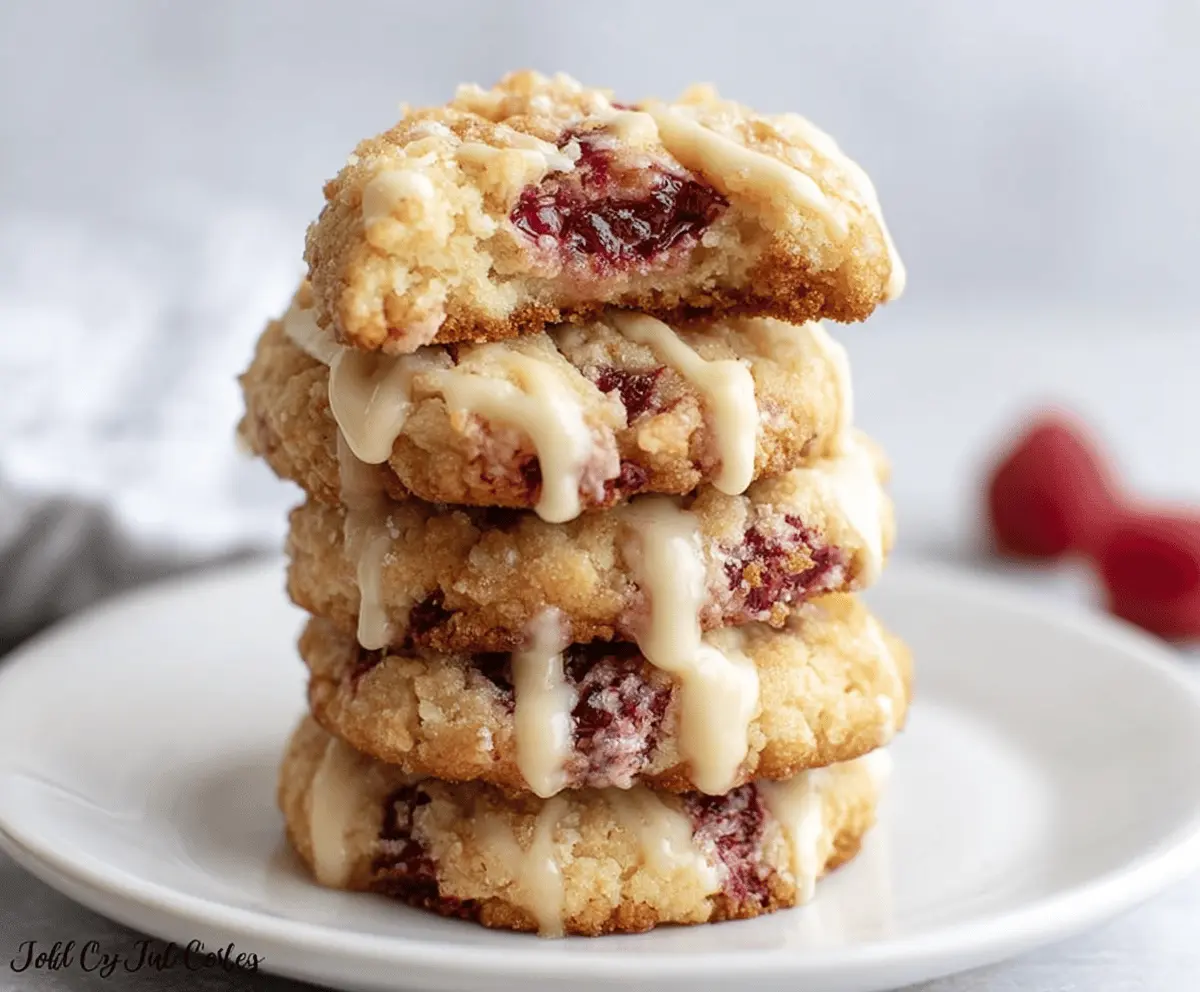
Key Ingredients & Tips for Low Carb Cookies
- Room Temperature Cream Cheese: This is key for a smooth, lump-free batter. Take it out of the fridge at least an hour before you start.
- Sugar Substitute Choice: Use a granular erythritol or a blend that measures like sugar. This helps achieve the right sweetness without the carbs.
What You Need for Low Carb Raspberry Cheesecake Cookies
- 8 oz cream cheese, softened
- ½ cup granular erythritol (or preferred sugar substitute)
- 1 large egg
- 1 teaspoon vanilla extract
- 1 ½ cups almond flour
- ½ teaspoon baking powder
- ¼ teaspoon salt
- ¾ cup fresh raspberries
⏱️ Time: 35 minutes🍽️ Yields: 16 cookies
How to Make Low Carb Raspberry Cheesecake Cookies
Step 1: Prepare the Wet Mix
Preheat your oven to 350°F (175°C). In a large mixing bowl, beat the softened cream cheese and granular erythritol together until the mixture is very smooth and creamy. Beat in the egg and vanilla extract until everything is well combined and fluffy.
Step 2: Add Dry Ingredients and Berries
In a separate bowl, whisk together the almond flour, baking powder, and salt. Gradually add the dry ingredients to the cream cheese mixture, mixing on low speed until the dough just comes together. Gently fold in the fresh raspberries.
Step 3: Bake and Chill
Drop spoonfuls of the cookie dough onto a baking sheet lined with parchment paper. Bake for 15-18 minutes, or until the edges are lightly set and the cookies are slightly golden. Let them cool on the baking sheet for about 5 minutes before moving them to a wire rack to cool completely. These cookies taste best when chilled.
📝 Final Note
Store any leftover low carb raspberry cheesecake cookies in an airtight container in the refrigerator. They are delicious cold!