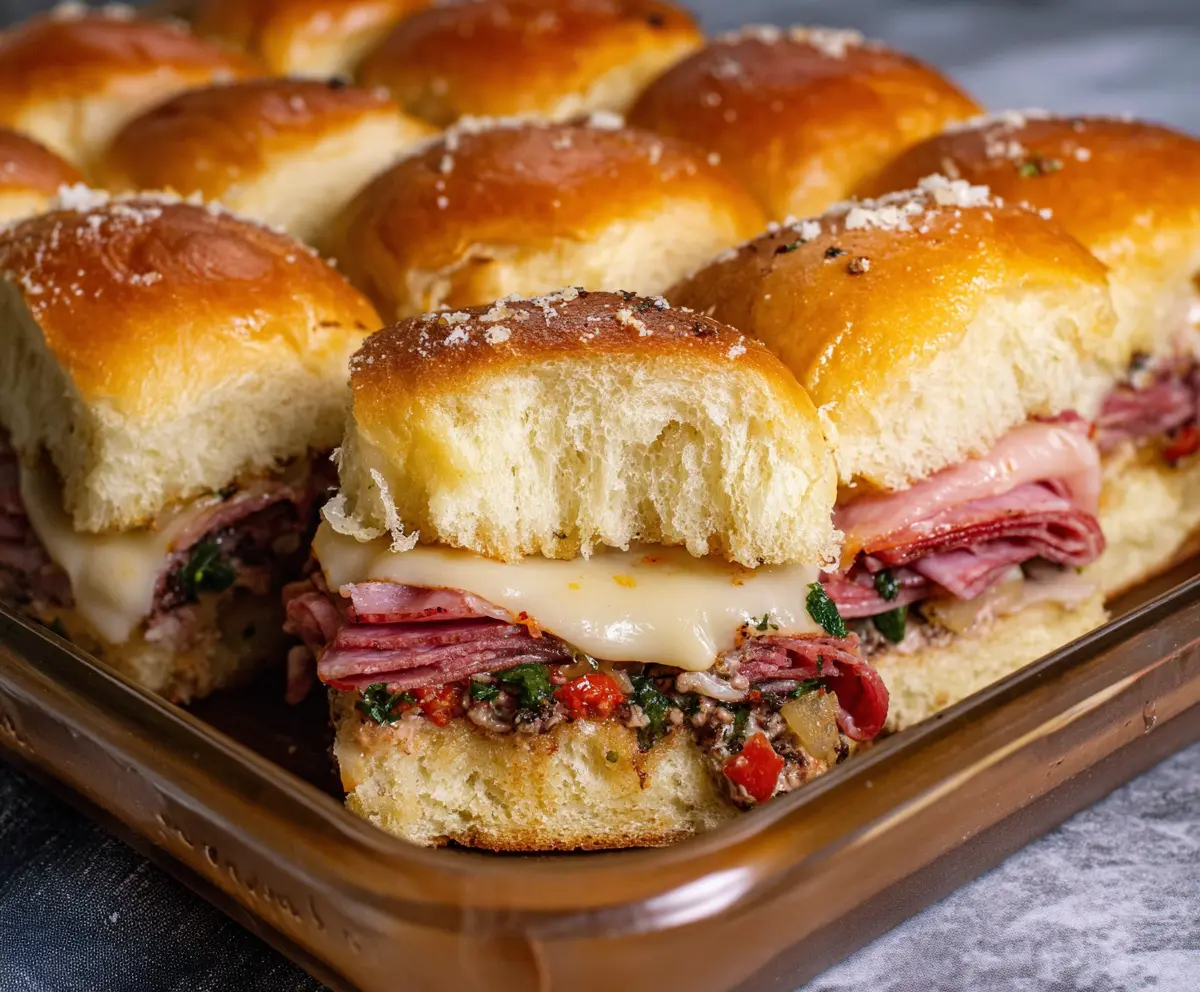
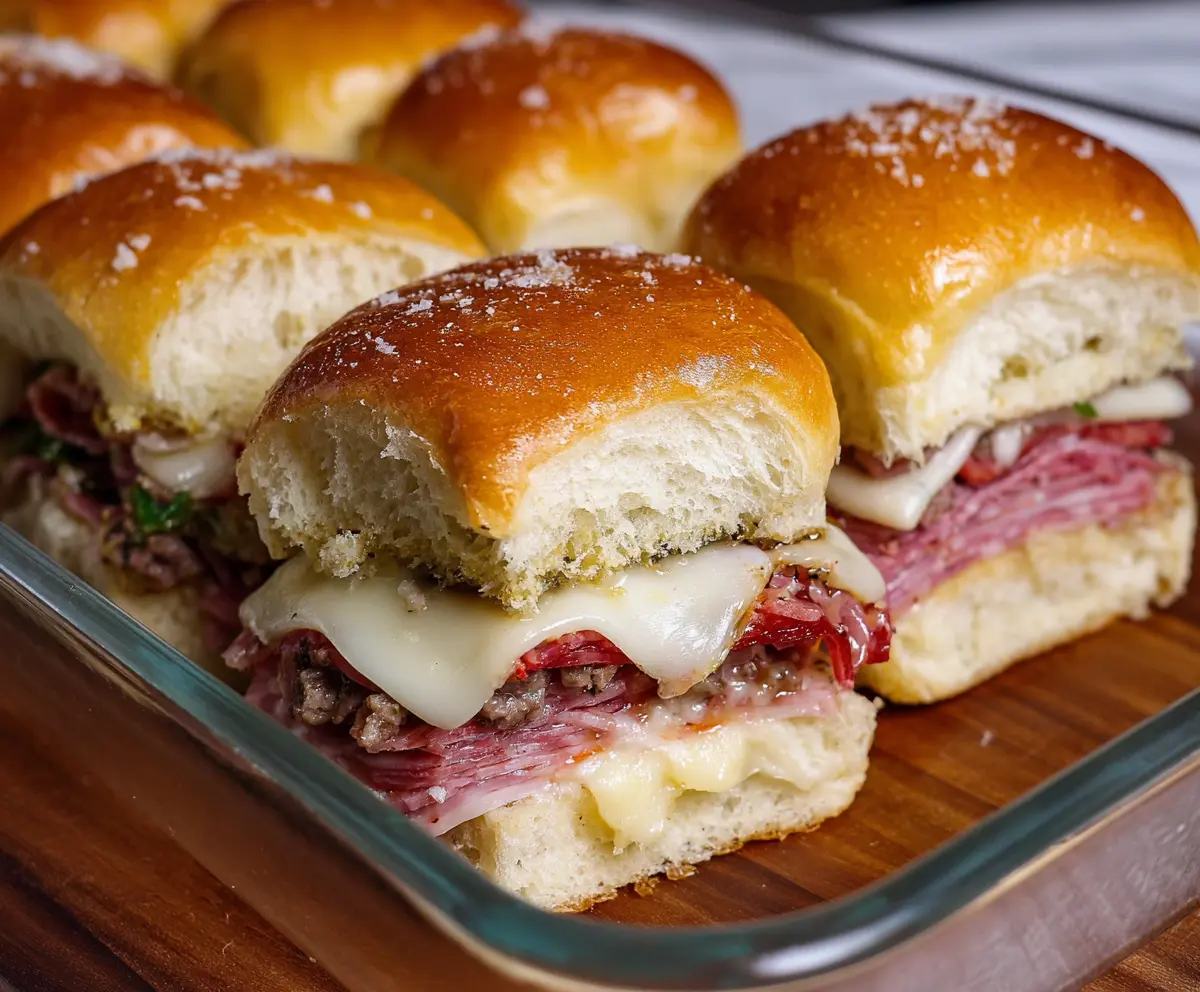
Muffuletta sliders are mini sandwiches packed with layers of deliciousness! They mix meats, cheese, and a zesty olive tapenade on soft rolls, making them a tasty treat for any gathering.
These sliders are so fun to make and share! I love biting into them while watching a game—who can resist that combo of flavors? They’re perfect for snacking! 🍴
Key Ingredients & Substitutions
Slider Buns: Hawaiian rolls give a hint of sweetness that pairs well with the savory filling. If you’re looking for a healthier option, whole wheat slider buns or homemade bread could work nicely.
Olive Salad: This tapenade is essential for that classic flavor. If you can’t find it, mix equal parts of chopped green and black olives, add some capers and a splash of vinegar for a quick alternative.
Meats: While salami, ham, and mortadella are traditional, don’t hesitate to use turkey or chicken for lighter sliders. Any deli meat will fit if you’re adjusting for preferences!
Cheese: Provolone has a nice melt and flavor, but you could swap it for mozzarella or pepper jack if you desire a different kick.
How Do I Get My Sliders Extra Cheesy and Delicious?
The trick to making these sliders truly special lies in getting that perfect melt on your cheese and achieving a golden crust on the buns. Here’s how:
- Use a good cheese—provolone is great, but feel free to mix in others like mozzarella for extra gooeyness.
- Cover your baking dish with foil initially to keep the moisture in. This helps the cheese melt beautifully without over-drying the buns.
- For the final touch, remove the foil and bake until the tops are golden brown. This gives a crispy finish, which contrasts nicely with the soft inside.
Don’t rush this step; letting the sliders rest a few minutes after baking allows the cheese to set before you cut them. Enjoy your sliders fresh from the oven!
How to Make Muffuletta Sliders
Ingredients You Will Need:
For the Sliders:
- 12 slider buns or Hawaiian rolls
- 1 cup olive salad (olive tapenade with chopped olives, celery, pimentos, garlic, and herbs)
- 6 oz sliced salami
- 6 oz sliced ham
- 6 oz sliced mortadella
- 6 oz sliced provolone cheese
For Assembly:
- ½ cup mayonnaise or softened butter (optional, for spreading)
- 1 tablespoon Italian seasoning or finely chopped fresh parsley and oregano
- 2 tablespoons melted butter
- Grated Parmesan cheese for topping
- Salt and freshly ground black pepper, to taste
How Much Time Will You Need?
This delightful recipe takes about 15 minutes for preparation, plus an additional 20-25 minutes for baking. So, all in all, you’ll spend about 40-45 minutes making these scrumptious Muffuletta Sliders. The time is so worth it for such a tasty treat!
Step-by-Step Instructions:
1. Preheat the Oven:
Start by preheating your oven to 350°F (175°C). This will ensure your sliders are warm and toasty in no time.
2. Prepare the Buns:
Take your slider buns and slice them horizontally. Make sure to keep the tops and bottoms connected as sets to hold everything together later.
3. Assemble the Bottom Layer:
Place the bottom halves of the slider buns into a 9×13-inch baking dish (or a similar size). This is where all the goodness will come together!
4. Spread the Olive Salad:
Evenly spread the olive salad over the bottom buns. This mixture is what gives Muffuletta its unique and tasty flavor!
5. Layer the Meats:
Start layering your sliced meats on top of the olive salad: first, the salami, followed by the ham, and then the mortadella. Feel free to mix things up if you like!
6. Add the Cheese:
Now, place slices of provolone cheese generously on top of the meat layers. This melty cheese is going to be heavenly!
7. Optional Creaminess:
If you want extra moisture, spread a bit of mayonnaise or softened butter on the inside of the top buns before placing them on top.
8. Place the Top Buns:
Add the top halves of the slider buns onto the layered cheese, creating a nice sandwich.
9. Brush with Herb Butter:
In a small bowl, mix together melted butter with Italian seasoning or fresh herbs. Brush this mixture generously over the tops of the slider buns for flavor and shine!
10. Add the Finishing Touches:
Sprinkle grated Parmesan cheese and a touch of salt and black pepper over the buttered buns to enhance the flavor.
11. Bake the Sliders:
Cover the baking dish tightly with foil and bake for about 15 minutes. This helps keep the steam in to melt the cheese beautifully.
12. Crisp the Tops:
After 15 minutes, remove the foil and bake for an additional 5-10 minutes until the tops are golden brown and the cheese is bubbling. Who doesn’t love a crispy top?
13. Let Them Rest:
Once they’re out of the oven, let the sliders rest for a few minutes. This will make slicing them easier and helps flavors meld.
14. Serve and Enjoy:
Now, slice between the sliders to separate them and serve them warm. Enjoy every bite of your deliciously layered Muffuletta Sliders!
With the perfect blend of flavors, these Muffuletta Sliders are sure to impress your friends and family. Perfect for parties, game days, or any casual get-together!
Can I Use Different Types of Meat in Muffuletta Sliders?
Absolutely! While traditional recipes use salami, ham, and mortadella, feel free to mix in your favorites. Turkey, chicken, or even roast beef can all work great as alternatives.
How Long Can I Store Leftover Muffuletta Sliders?
Leftover sliders can be stored in an airtight container in the fridge for up to 3 days. To reheat, wrap them in foil and warm in the oven, or pop them in the microwave for a quick snack!
Can I Prepare the Sliders in Advance?
Yes! You can assemble the sliders a few hours ahead of time, cover them tightly with foil, and refrigerate them. When ready to bake, just follow the instructions with a few extra minutes in the oven if they’re cold from the fridge.
What Can I Serve with Muffuletta Sliders?
These sliders are delicious on their own, but consider pairing them with a simple salad, chips, or roasted vegetables for a complete meal. They also go great with pickles or a zesty dipping sauce!