Fall is here, and you know what that means – it’s pumpkin season! I love baking simple, delicious treats, and nothing says cozy like a pan of warm pumpkin bars.
If you’re looking for easy pumpkin recipes that are perfect for sharing or just enjoying with a cup of coffee, you’re in the right place. I’ve gathered some of my favorite pumpkin bar recipes that are sure to make your kitchen smell amazing and your taste buds happy. Get ready to bake some fantastic pumpkin treats!
Jump to Recipe:
Delicious Pumpkin Chocolate Chip Bars
These pumpkin chocolate chip bars are soft, chewy, and packed with everyone’s favorite chocolate chips. They are a simple treat that’s great for any fall gathering or lunchbox.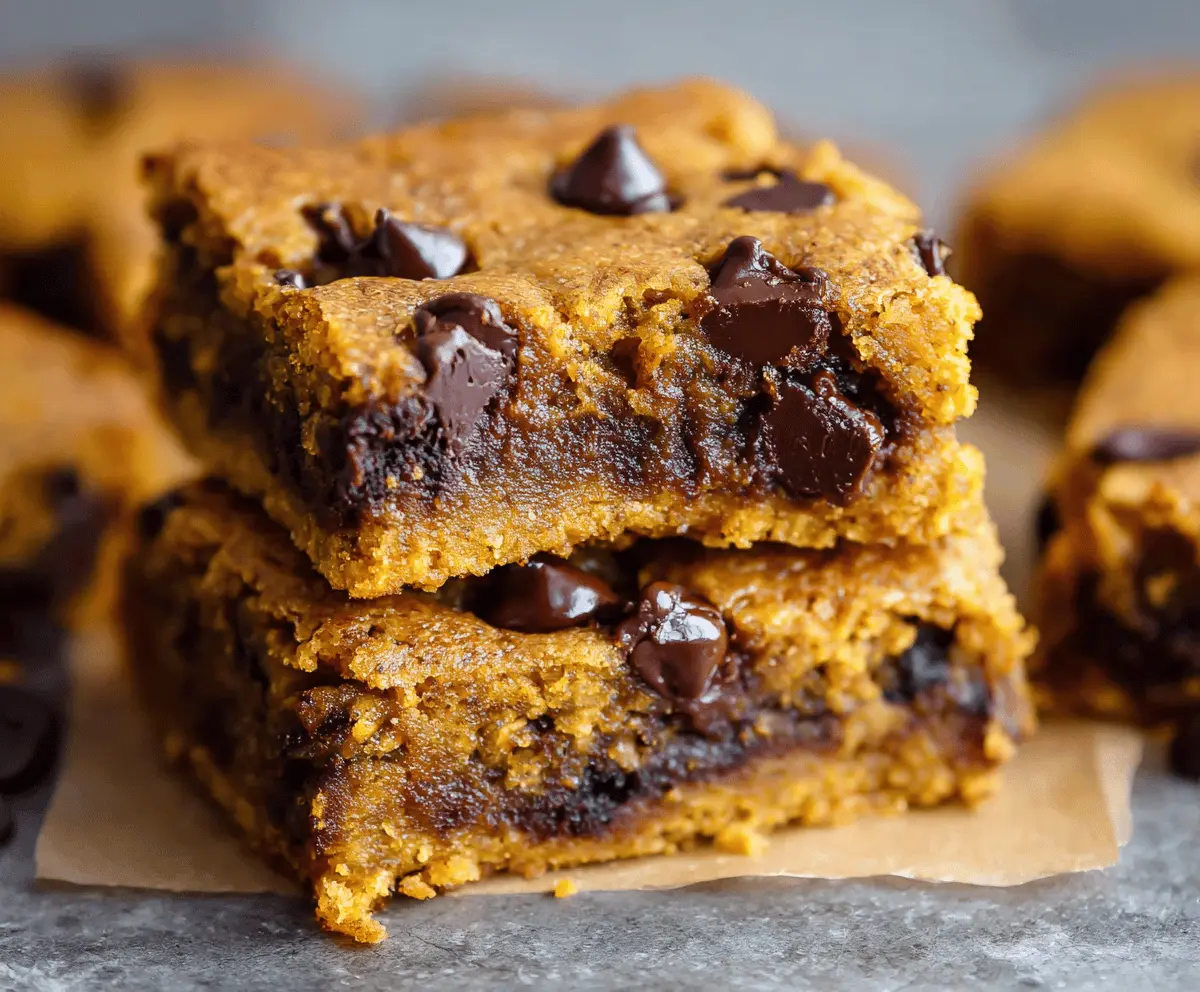
Key Ingredients & Tips
- Pumpkin Puree: Always use 100% pumpkin puree, not pumpkin pie filling, for these bars to get the right texture and flavor.
- Chocolate Chips: Semi-sweet chocolate chips work best here, offering a balanced sweetness that perfectly complements the pumpkin spice.
What You Need
- 1 ½ cups all-purpose flour
- 1 tsp baking soda
- 1 tsp pumpkin pie spice
- ½ tsp salt
- ½ cup unsalted butter, softened
- ¾ cup granulated sugar
- 1 large egg
- 1 cup pumpkin puree
- 1 cup semi-sweet chocolate chips
⏱️ Time: 40 mins🍽️ Yields: 20 bars
How to Make It
Step 1: Mix Dry and Wet Ingredients
Preheat your oven to 350°F (175°C). In a medium bowl, whisk together the flour, baking soda, pumpkin pie spice, and salt. In a large mixing bowl, cream together the softened butter and granulated sugar until the mixture is light and fluffy. Beat in the egg, then stir in the pumpkin puree until everything is well combined.
Step 2: Combine and Fold
Gradually add the dry ingredients to the wet mixture, mixing on low speed until they are just combined and no streaks of flour remain. Do not overmix. Gently fold in the semi-sweet chocolate chips until they are evenly distributed throughout the batter.
Step 3: Bake until Golden
Spread the batter evenly into a greased 9×13 inch baking dish. Bake for 25-30 minutes, or until a toothpick inserted into the center of the bars comes out with moist crumbs attached. Let the pumpkin chocolate chip bars cool completely in the pan on a wire rack before cutting into squares.
📝 Final Note
These pumpkin chocolate chip bars stay fresh and soft for up to 3 days when stored in an airtight container at room temperature.
Hearty Pumpkin Oatmeal Bars
These hearty pumpkin oatmeal bars offer a great texture with wholesome oats and warm pumpkin spice. They are perfect for breakfast, a snack, or a lighter dessert option.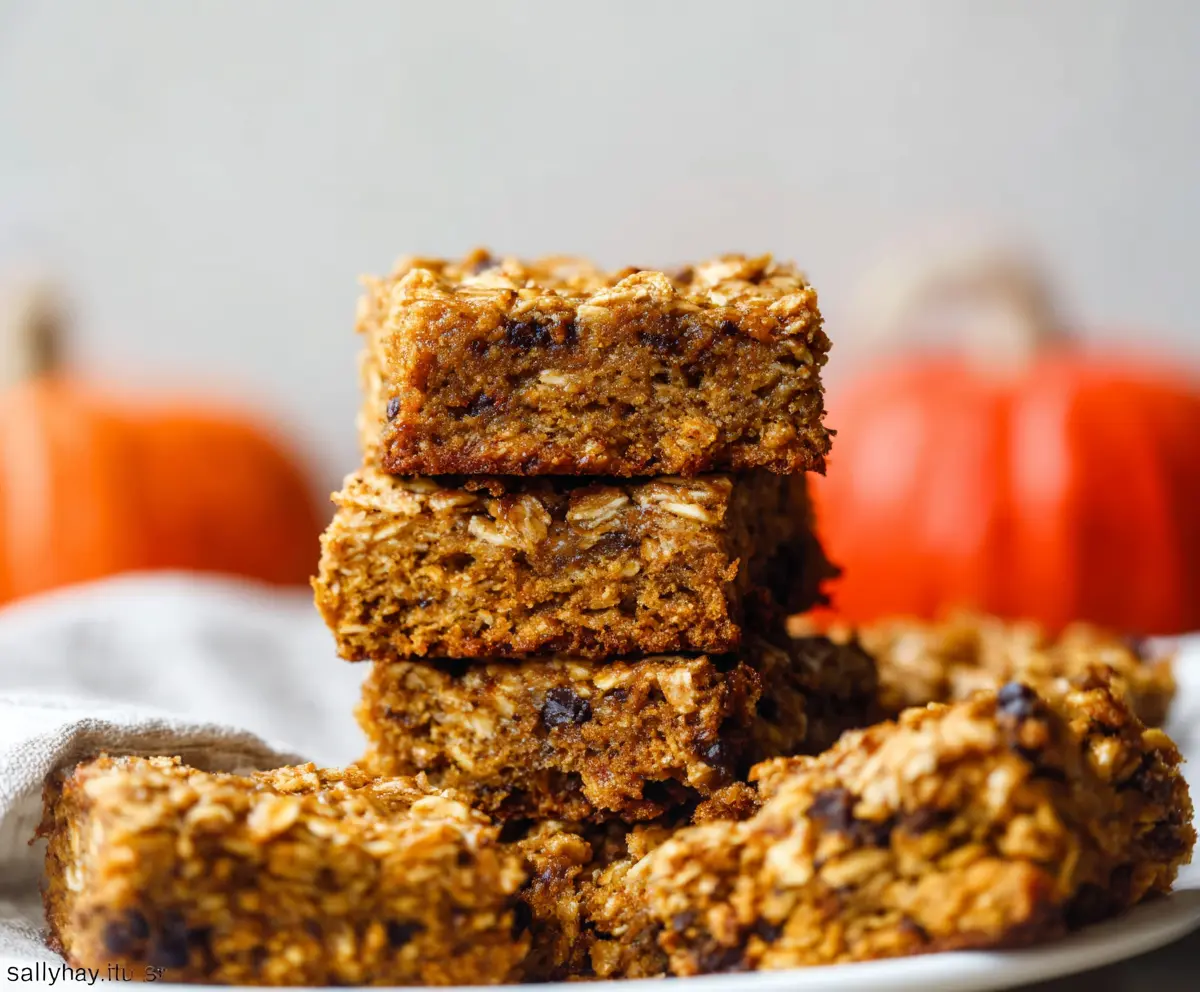
Key Ingredients & Tips
- Rolled Oats: For the best chewy texture in these pumpkin bars, use old-fashioned rolled oats, not quick-cooking or instant varieties.
- Cinnamon: A generous amount of ground cinnamon really brings out the warmth of the pumpkin and complements the oats beautifully.
What You Need
- 1 cup all-purpose flour
- 1 cup old-fashioned rolled oats
- ½ cup packed brown sugar
- 1 tsp baking powder
- 1 tsp cinnamon
- ½ tsp ginger
- ¼ tsp ground cloves
- ¼ cup unsalted butter, melted
- 1 cup pumpkin puree
- 1 large egg
⏱️ Time: 50 mins🍽️ Yields: 18 bars
How to Make It
Step 1: Combine Dry Ingredients
Preheat your oven to 375°F (190°C). In a large mixing bowl, combine the all-purpose flour, old-fashioned rolled oats, packed brown sugar, baking powder, cinnamon, ginger, and ground cloves. Use a whisk to ensure all the dry ingredients are thoroughly mixed together.
Step 2: Mix Wet and Combine
In a separate medium bowl, whisk together the melted unsalted butter, pumpkin puree, and one large egg until smooth. Pour these wet ingredients into the dry oat mixture and stir with a spoon or spatula until everything is just combined and you no longer see dry streaks of flour.
Step 3: Bake and Cool
Press the mixture evenly into a greased 9×13 inch baking dish. Bake for 30-35 minutes, or until the edges are golden brown and a toothpick inserted into the center comes out clean. Let the pumpkin oatmeal bars cool completely in the pan on a wire rack before cutting.
📝 Final Note
For an extra layer of sweetness, you can drizzle these cooled pumpkin oatmeal bars with a simple glaze made from powdered sugar and a splash of milk or orange juice.
Sweet Pumpkin Toffee Bars
With crunchy toffee bits mixed into a soft pumpkin base, these pumpkin toffee bars offer a delightful texture and sweet flavor. They are a unique and delicious addition to your fall baking.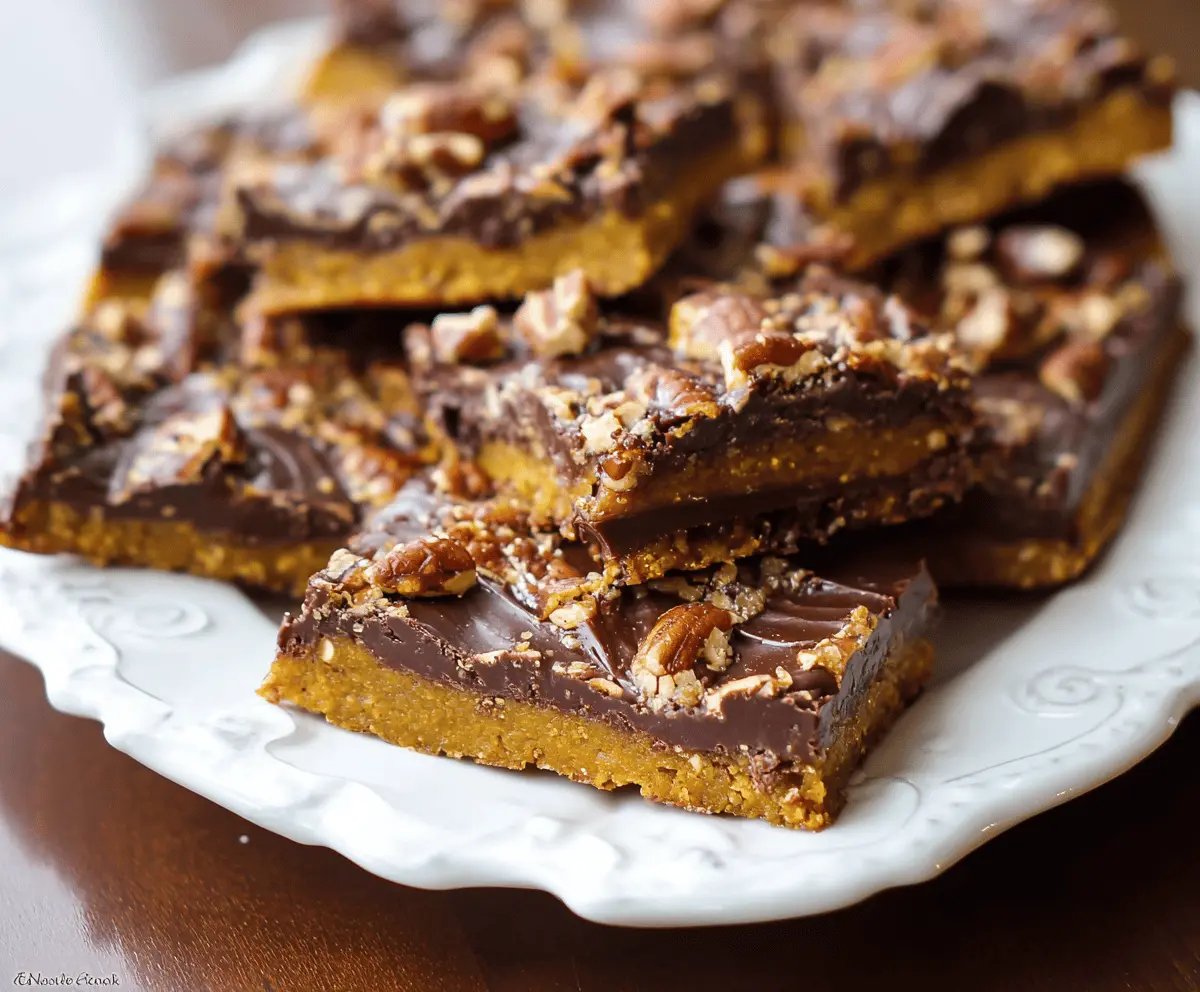
Key Ingredients & Tips
- Toffee Bits: Plain toffee bits add a lovely sweet crunch to these bars. You can also use chocolate-covered toffee bits for extra richness.
- Brown Sugar: Using brown sugar helps keep these pumpkin bars wonderfully moist and adds a deeper, molasses-like flavor that works so well with pumpkin.
What You Need
- 1 ¾ cups all-purpose flour
- 1 tsp baking powder
- ½ tsp baking soda
- 1 tsp pumpkin pie spice
- ½ tsp salt
- ½ cup unsalted butter, softened
- 1 cup packed brown sugar
- 1 large egg
- 1 cup pumpkin puree
- ¾ cup toffee bits
⏱️ Time: 45 mins🍽️ Yields: 16 bars
How to Make It
Step 1: Cream Wet Ingredients
Preheat your oven to 350°F (175°C). In a large mixing bowl, cream together the softened unsalted butter and packed brown sugar until the mixture is light and fluffy. Beat in the large egg until well combined, then stir in the pumpkin puree.
Step 2: Combine Dry and Fold in Toffee
In a separate medium bowl, whisk together the all-purpose flour, baking powder, baking soda, pumpkin pie spice, and salt. Gradually add the dry ingredients to the wet mixture, mixing on low speed until just combined. Fold in the toffee bits until they are evenly distributed throughout the batter.
Step 3: Bake until Ready
Spread the batter evenly into a greased 9×13 inch baking dish. Bake for 28-32 minutes, or until the top is golden brown and a toothpick inserted into the center comes out clean. Let the pumpkin toffee bars cool completely in the pan on a wire rack before slicing.
📝 Final Note
A small sprinkle of flaky sea salt over the top of the bars just before baking can really enhance the sweet and buttery toffee flavor.