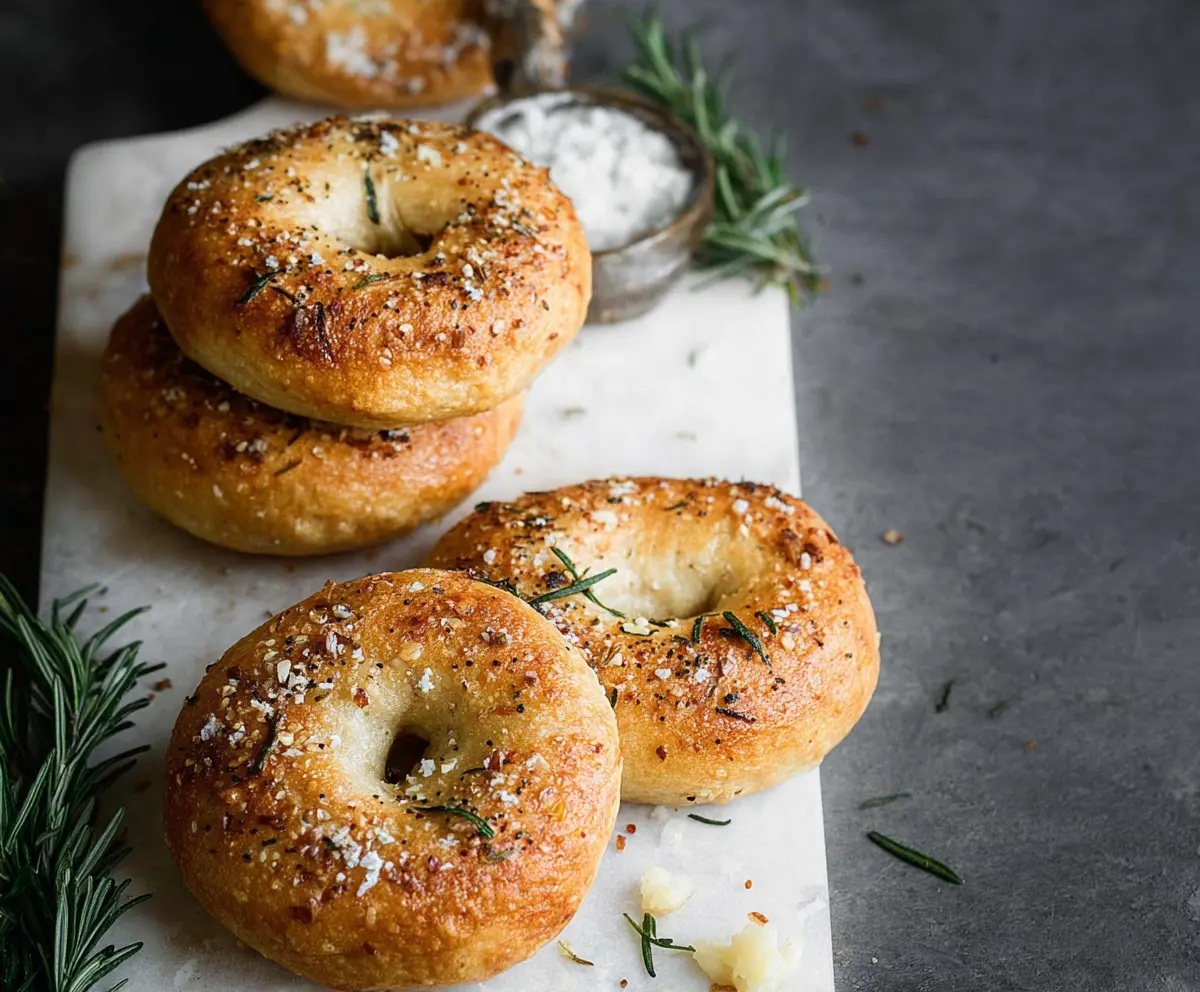
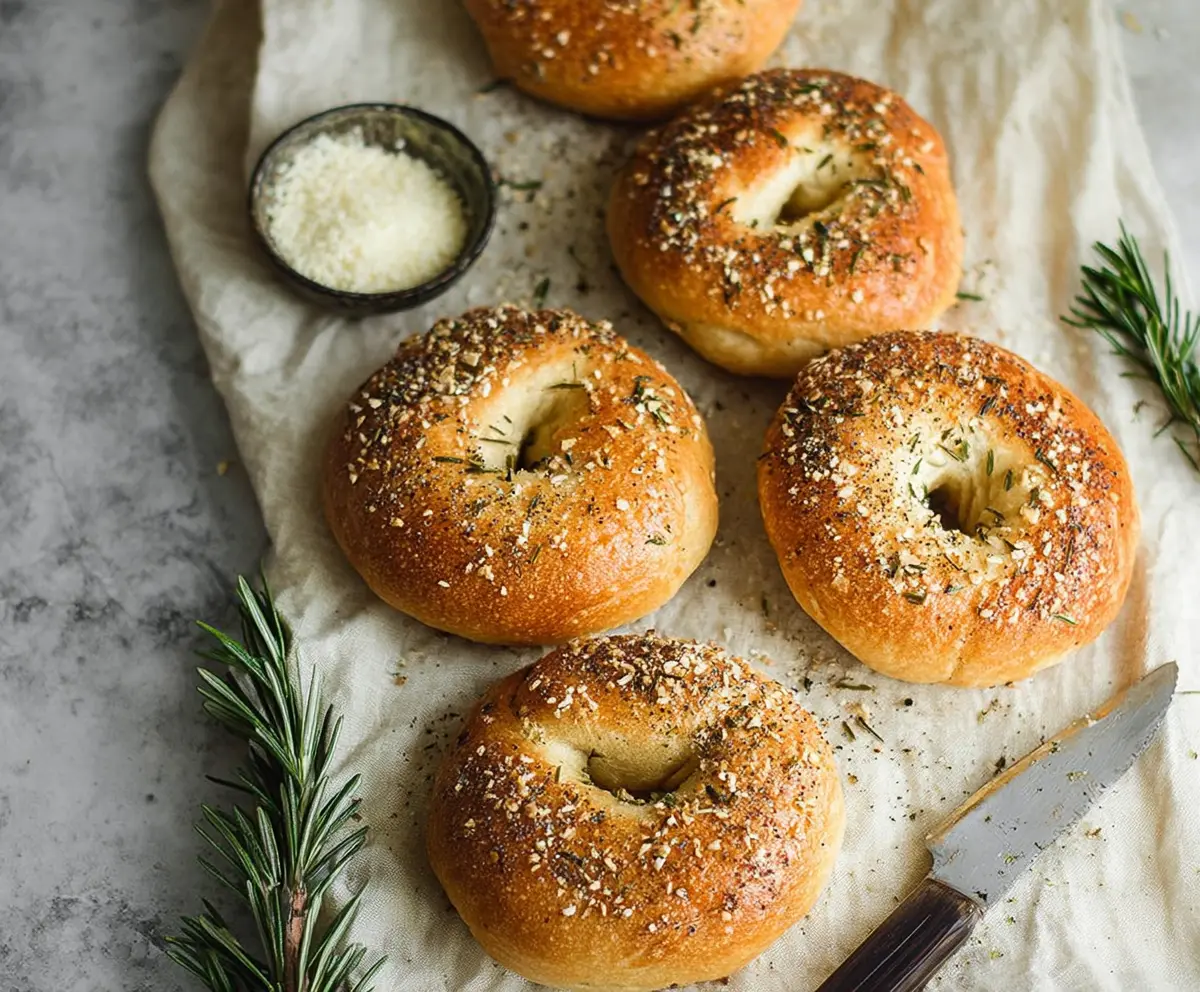
These rosemary bagels are a tasty twist on a classic breakfast favorite! With fresh rosemary mixed in, they have a lovely herby flavor that’s hard to resist.
Baking them fills your kitchen with a wonderful smell, and trust me, you won’t want to eat just one. I love to top mine with cream cheese or avocado for a yummy start to the day!
Key Ingredients & Substitutions
Bread Flour: This flour gives bagels their chewy texture. You can substitute all-purpose flour, but the texture will be a bit softer. Some people even mix half all-purpose and half bread flour for a nice balance.
Fresh Rosemary: Fresh rosemary will give the best flavor. If you don’t have fresh, using 1 tablespoon of dried rosemary works too; just remember it’s more concentrated. You can try thyme or oregano for a different herbal twist!
Olive Oil: Brushing with olive oil adds a nice shine and flavor. If you prefer not to use it, you can skip this step and still have delicious bagels! For a bit of flavor, melted butter could be a tasty alternative.
Coarse Sea Salt: This enhances the bagel’s flavor. If you can’t find it, kosher salt or even regular table salt can work, but use less as it’s finer.
How Can I Achieve the Perfect Bagel Shape?
Shaping your bagels is a fun part of the process! After you divide the dough, each piece should be shaped gently to ensure even cooking.
- Once you have a ball, use your thumb to poke a hole through the center gently. This step is key for bagel shape!
- Stretch the hole slightly to create a nice ring, about 2-3 inches wide, as it will shrink during boiling and baking.
- Try not to overwork or flatten the dough too much; you want to keep that chewy texture intact.
Give each bagel a little love and they will turn out beautifully! Enjoy your baking!
How to Make Rosemary Bagels
Ingredients You’ll Need:
For the Bagels:
- 4 cups bread flour
- 1 tablespoon sugar
- 1 ½ teaspoons salt
- 1 tablespoon instant yeast
- 1 ¼ cups warm water (around 110°F / 43°C)
- 2 tablespoons fresh rosemary, finely chopped (plus extra sprigs for garnish)
- 1 tablespoon olive oil (optional, for brushing)
- Coarse sea salt, for sprinkling
- 1 teaspoon crushed red pepper flakes (optional, for topping)
- 1 tablespoon baking soda (for boiling water)
How Much Time Will You Need?
This recipe takes about 15 minutes to prep, plus about 1 to 1 ½ hours for the dough to rise, and then another 20-25 minutes for baking. So, you’re looking at a total of around 2 to 2 ½ hours from start to finish, but most of that time is just waiting. The result is worth it!
Step-by-Step Instructions:
1. Mixing the Dough:
Start by taking a large bowl and mixing together the bread flour, sugar, salt, and instant yeast. Make sure the ingredients are well combined.
2. Adding Wet Ingredients:
Now, pour in the warm water and sprinkle the chopped rosemary over the dry ingredients. Stir everything together until a dough starts to form. It might be a bit shaggy at first, but that’s okay!
3. Kneading the Dough:
Turn the dough out onto a floured surface. Knead it gently for about 8-10 minutes. You want it to be smooth and elastic—this is what gives your bagels that perfect chewy texture.
4. Letting the Dough Rise:
Place your kneaded dough into a lightly oiled bowl. Cover it with a damp towel or plastic wrap, and find a warm spot for it to rise. Let it sit for about 1 to 1 ½ hours until it’s doubled in size. This is when it gets all fluffy!
5. Shaping the Bagels:
Once the dough has risen, it’s time to punch it down gently. Divide it into 8 equal pieces. Roll each piece into a ball. Then, using your thumb, poke a hole through the center of each ball and stretch it to shape a bagel—aim for about 2-3 inches in diameter.
6. Final Rise:
Place your shaped bagels onto a parchment-lined baking sheet. Cover them again and let them rise for another 20-30 minutes. This helps them stay fluffy!
7. Preheating the Oven:
While the bagels are rising, preheat your oven to 425°F (220°C) so it’s all ready when the bagels are done rising.
8. Boiling the Bagels:
Bring a large pot of water to a boil and add the baking soda (this helps them get a nice crust). Boil the bagels in batches for about 1-2 minutes on each side. Use a slotted spoon to remove them and place them back on the parchment-lined sheet.
9. Baking the Bagels:
If you’d like, brush each bagel with olive oil for extra flavor. Now it’s time to sprinkle them with coarse sea salt, and if you want a bit of spice, add those crushed red pepper flakes and some extra rosemary sprigs!
10. Enjoying Your Bagels:
Bake the bagels in the preheated oven for 20-25 minutes or until they are golden brown. Once they’re done, take them out and let them cool on a wire rack. Now, you can enjoy these aromatic rosemary bagels plain or with your favorite spreads!
Happy baking!
Can I Use All-Purpose Flour Instead of Bread Flour?
Yes, you can use all-purpose flour, but keep in mind that the bagels will be softer and less chewy than those made with bread flour. If you want a similar texture, consider mixing half all-purpose and half bread flour!
How Long Can I Store Leftover Bagels?
Store your leftover bagels in an airtight container at room temperature for up to 3 days. For longer storage, freeze them in a freezer bag. To enjoy, just toast them straight from the freezer!
Can I Make These Bagels Without Yeast?
The yeast is essential for the bagels’ rise and chewy texture. However, if you’re looking for a yeast-free option, consider trying a baking powder bagel recipe, though the texture will differ significantly!
What if I Don’t Have Fresh Rosemary?
If fresh rosemary isn’t available, you can substitute with about 1 tablespoon of dried rosemary. Just remember that dried herbs are more concentrated, so adjust to your taste. Alternatively, other herbs like thyme or oregano can give your bagels a different yet delicious flavor!