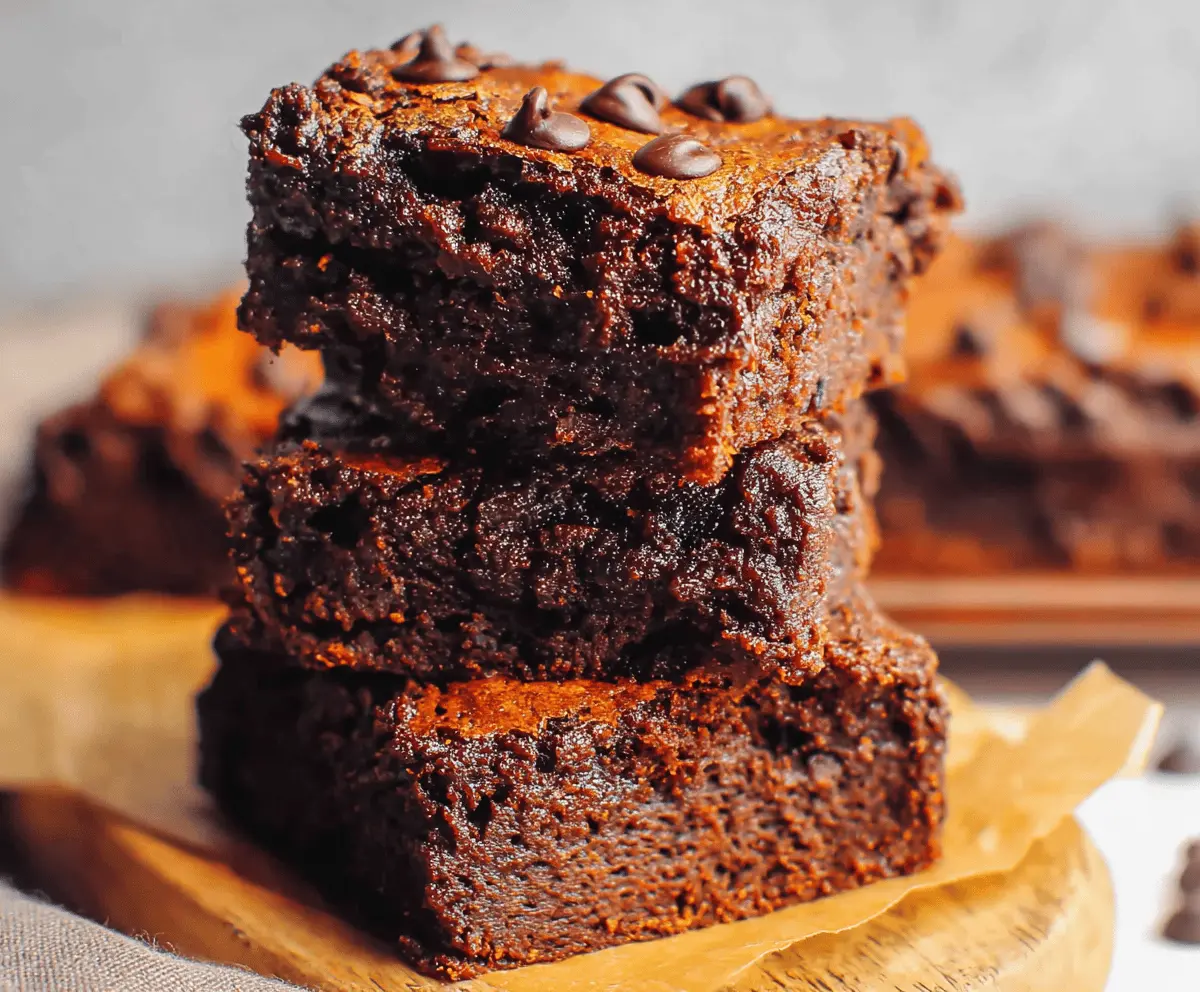
Sweet potato brownies are a fun and tasty treat that gives you a hint of sweetness with a healthy twist! Made with mashed sweet potatoes, cocoa powder, and a few other simple ingredients, they are so fudgy!
The best part? You can enjoy these brownies without any guilt! I love how they satisfy my chocolate cravings while sneaking in some veggies. Who knew healthy could taste this good? 😋
Key Ingredients & Substitutions
Sweet Potato: This is the star of the show! Use about one medium sweet potato for a cup of mashed goodness. If you’re in a pinch, canned sweet potato puree works too—just make sure it’s plain, not spiced.
Coconut Oil or Butter: Coconut oil adds a lovely flavor, but melted butter gives a rich taste. If you want to keep it dairy-free, stick with coconut oil or use a vegan butter alternative.
Brown Sugar or Coconut Sugar: Both add sweetness, but brown sugar gives a deeper, caramel-like taste. If you’re aiming for lower sugar, you can try using maple syrup, reducing the flour a bit to compensate.
Cocoa Powder: Unsweetened cocoa is essential for that chocolatey taste! If you want something lighter, carob powder can be a fun substitute, though the flavor will be a bit different.
Chocolate Chips: These are optional but highly recommended! For a dairy-free version, choose vegan chocolate chips. If you’re avoiding sugar, try dark chocolate or cacao nibs.
How Do I Cook and Mash Sweet Potatoes Properly?
Getting your sweet potatoes right is key for this recipe. Here’s how to do it with ease:
- Baking: Preheat the oven to 400°F (200°C). Poke holes in the sweet potato with a fork and bake for about 45-60 minutes until tender.
- Boiling: Peel and chop sweet potatoes into chunks. Boil them in water for about 15-20 minutes or until soft. Drain and mash.
- Microwaving: Poke holes in the sweet potato and microwave for about 6-8 minutes, flipping halfway through. Let it cool before peeling and mashing.
Once cooked, mash until smooth, and you’re ready to create your brownies!
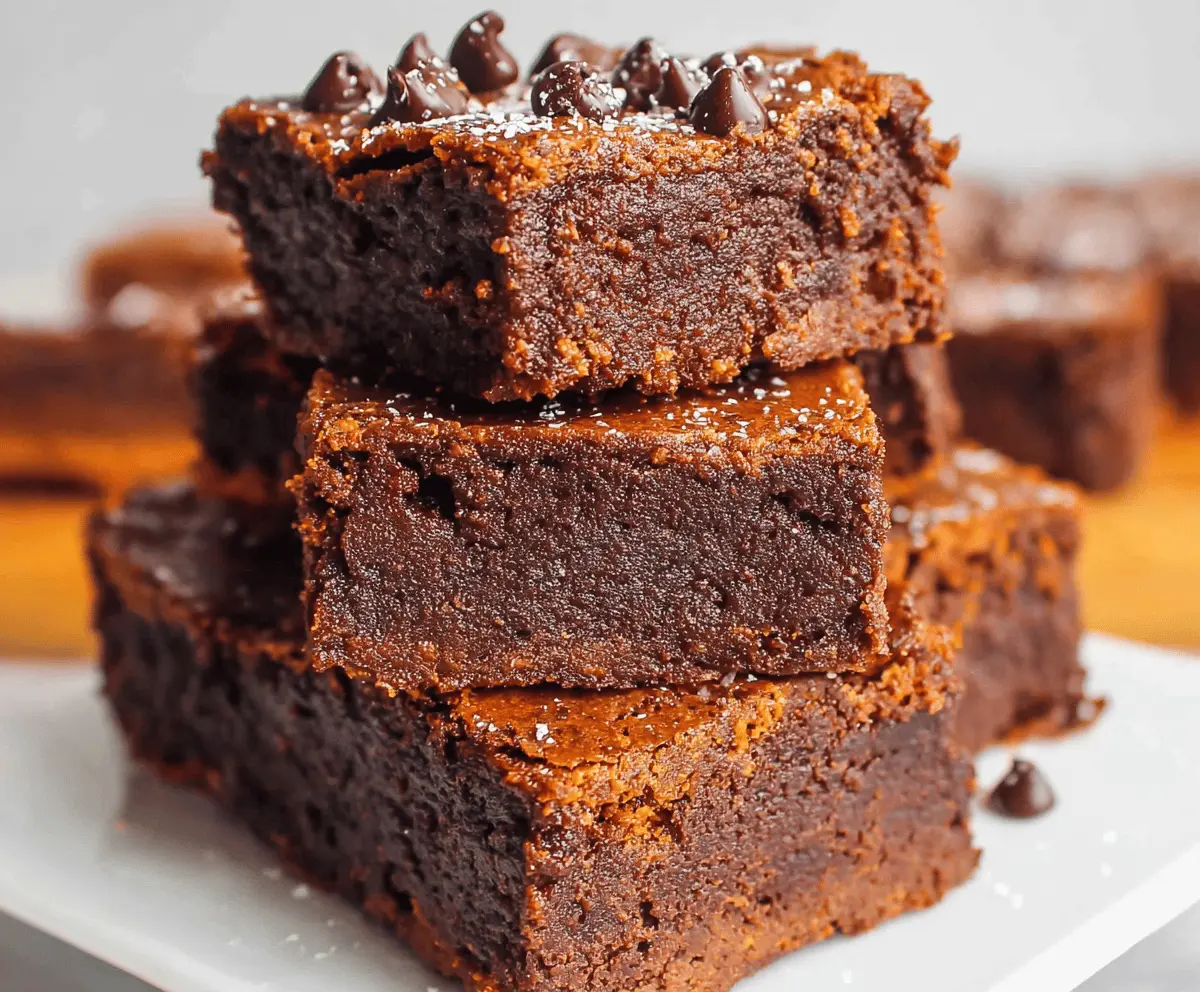
Sweet Potato Brownies
Ingredients You’ll Need:
For the Brownie Batter:
- 1 cup cooked and mashed sweet potato (about 1 medium sweet potato)
- 1/2 cup coconut oil or melted butter
- 1 cup brown sugar or coconut sugar
- 2 large eggs
- 1 tsp vanilla extract
- 1/2 cup cocoa powder, unsweetened
- 3/4 cup all-purpose flour (or whole wheat pastry flour for a healthier option)
- 1/2 tsp baking powder
- 1/4 tsp salt
- 1/2 cup chocolate chips (optional, plus extra for topping)
How Much Time Will You Need?
This delicious recipe takes about 15 minutes to prepare and 25-30 minutes to bake. Including cooling time, plan for about an hour before you can dive into these tasty brownies!
Step-by-Step Instructions:
1. Prepping the Oven and Pan:
First, preheat your oven to 350°F (175°C). While it’s heating, grab an 8×8-inch baking pan and line it with parchment paper or lightly grease it to ensure your brownies come out easily.
2. Cooking and Mashing the Sweet Potato:
Next, cook and mash your sweet potato until it’s nice and smooth. You can do this by baking, boiling, or microwaving it—whichever way you prefer. Just make sure it’s tender and mashed well!
3. Mixing the Wet Ingredients:
In a large mixing bowl, combine the mashed sweet potato, coconut oil (or melted butter), and brown sugar. Stir well until everything is nicely blended and smooth. This is the base of your brownie magic!
4. Adding in the Eggs:
Now, add the eggs and vanilla extract to the mixture. Whisk everything together until it’s fully incorporated and looks creamy.
5. Combining Dry Ingredients:
In another bowl, sift together the cocoa powder, flour, baking powder, and salt. This will ensure there are no lumps and everything mixes evenly.
6. Bringing It All Together:
Carefully fold the dry ingredients into the wet mixture, combining them gently until just mixed. Be careful not to overmix, as we want our brownies to stay nice and fudgy!
7. Adding Chocolate Chips:
If you’re using chocolate chips, gently fold them into the batter. Yum! This will give your brownies even more chocolatey goodness.
8. Baking the Brownies:
Pour the batter into the prepared baking pan and spread it out evenly with a spatula. If you like, sprinkle a few extra chocolate chips on top for a delightful garnish. Bake in the oven for 25-30 minutes. Keep an eye on them—when a toothpick inserted in the center comes out with a few moist crumbs, they’re ready!
9. Cooling and Serving:
Once baked, allow the brownies to cool completely in the pan before slicing them into squares. This helps them set up perfectly!
10. Enjoy!
Now it’s time to dig into your rich, moist, and fudgy sweet potato brownies! They’re perfect for a snack, dessert, or just anytime you want something sweet. Store any leftovers in an airtight container for several days if they last that long!
Enjoy your homemade treat! 😋
Can I Use Canned Sweet Potatoes Instead of Fresh?
Yes, you can use canned sweet potato puree! Just make sure it’s plain and not sweetened or spiced. Measure out 1 cup for your recipe, and proceed as normal!
How Can I Make This Recipe Gluten-Free?
To make these brownies gluten-free, simply substitute the all-purpose flour with a gluten-free flour blend. You may also use almond flour or coconut flour, but adjust the quantity as needed since they absorb moisture differently.
What’s the Best Way to Store Leftover Brownies?
Store leftover brownies in an airtight container at room temperature for up to 3 days. If you want to keep them longer, you can refrigerate them for up to a week or freeze them for up to 3 months. Just remember to wrap them well in plastic wrap or foil before freezing!
Can I Make These Brownies Vegan?
Absolutely! To make the brownies vegan, replace the eggs with flax eggs (1 tablespoon flaxseed meal mixed with 2.5 tablespoons water per egg, let it sit for a few minutes to thicken) or applesauce. Additionally, ensure that the chocolate chips you use are dairy-free.