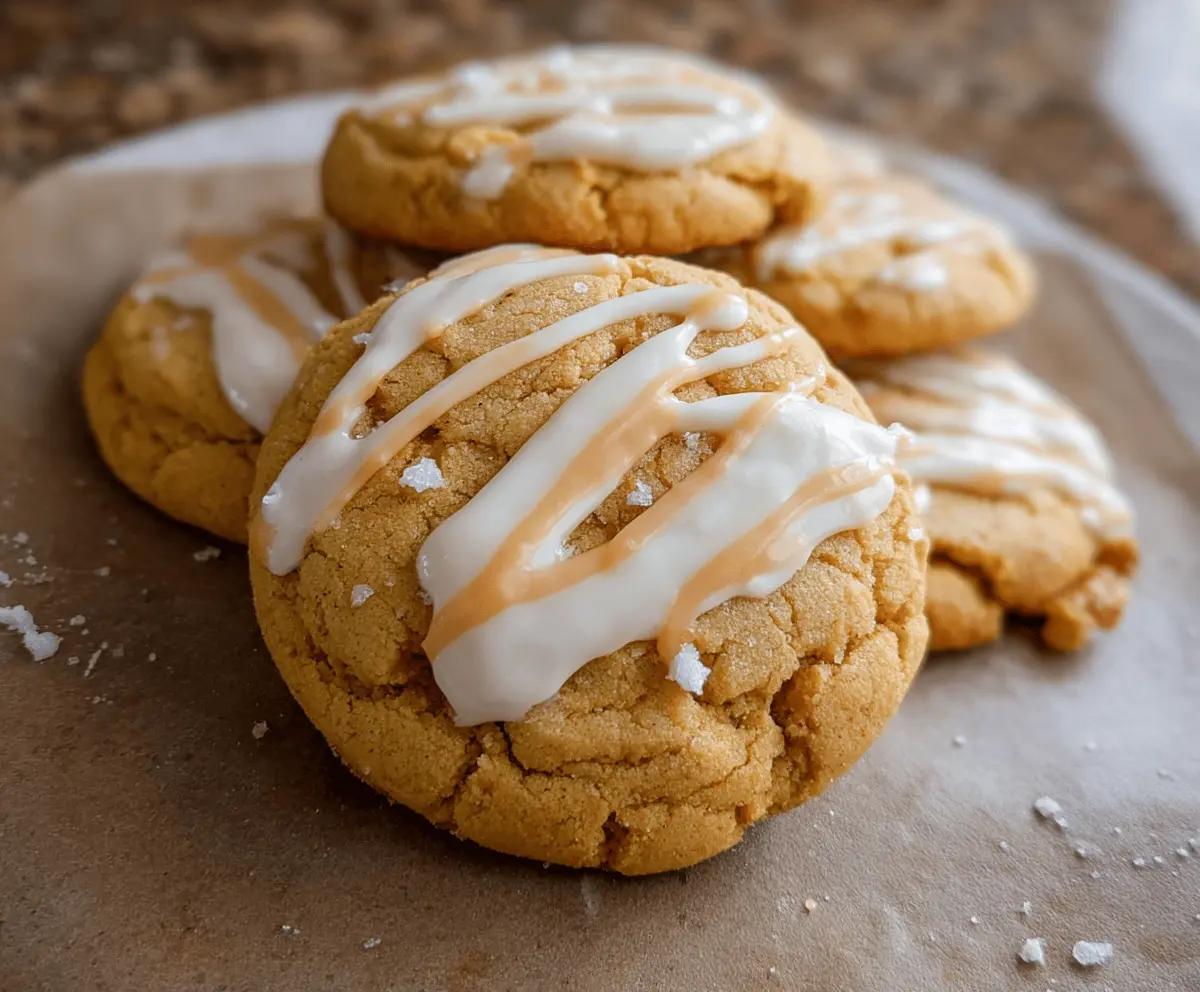
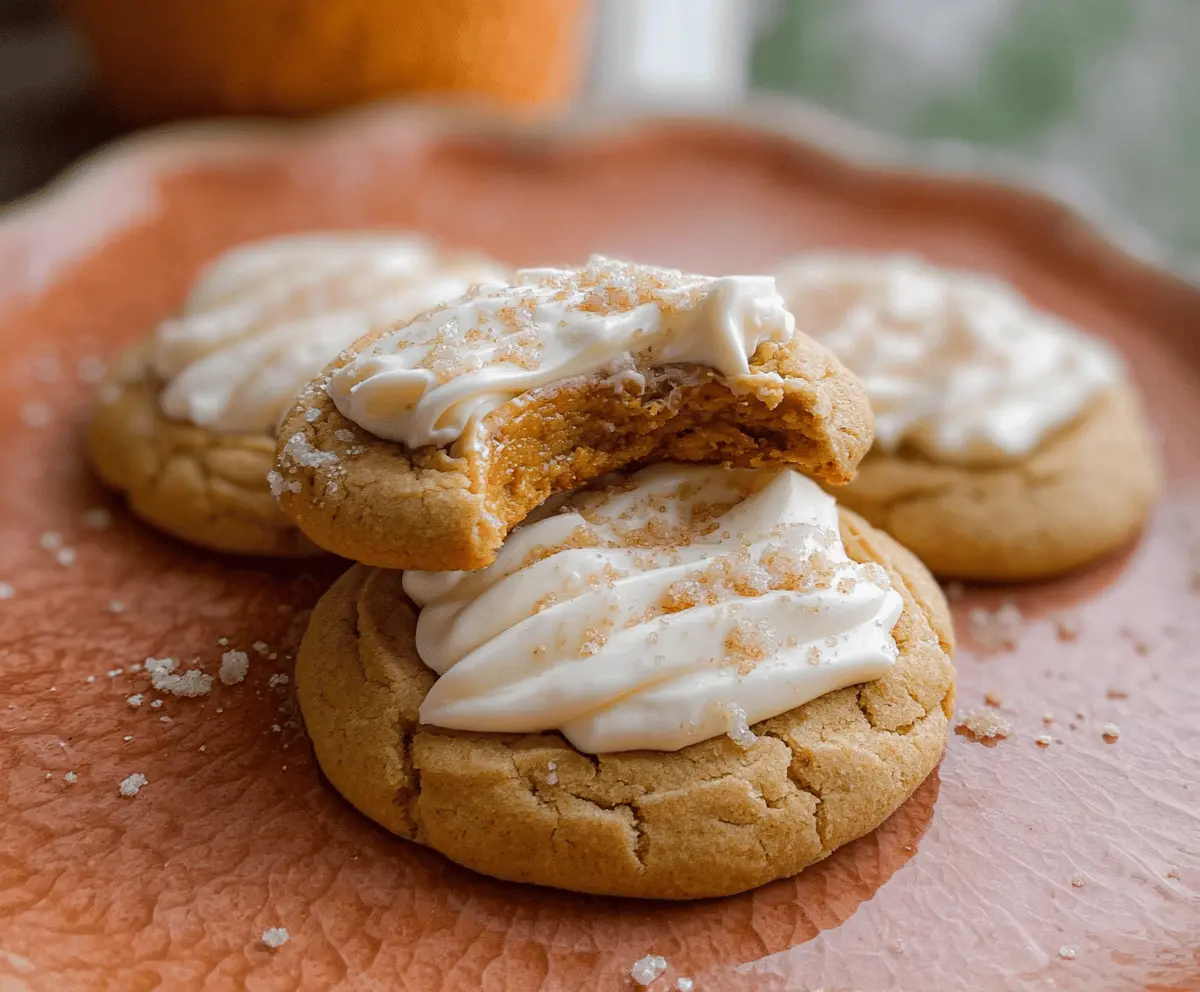
These Pumpkin Pie Cookies are soft, chewy, and bursting with cozy fall flavors. Each bite tastes just like a slice of pumpkin pie, complete with a sweet frosting on top!
Honestly, who can resist a cookie that combines two favorites? I like to enjoy these with a warm cup of coffee, and they make my house smell amazing while baking! 🎃
Key Ingredients & Substitutions
All-Purpose Flour: This is your base. If you want a gluten-free version, feel free to substitute with a 1:1 gluten-free flour blend. I’ve tried it and it works great!
Pumpkin Puree: Make sure it’s pure pumpkin, not the spiced pie filling. Canned is convenient, but you can also roast and puree fresh pumpkin if you’re up for it. It gives a lovely, fresh flavor!
Butter: Unsalted butter is used here to control the salt levels. However, you can use coconut oil or a dairy-free butter substitute for a vegan option. Just ensure it’s softened for mixing.
Spices: The combination of cinnamon, ginger, nutmeg, and cloves is classic. If you don’t have one, simply increase the amount of the others, or use pumpkin pie spice which conveniently has all these mixed together!
How Do You Achieve Soft and Chewy Cookies?
The key to perfect cookies is not overmixing! Once you blend the wet and dry ingredients, stop as soon as you don’t see dry flour. This keeps the cookies soft. Also, ensure you bake them just until the edges set – they will continue cooking on the baking sheet!
- Preheat your oven correctly to ensure even baking.
- Use a cookie scoop to make uniform cookies so they bake evenly.
- Don’t let them cool for too long on the baking sheet, or they may become too firm.
The Best Pumpkin Pie Cookies Inspired by Crumbl
Ingredients You’ll Need:
For the Cookies:
- 2 1/4 cups all-purpose flour
- 1 teaspoon baking powder
- 1/2 teaspoon baking soda
- 1 teaspoon ground cinnamon
- 1/2 teaspoon ground ginger
- 1/4 teaspoon ground nutmeg
- 1/4 teaspoon ground cloves
- 1/4 teaspoon salt
- 3/4 cup unsalted butter, softened
- 1 cup granulated sugar
- 1 large egg
- 1 teaspoon vanilla extract
- 1 cup canned pumpkin puree (not pumpkin pie filling)
For the Frosting:
- 1/2 cup unsalted butter, softened
- 2 1/2 cups powdered sugar
- 1 teaspoon vanilla extract
- 1 to 2 tablespoons milk or heavy cream
- 1/2 teaspoon ground cinnamon
- Pinch of ground nutmeg (optional)
How Much Time Will You Need?
This delightful recipe takes about 15 minutes to prep and approximately 10-12 minutes to bake, plus additional time for cooling. Set aside around 30-40 minutes in total to make, frost, and enjoy your cookies!
Step-by-Step Instructions:
1. Preheat the Oven:
Start by preheating your oven to 350°F (175°C). Line a baking sheet with parchment paper or a silicone baking mat to prevent sticking.
2. Mix the Dry Ingredients:
In a medium bowl, whisk together the flour, baking powder, baking soda, cinnamon, ginger, nutmeg, cloves, and salt until everything is well mixed. This will ensure a balanced flavor.
3. Cream the Butter and Sugar:
In a large bowl, use an electric mixer to cream the softened butter and granulated sugar together. Beat them until the mixture is light and fluffy, which should take about 2-3 minutes.
4. Incorporate the Wet Ingredients:
Next, beat in the egg, vanilla extract, and pumpkin puree. Continue mixing until everything is fully incorporated and the mixture is smooth.
5. Combine the Mixtures:
Gradually add the dry ingredients to the wet mixture, mixing on low speed. Be careful not to overmix, as this can make the cookies tough. Just mix until there are no visible dry ingredients.
6. Form the Cookies:
Scoop the cookie dough onto the prepared baking sheet using a cookie scoop or tablespoon. Make sure to space the cookies about 2 inches apart. Gently flatten each cookie with your fingers or the back of a spoon.
7. Bake:
Bake the cookies for 10-12 minutes or until the edges are set and a light golden brown. The centers may look a little underbaked, but they’ll continue to firm up as they cool.
8. Cool the Cookies:
Let the cookies cool on the baking sheet for about 5 minutes before transferring them to a wire rack to cool completely. This step is important to maintain their soft texture!
9. Prepare the Frosting:
While the cookies cool, prepare the frosting. In a mixing bowl, beat the softened butter until creamy using an electric mixer.
10. Add Sugar and Spices:
Gradually add the powdered sugar, ground cinnamon, and nutmeg, mixing well after each addition until smooth.
11. Add Vanilla and Milk:
Add the vanilla extract and 1 tablespoon of milk or cream, beating until fluffy. If the frosting is too thick, feel free to add more milk until you reach your desired consistency.
12. Frost the Cookies:
Once the cookies are completely cool, spread or pipe the frosting generously onto each cookie. Each cookie deserves a lovely layer!
13. Optional Garnish:
If you’re feeling festive, sprinkle a little extra cinnamon or decorations on top for a nice touch!
14. Enjoy!
Serve your delicious pumpkin pie cookies and enjoy this perfect fall treat inspired by Crumbl!
I hope you love these cookies as much as I do! Happy baking! 🎃
FAQ About Pumpkin Pie Cookies
Can I Use Fresh Pumpkin Instead of Canned?
Yes, absolutely! Just cook and puree fresh pumpkin until smooth. You’ll need about the same amount as canned (1 cup). Make sure to drain any excess moisture for the best texture!
How Should I Store These Cookies?
Store your cookies in an airtight container at room temperature for up to 3 days. If you want to keep them fresher longer, you can also refrigerate them for up to a week. Just make sure to let them come to room temperature before serving!
Can I Freeze the Cookie Dough?
Definitely! You can scoop the cookie dough onto a baking sheet and freeze the individual cookies until firm. Then, transfer them to a freezer bag. When you’re ready to bake, just add a few extra minutes to the baking time while baking from frozen.
Can I Make the Frosting Ahead of Time?
Yes, you can make the frosting a day in advance! Store it in an airtight container in the fridge. Just give it a good stir and add a splash of milk to revive it if it thickens up before frosting your cookies.