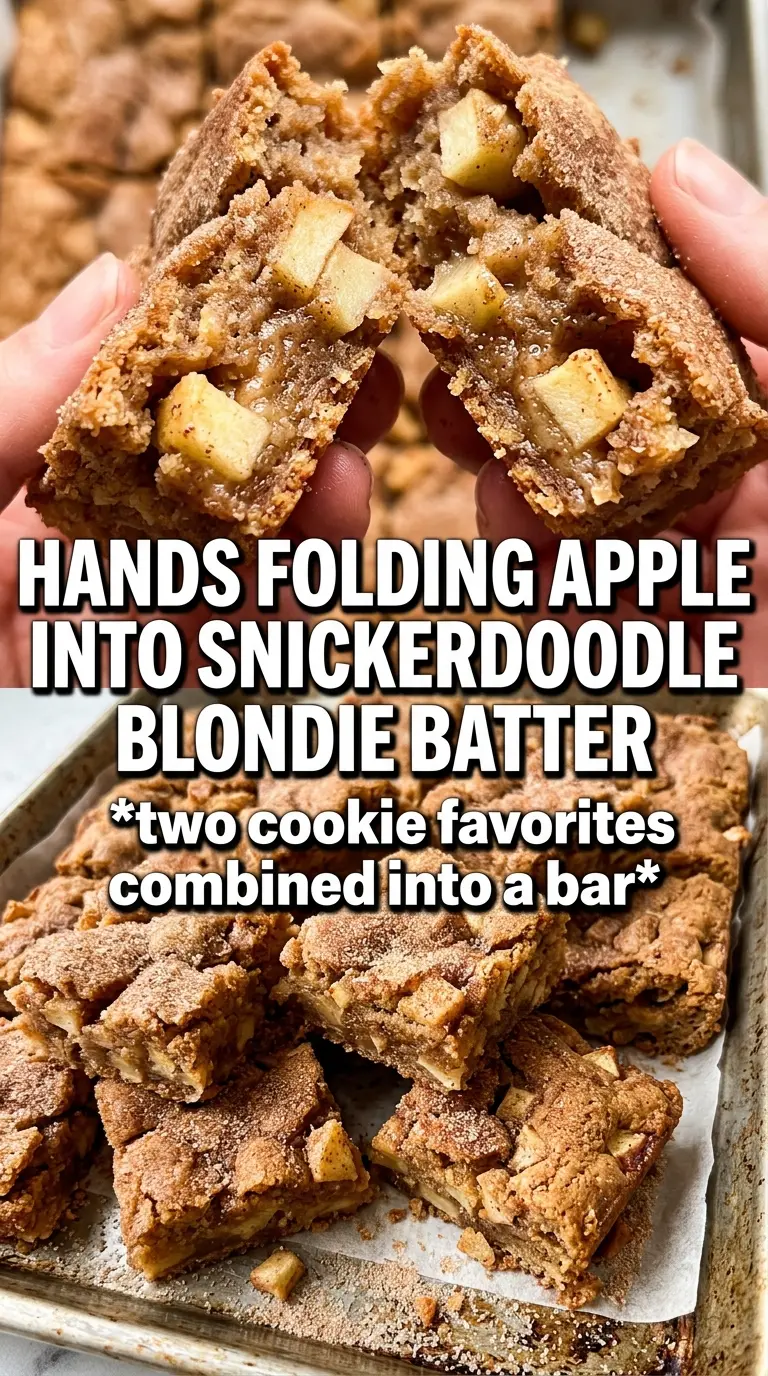
Apple snickerdoodle blondies bake up thick, chewy, and packed with warm cinnamon flavor, with little pockets of tender apple tucked through every square. The top turns crackly and sweet from the cinnamon-sugar layer, while the middle stays soft and dense in the best blondie way. A caramel drizzle finishes them with just enough shine to make each bar feel bakery-style without losing that homemade comfort.
Browned butter is what makes these blondies stand out. It gives the batter a nutty depth that plays beautifully with apples and cinnamon, and it keeps the bars from tasting flat or overly sweet. The apples need to be diced small and evenly so they soften as the bars bake without turning the center watery. I also like a quick rest after baking, because cutting them too soon will smear the crumb and make the bars look underdone even when they’re set.
Below, I’m walking through the small details that matter most, including how to keep the center chewy instead of cakey and what to do if your apples are especially juicy.
The browned butter made these taste way richer than a normal blondie, and the cinnamon sugar on top gave them that snickerdoodle crackle. Mine baked in 28 minutes and came out perfectly chewy once they cooled completely.
Save these apple snickerdoodle blondies for the chewy cinnamon-sugar top and that browned-butter apple center.
The Browning Step That Keeps These Blondies from Tasting Flat
Brown butter changes the whole pan. It takes a blondie from sweet and one-note to nutty, toasty, and deeper in flavor, which matters here because apples and cinnamon can get muddy if the base isn’t doing enough work. Once the butter turns golden and smells like toasted hazelnuts, pull it off the heat and let it cool for about 10 minutes so it doesn’t scramble the eggs.
The other thing that keeps these bars in the chewy camp is not overmixing once the flour goes in. Stir until the flour disappears, then stop. If you beat the batter at that point, you’ll build too much structure and end up with something closer to cake than a blondie.
- Browned butter — This is the flavor engine. Melted butter will work in a pinch, but you lose the toasted, nutty depth that makes these taste special.
- Cream of tartar — It gives the cinnamon-sugar top a little snickerdoodle character and helps keep the spice note sharp instead of dull.
- Finely diced apples — Small pieces bake tender without creating wet pockets. Larger chunks can sink and leak moisture into the center.
- Brown sugar — Packed brown sugar keeps the crumb moist and dense. Light or dark both work; dark brown sugar gives a deeper caramel note.
What Each Ingredient Is Actually Doing in This Pan
- All-purpose flour — The amount here is calibrated for a dense blondie. Too much flour and the bars turn dry; too little and they won’t set cleanly.
- Baking powder — Just enough lift to keep the bars from being heavy, but not enough to make them puff like cake.
- Cinnamon, nutmeg, and cream of tartar — Cinnamon and nutmeg warm up the apples, while cream of tartar gives the top that snickerdoodle edge. If you skip the cream of tartar, the bars still work, but the topping tastes more like cinnamon sugar than snickerdoodle.
- Eggs and vanilla — Eggs bind the batter and help it slice cleanly after cooling. Vanilla rounds out the browned butter and apple without making the bars taste like cookie dough.
- Apples — Use a firm baking apple if you can. Softer apples break down too much and can make the center soggy.
- Cinnamon sugar topping — This is what gives the crust its crackly finish. Be generous; a light dusting disappears into the batter.
Building the Batter So the Center Stays Chewy
Brown the butter first
Cook the butter over medium heat until the milk solids turn golden brown and the aroma shifts from melted butter to toasted nuts. You’ll hear it start to sizzle, then quiet down as the water cooks off. The second you see amber specks at the bottom, take it off the heat and pour it into a bowl so it doesn’t keep cooking in the hot pan.
Whisk the sugar into the warm butter
Stir the brown sugar into the cooled browned butter until it looks thick and glossy. This helps dissolve the sugar a little and gives the finished bars that dense, chewy texture instead of a grainy crumb. Add the eggs one at a time, then the vanilla, and stop as soon as the mixture looks smooth.
Fold in the dry ingredients and apples
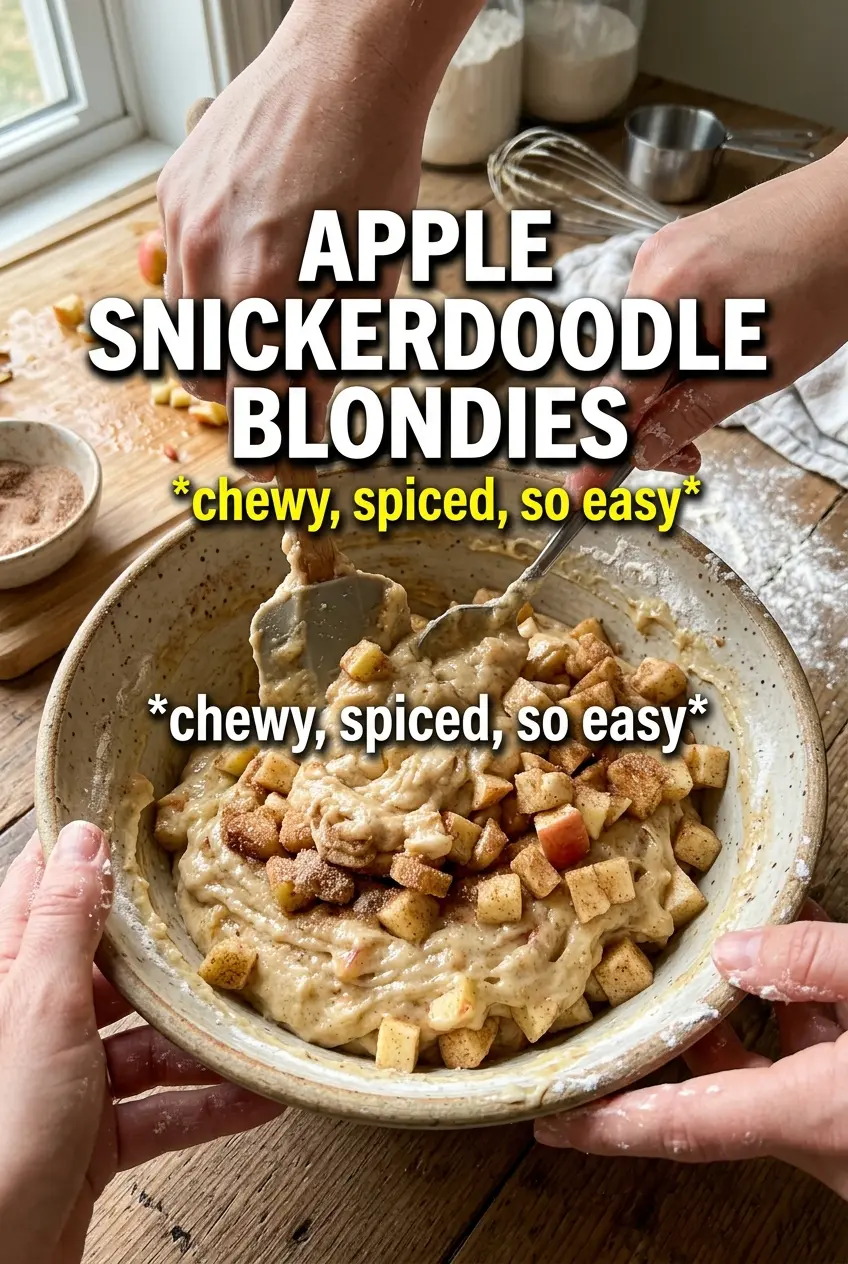
Add the flour mixture and fold just until no dry streaks remain. The batter will be thick, and that’s exactly what you want. Fold in the diced apples at the end so they stay suspended instead of getting smashed into the batter. Spread everything evenly into the pan, then scatter the cinnamon sugar across the top so every square gets a crisp little crust.
Bake until the middle is just set
Bake until the edges are set and a toothpick in the center comes out with a few moist crumbs. If the toothpick is completely clean, you’ve probably gone a minute or two too far and the bars will be drier once they cool. Let them cool completely before slicing, because the texture firms up as the butter resets and the crumb becomes much cleaner.
Three Ways to Adjust These Bars Without Losing the Good Part
Gluten-Free Version
Use a 1:1 gluten-free baking blend with xanthan gum already included. The bars will still be chewy, but they may need the full bake time because gluten-free flour often holds onto moisture a little longer.
Dairy-Free Option
Swap the butter for a plant-based butter that browns well, or use a neutral vegan butter if browning isn’t possible. You’ll lose some of the nutty depth if the substitute won’t brown, so add a tiny pinch more cinnamon to keep the flavor warm and balanced.
Extra-Apple Version
You can add another 1/2 cup of diced apple if you want a fruitier bar, but toss the pieces with a teaspoon of flour first. That extra coating helps keep the apples from sinking and keeps the center from turning wet.
Storage and Reheating
- Refrigerator: Store in an airtight container for up to 5 days. The cinnamon sugar top softens a little, but the bars stay chewy.
- Freezer: Freeze tightly wrapped squares for up to 2 months. Thaw at room temperature before serving so the texture comes back properly.
- Reheating: Warm individual bars for 10 to 15 seconds in the microwave if you want the caramel drizzle to loosen. Don’t overheat them or the edges will turn rubbery and the apples will taste mushy.
Answers to the Questions Worth Asking
Apple Snickerdoodle Blondies
Ingredients
Equipment
Method
- Brown the butter in a cast iron skillet until golden and nutty, then cool for 10 minutes.
- Preheat oven to 350F and grease a 9x13 pan.
- Whisk the all-purpose flour, baking powder, cinnamon, cream of tartar, nutmeg, and salt until evenly combined.
- Whisk the browned butter and packed brown sugar until smooth, then add eggs and vanilla extract and whisk until smooth.
- Fold the flour mixture into the batter until just combined.
- Fold in the finely diced apples.
- Spread the batter into the prepared pan.
- Mix the sugar and cinnamon for the cinnamon sugar top, then sprinkle generously over the surface.
- Bake at 350F for 25-30 minutes, until a toothpick comes out with just a few crumbs.
- Drizzle with caramel and cool completely before slicing.