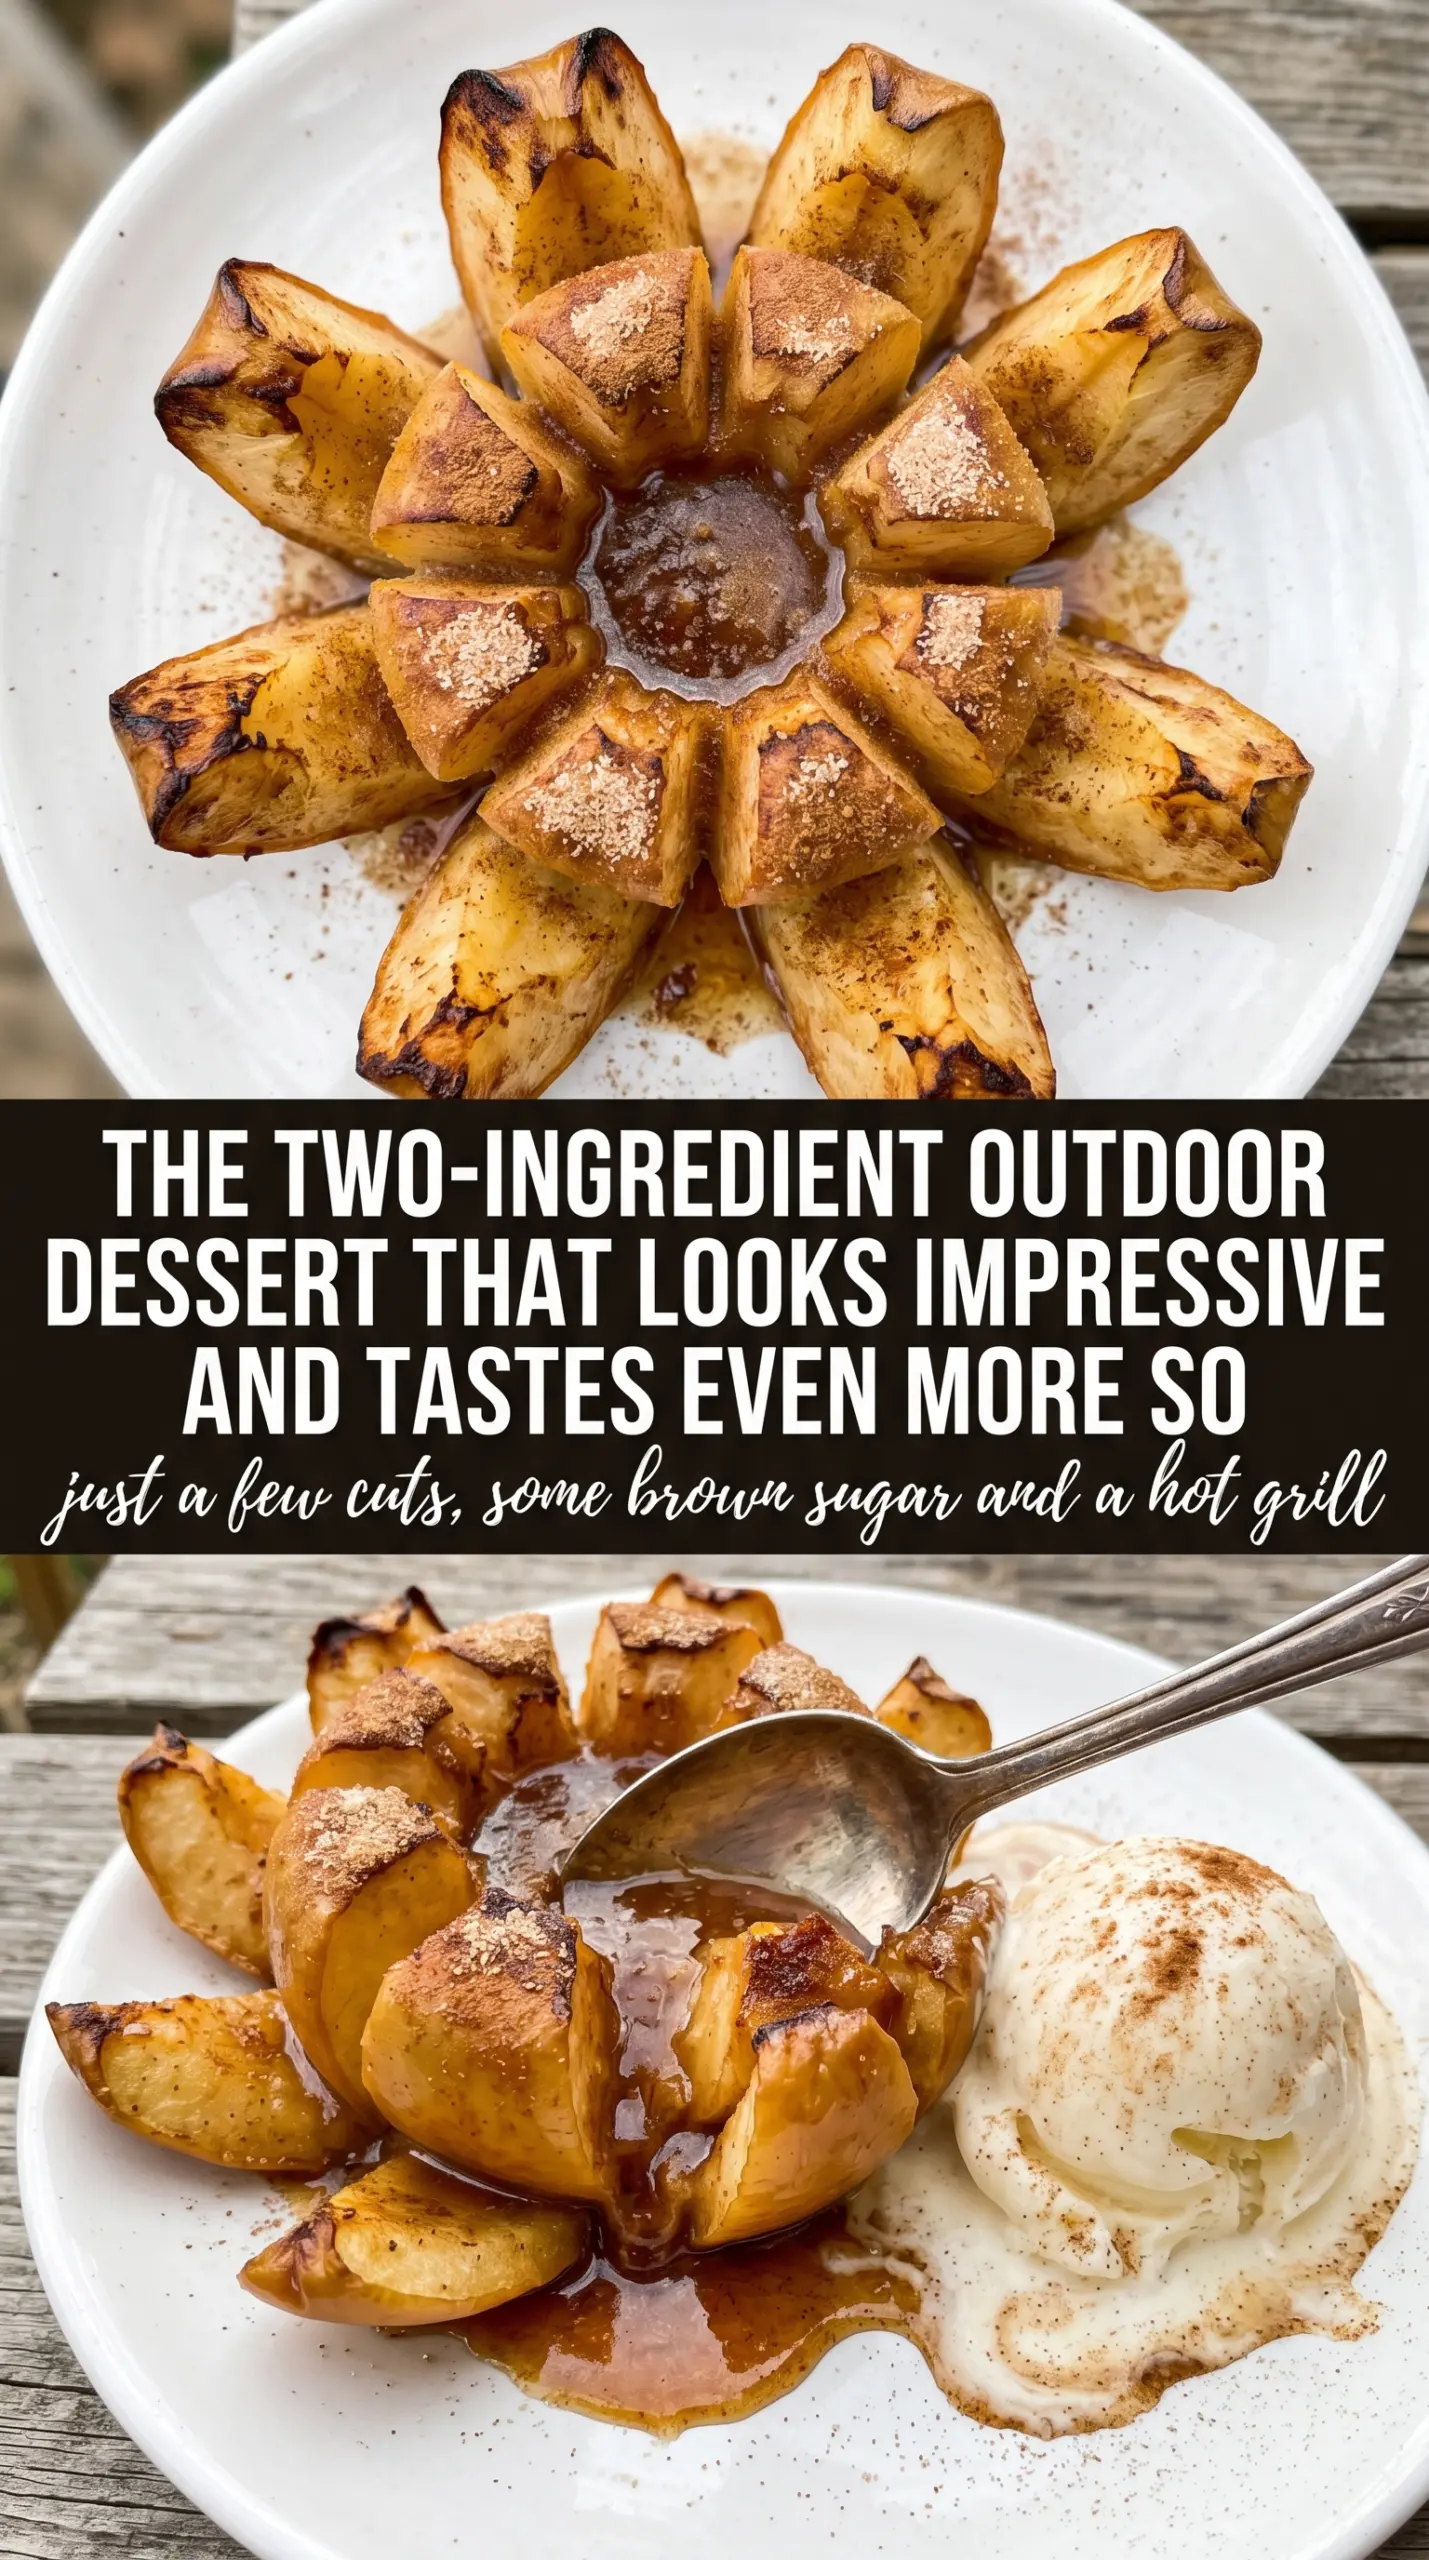
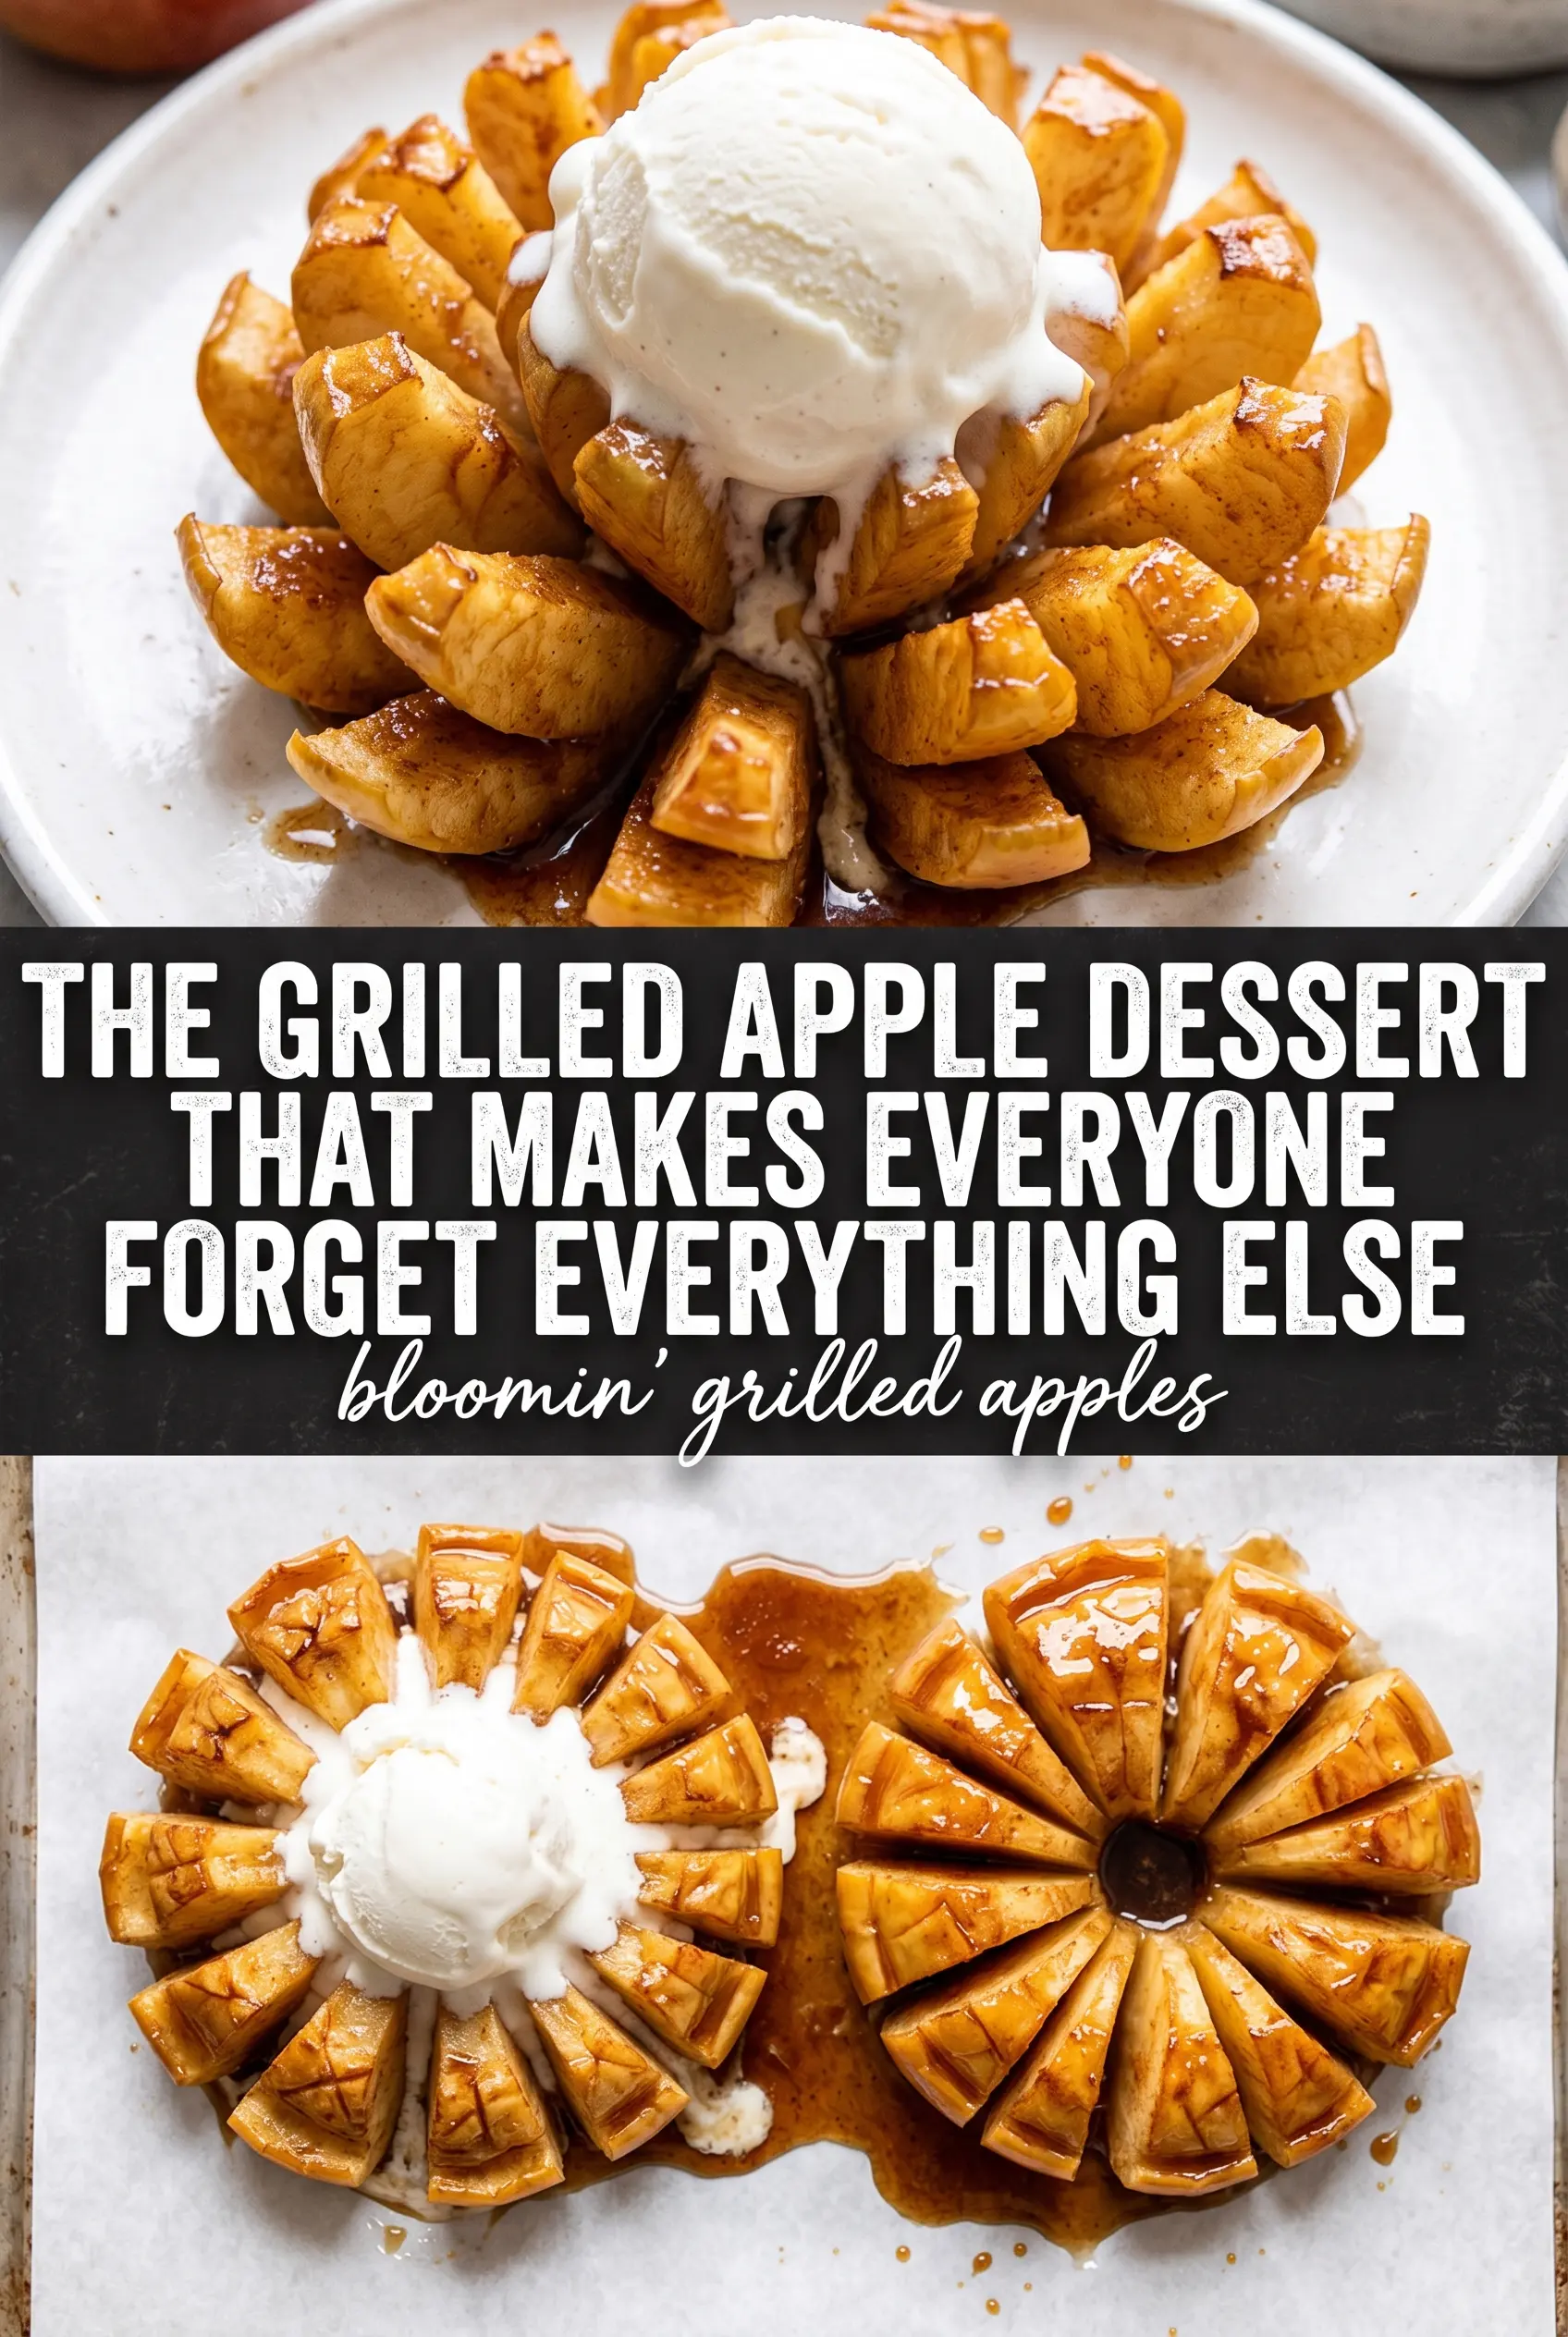
Bloomin’ grilled apples hit that sweet spot between simple and special: tender fruit, caramelized edges, and warm cinnamon butter that sinks into every slice. The apples hold their shape on the grill, but the cuts open just enough to catch the glaze, so each bite tastes like crisp apple, toasted sugar, and a little smoke from the fire.
What makes this version work is the slicing. Thin cuts give you lots of surface area for the butter mixture, but stopping short at the bottom keeps the apple intact so it fans out instead of falling apart. Wrapping the base in foil helps the fruit soften without losing all its juices, and grilling over medium heat gives the sugars time to caramelize instead of burning before the center turns tender.
Below you’ll find the small details that matter most, from choosing the right apple to the cue that tells you it’s time to pull them off the grill. If you’ve ever wanted a dessert that looks like you put in far more effort than you did, this is it.
The apples fanned out beautifully on the grill and the cinnamon butter caramelized right into the slices without turning mushy. I served them with vanilla ice cream and my husband asked for a second one before he finished the first.
Bloomin’ Grilled Apples with cinnamon butter and caramelized edges deserve a spot in your dessert rotation.
The Slice Pattern That Keeps These Apples Intact on the Grill
The trick here is stopping your knife before it reaches the cutting board. Once the slices go all the way through, the apple collapses as soon as it warms up and you lose the blooming effect. Keep the cuts even and fairly close together so the fruit fans open in a neat circle, not a loose pile of wedges.
Grilling fruit is mostly about control. Medium heat gives the sugar time to deepen into a caramel note while the apple softens from the inside out. If the grill is too hot, the butter glaze scorches before the center turns tender, and the outside ends up bitter instead of glossy.
Why the Apple, Butter, and Cinnamon Combination Works
- Granny Smith or Honeycrisp apples — Granny Smith stays tart and firm, which gives you a sharper contrast against the sweet topping. Honeycrisp is a little juicier and sweeter, and it still holds up well if you want a softer, rounder bite. Avoid apples that turn mealy when heated; they won’t keep that blooming shape.
- Butter — Melted butter carries the cinnamon and brown sugar into every cut. It’s what gives the apples that glossy finish and helps the edges brown instead of drying out. You can use salted butter if that’s what you keep on hand, but unsalted lets the apple flavor stay in front.
- Brown sugar — This does more than sweeten. The molasses in the sugar helps the coating caramelize on the grill and adds a deeper note than white sugar would. If you need a substitution, coconut sugar works, though the finish will be slightly drier and less sticky.
- Cinnamon — Use a fresh jar if you can. Old cinnamon turns flat fast, and this recipe depends on the spice standing up to heat. A little extra is fine if you want a stronger bakery-style finish.
Getting the Bloomed Apples Tender Without Burning the Sugar
Cutting the Apples for the Fan
Slice each apple from top to bottom in thin, evenly spaced cuts, leaving the bottom inch or so intact. That base is what holds the whole thing together while it softens. If the cuts are too wide, the apple won’t bloom evenly; if they’re too shallow, the butter won’t get between the slices where the good flavor happens.
Brushing on the Cinnamon Butter
Mix the melted butter, brown sugar, and cinnamon until the sugar starts to look suspended in the fat, then brush it generously over the opened slices. Get some between the cuts and over the top because that is where the caramelized edges form. If the mixture pools at the bottom, keep fanning the slices open a little more so the coating can do its job.
Grilling and Knowing When They’re Done
Wrap the lower portion of each apple in foil so the base steams gently while the top caramelizes. Set them over medium heat and leave them alone long enough for the sugar to darken and the fruit to soften. They’re ready when a knife slides in easily and the slices have dark amber edges, not black ones. If the top starts to scorch before the center feels tender, move them to a cooler spot on the grill and close the lid for a minute or two.
How to Adapt These Grilled Apples for Different Desserts and Diets
Dairy-Free Version
Swap the butter for a plant-based stick butter that melts cleanly. Coconut oil will work in a pinch, but it gives the apples a lighter, less buttery finish and can set up more quickly as it cools. The texture stays close, but the flavor lands a little cleaner and less rich.
Lower-Sugar Approach
Cut the brown sugar to 2 tablespoons and keep the cinnamon the same. You’ll still get a caramel note from the heat and the natural sugars in the apples, but the finish will be less sticky and a little more fruit-forward. This works best with Honeycrisp, which bring their own sweetness.
Oven Method When the Grill Isn’t Available
Set the apples on a foil-lined baking sheet and roast at 400°F until tender and caramelized at the edges, about 15 to 20 minutes depending on the size of the fruit. You won’t get the same smoky edge from the grill, but the bloom pattern and cinnamon butter still work beautifully. Broil for the last minute if you want more color on top.
Storage and Reheating
- Refrigerator: Store leftovers in an airtight container for up to 3 days. The apples soften more as they sit, so expect a pudding-like texture rather than the original bloom.
- Freezer: I don’t recommend freezing these. The apples turn watery and lose their shape once thawed.
- Reheating: Warm them in a 300°F oven until heated through. The microwave makes them collapse and turns the sugar syrupy in a muddy way, so use dry heat instead.
Answers to the Questions Worth Asking
Bloomin' Grilled Apples
Ingredients
Method
- Core the apples if needed, then cut thin slices into each apple from top to bottom without cutting all the way through, so they stay attached at the base. Keep the cuts consistent so the fanned slices grill evenly.
- Mix the melted butter, brown sugar, and cinnamon in a small bowl until it looks like a thick cinnamon butter glaze. Stop when the sugar is evenly coated through.
- Fan the apple slices open slightly and brush the cinnamon butter mixture into the openings, making sure some glaze reaches between the slices. The surface should look glossy and speckled with cinnamon sugar.
- Wrap the bottom of each apple in foil, leaving the top exposed so it can caramelize on the grill. Press the foil gently to help keep the base from over-browning.
- Preheat the grill to medium heat and place the foil-wrapped apples on the grates with the tops facing up. Grill over medium heat for 12-15 minutes, until the apples are tender and caramelized.
- Remove the apples from the grill and let any surface glaze settle for 1-2 minutes, then serve warm over vanilla ice cream. Spoon the cinnamon caramel from the fanned openings over the ice cream.