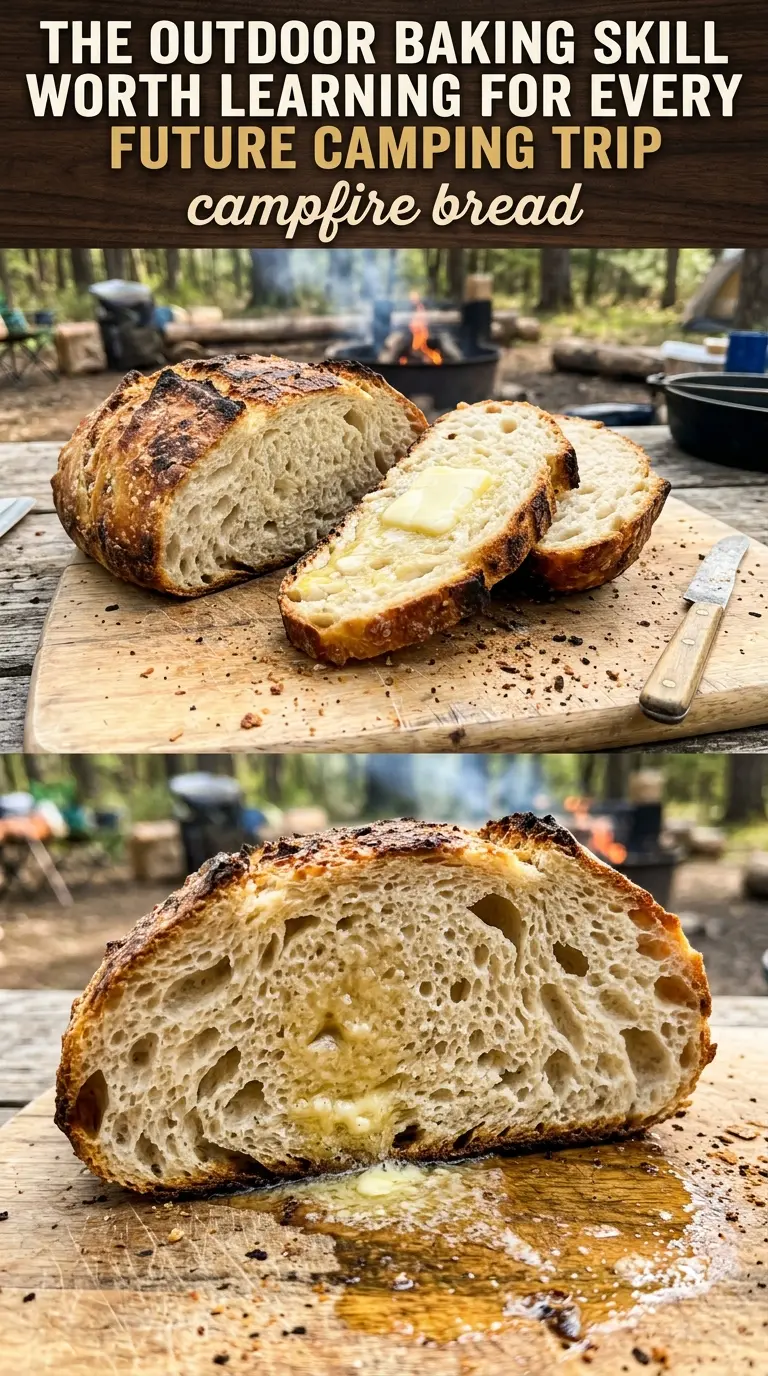
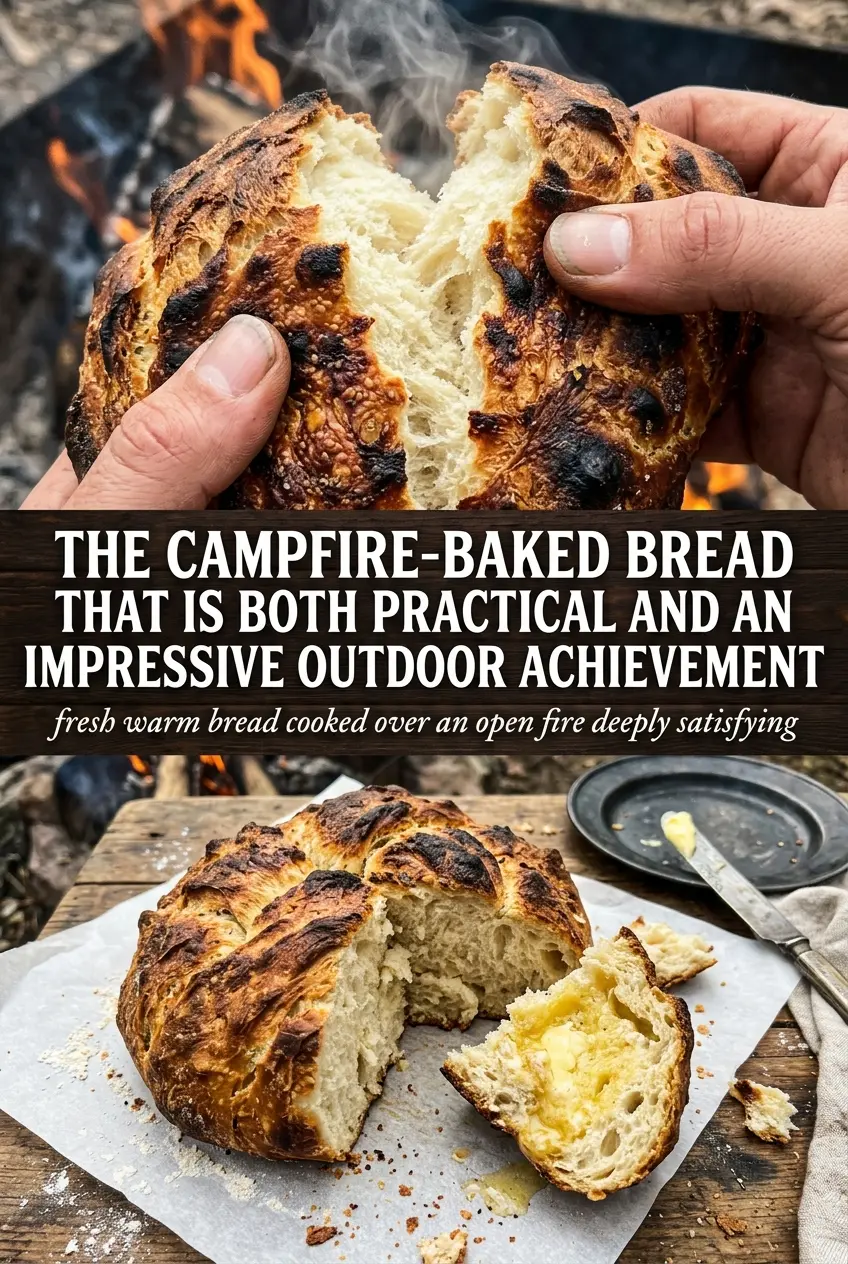
Campfire bread turns a simple ball of dough into something golden, crackly, and warm all the way through, with a fluffy center that pulls apart in soft strands. The outside picks up a light toast from the fire while the inside stays tender, which is exactly why this belongs in the rotation for camping trips and backyard fire pits alike.
The trick is in the dough and the heat. A little sugar and powdered milk help the bread brown before the inside dries out, and the dough is mixed just until it comes together so it stays easy to wrap around the stick. The other big win is cooking over coals instead of open flames. Flames scorch the outside fast while the middle stays raw. Coals give you steady heat and a better chance at even cooking.
Below, I’ve included the details that matter most: how sticky the dough should feel, what the rope should look like before it hits the stick, and how to keep the bread turning so it bakes instead of burning. There’s also a few good ways to serve it once it slides off the stick.
The dough wrapped around the stick without sliding, and rotating it over the coals gave me a crisp golden outside with a soft middle. My kids ate theirs before I even sat down.
Save this campfire bread for the next night over the fire when you want golden stick bread with a soft, pull-apart center.
The Part Most People Get Wrong: Heat Control Over the Fire
Campfire bread fails for one reason more than any other: the fire is too hot. If the dough sits over flames, the outside goes dark before the center has time to set, and you end up with a burned shell and raw dough underneath. Coals give off steadier heat, which is what lets the bread cook through while still browning.
The dough should be soft and slightly sticky, not dry or firm. That little bit of tackiness helps it cling to the stick and keeps it from cracking as it turns. If the dough feels stiff, add a splash more water. If it’s wet enough to slump off your hands, dust in a little flour until it holds its shape.
- Rotating constantly keeps one side from taking all the heat. Slow, steady turning is what gives you an even crust.
- Coals, not flames is the difference between toasted and scorched. Wait until the fire settles down before you start roasting.
- Short ropes cook better than thick bundles. A rope about 1 inch thick bakes through without leaving a raw center.
What Each Ingredient Is Actually Doing in This Dough
- All-purpose flour gives the bread enough structure to coil around the stick without tearing, while still baking up tender. Bread flour is too chewy for this style.
- Baking powder is what gives campfire bread its lift. Don’t skip it or the bread turns dense and heavy.
- Powdered milk helps with browning and adds a richer, almost bakery-style flavor. If you don’t have it, the bread still works, but it won’t color as well.
- Sugar helps the crust take on that golden finish over the coals. It’s not there to make the bread sweet.
- Water is the only liquid you need, but add it gradually. The dough should come together in a bowl or bag without turning soupy.
- Roasting sticks should be clean and sturdy. Green wood or proper roasting sticks both work, as long as they’re safe for food and long enough to keep your hands out of the heat.
Wrapping, Roasting, and Knowing When It’s Done
Mixing the Dough Fast
Combine the dry ingredients first, then add the water and stir just until the dough forms. Overmixing makes the bread tougher and harder to wrap, so stop as soon as you no longer see dry flour. The dough should be soft enough to roll, with a slight stick to it. If it clings hard to your hands, dust your hands with a little flour instead of working in a lot more flour.
Shaping the Ropes
Divide the dough into 10 even portions and roll each one into a rope about 1 inch thick. If the rope is too skinny, it dries out before the center cooks. If it’s too thick, the outside browns too fast. Wrap it in a loose spiral around the end of the stick so heat can reach the dough from all sides.
Roasting Over the Coals
Hold the stick over hot coals, not open flame, and keep it turning the whole time. You’re looking for a deep golden color and a surface that feels dry and set when you tap it lightly. If the bread is browning too fast, lift it a little higher from the heat. If it’s pale after several minutes, move it closer to the coals and keep turning.
Sliding It Off and Serving
Let the bread rest for a minute before sliding it off the stick so the steam settles and the crumb finishes setting. Pull it free gently; if it sticks, twist the bread a little instead of yanking. Serve it warm with butter or jam while the outside still has that fresh-from-the-fire crunch.
Ways to Adapt Campfire Bread Without Losing the Good Part
Dairy-Free Version
Skip the powdered milk and replace it with an equal amount of flour. The bread still works, but it will brown a little less and taste a bit more plain, so serving it with butter, honey, or jam helps finish it off.
Sweeter Breakfast Style
Add a little cinnamon to the dry mix and serve the bread with honey or maple syrup. That pushes the bread toward a campfire breakfast feel without changing the structure of the dough.
Savory Herb Twist
Cut the sugar down a little and stir dried herbs or garlic powder into the dry ingredients. The crust loses some of its classic lightly sweet flavor, but the bread pairs better with soups, chili, or grilled meat.
Gluten-Free Version
Use a 1:1 gluten-free flour blend that includes xanthan gum. The dough may be a little more delicate when wrapped, so keep the ropes slightly thicker and handle them gently while roasting.
Storage and Reheating
- Refrigerator: Store leftover bread in an airtight container for up to 2 days. The crust softens as it sits, but the bread will still toast well.
- Freezer: It freezes poorly once cooked because the texture turns a little dry after thawing. If you need to prep ahead, freeze the mixed dough portions instead and thaw before shaping.
- Reheating: Warm it wrapped loosely in foil near low coals or in a low oven for a few minutes. Don’t blast it with high heat or the outside dries out before the center warms.
Questions I Get Asked About This Recipe
Campfire Bread
Ingredients
Method
- In a large bowl or zip-top bag, combine all-purpose flour, baking powder, salt, sugar, and powdered milk until evenly mixed (no dry pockets).
- Add water and mix until a dough forms; it should be slightly sticky.
- Divide the dough into 10 portions.
- Roll each portion into a long rope about 1 inch thick.
- Wrap each dough rope around the end of a roasting stick in a spiral pattern with even spacing.
- Hold each stick over campfire coals (not flames) and rotate constantly to prevent uneven browning.
- Roast for 12-15 minutes until golden brown and cooked through, using rotation as the visual cue that browning is even.
- Slide the bread off the stick and serve warm with butter or jam.