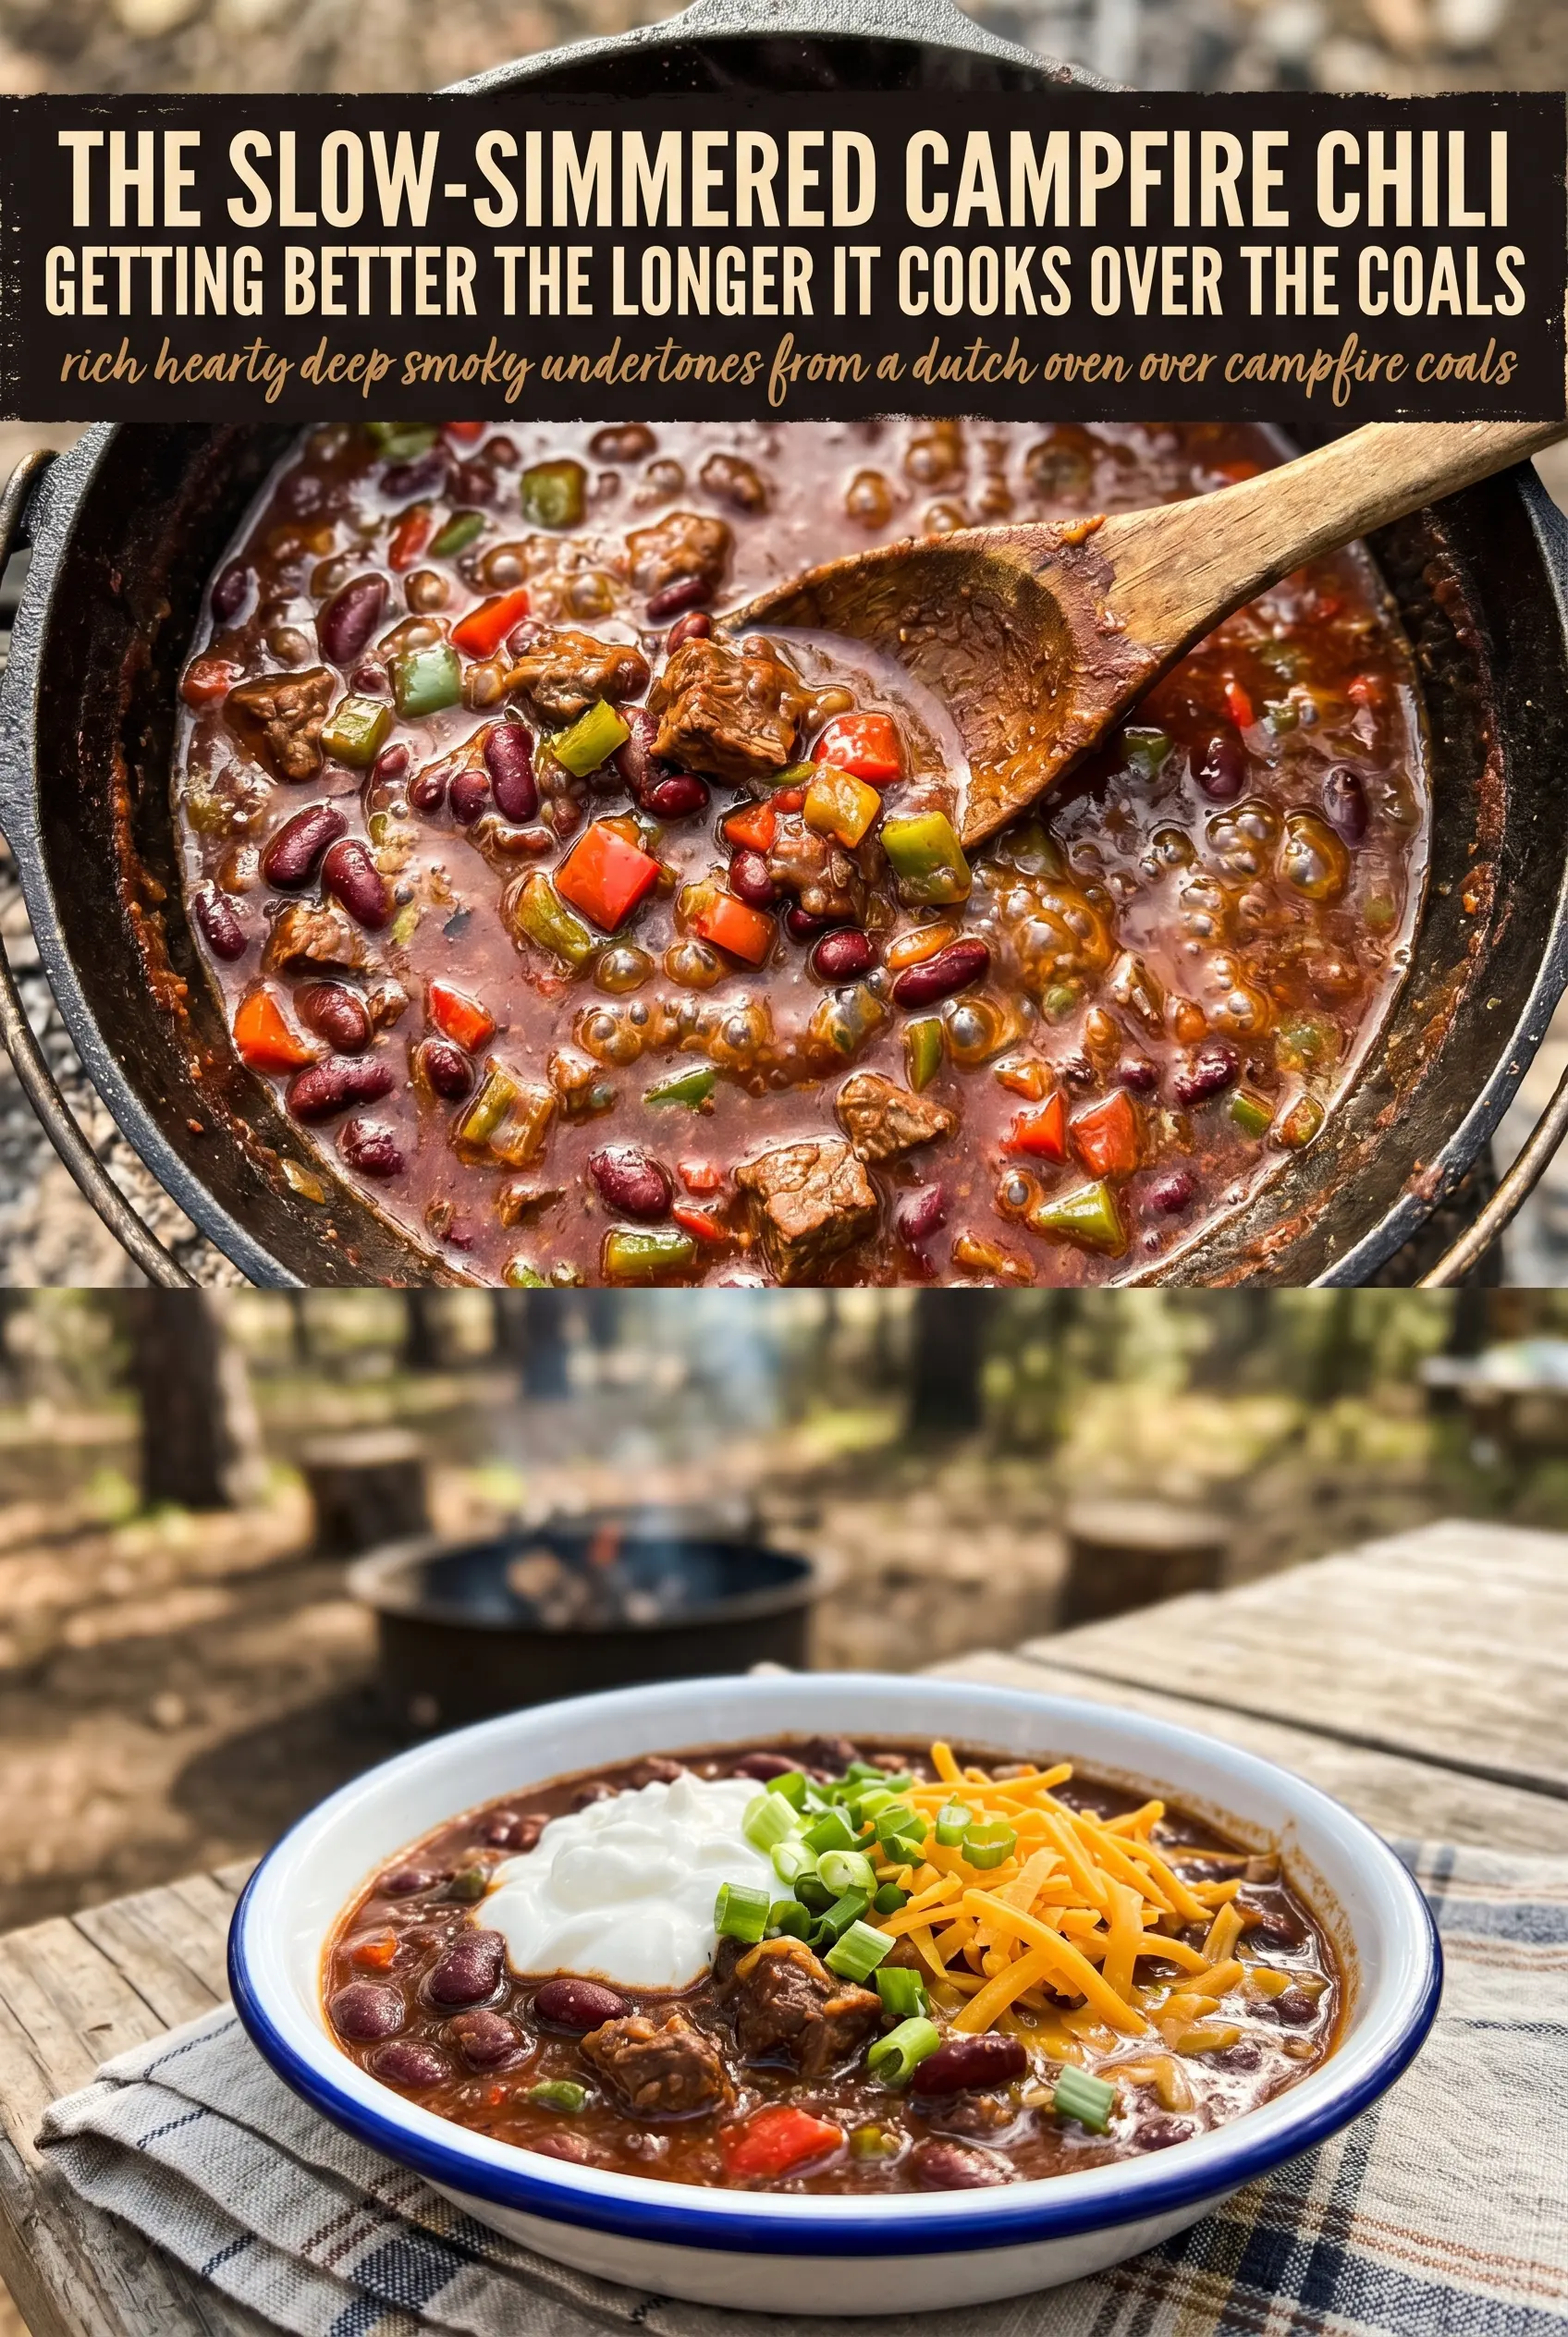
Bubbling campfire chili has a way of turning a simple pot of ground beef and beans into the kind of dinner people drift back to with bowls in hand. The best version is thick, smoky, and hearty enough to hold up to a scoop of sour cream and a handful of crackers without turning watery. This one does that by starting with a good browning on the meat and then letting the tomato paste cook long enough to lose its raw edge.
The campfire part matters here. A Dutch oven gives you steady heat and enough depth for a full, generous batch, and the lid keeps the chili from drying out while it simmers over the fire. The onions and bell pepper soften right in the same pot, which builds flavor without adding extra steps or dirty dishes. I also like that the beans stay intact instead of breaking down into mush, so every spoonful has a little more texture.
Below, I’ve added the details that keep this chili from going flat: how to keep the fire from scorching the bottom, why the simmer time matters, and a few smart swaps if you’re cooking at home instead of over coals.
Save this campfire chili for your next Dutch oven dinner when you want a smoky, thick chili that holds up to toppings and crackers.
The Fire Pit Mistake That Turns Chili Watery
Most campfire chili gets bland or thin for one of two reasons: the meat never browns properly, or the pot spends the whole cook at a rolling boil instead of a gentle simmer. Browning the beef first gives you the savory base that makes the whole pot taste like more than beans in tomato sauce. If you rush that part, the chili can still be edible, but it won’t have the depth that makes people want a second bowl.
The other failure point is heat control. A campfire can swing from too hot to too cold fast, and a Dutch oven sitting directly over flames can scorch the bottom before the top has had time to thicken. You want lazy bubbles around the edges and occasional movement in the center. That’s the sweet spot where the tomatoes cook down, the spices bloom, and the chili turns thick instead of soupy.
What Each Ingredient Is Actually Doing in the Pot

- Ground beef This is the backbone of the chili. An 80/20 blend gives you enough fat for flavor without leaving the pot greasy. If you use leaner beef, add a spoonful of oil at the start so the onions don’t stick.
- Onion and bell pepper They soften the edges of the beef and give the chili a little sweetness. Dice them small so they melt into the pot instead of staying crunchy after the short simmer.
- Tomato paste This is what gives the chili body. Let it cook for a minute with the meat and vegetables before the liquid ingredients go in; that step removes the tinny taste and deepens the color.
- Kidney beans They hold their shape better than softer beans and give each spoonful a hearty bite. If you want a thicker texture, mash a small scoop against the side of the pot near the end.
- Chili powder and cumin Chili powder carries the main seasoning while cumin adds the warm, earthy note that reads as chili instead of just seasoned tomatoes. Fresh spices matter here because the cook time is short.
Building a Thick Chili Over Live Coals
Browning the Beef First
Start with the ground beef in the Dutch oven and break it up as it cooks. You want browned bits on the bottom, not pale steamed meat, because those browned spots become the base of the flavor. If the fire is too hot and the meat starts throwing off a lot of liquid, move the pot to a cooler part of the fire so it can brown instead of boil.
Softening the Vegetables in the Fat
Once the beef is browned, add the diced onion and bell pepper and cook for about 5 minutes. They should lose their raw sharpness and start to look glossy and tender. If they’re still crunchy when you move on, they’ll stay that way in the finished chili because the simmer isn’t long enough to fully erase that texture.
Letting the Chili Simmer Into Itself
Stir in the beans, tomatoes, tomato paste, chili powder, cumin, salt, and pepper, then bring everything to a simmer. Cover the pot and let it cook for 35 to 40 minutes, stirring now and then so nothing catches on the bottom. The chili is ready when it looks thick, the tomatoes have broken down, and a spoon dragged through the pot leaves a trail for a second before filling back in.
How to Adapt This Chili for the Camp Ground, the Stove, or a Different Diet
Make It on the Stove
Use a heavy pot or Dutch oven on medium heat and follow the same order. The stovetop gives you steadier control, so the chili is less likely to scorch, but you still want a low simmer rather than a hard boil. The texture stays the same, and you’ll often get a slightly more even reduction.
Swap in Ground Turkey
Ground turkey works well if you want a lighter bowl, but it needs a little help because it doesn’t bring the same richness as beef. Add a tablespoon of oil when you brown it and don’t skip the tomato paste step. The finished chili will taste cleaner and a little leaner, but still hearty.
Make It Dairy-Free
The chili itself is already dairy-free, so the only adjustment is at serving time. Skip the sour cream and top each bowl with sliced avocado, chopped onion, or extra beans for creaminess. The flavor stays bold, and you don’t lose anything in the pot.
Thicken It for Bowlable Chili
If you like chili that clings to a spoon, uncover the pot for the last 10 minutes and let the steam escape. You can also mash a few beans against the side of the pot, which thickens the broth without changing the flavor. That’s the easiest fix if your chili looks a little loose near the end.
Storage and Reheating
- Refrigerator: Store for up to 4 days. The chili thickens as it chills, so expect a denser texture the next day.
- Freezer: It freezes well for up to 3 months. Cool it completely first, then portion it into airtight containers so it reheats evenly.
- Reheating: Warm it gently on the stove over medium-low heat, stirring and adding a splash of water if needed. Don’t blast it over high heat or the bottom can catch before the center is hot.
Questions I Get Asked About This Recipe
Campfire Chili
Ingredients
Equipment
Method
- Heat a Dutch oven over the campfire and brown the ground beef, stirring occasionally until no longer pink.
- Add the diced onion and diced bell pepper, then cook for 5 minutes, stirring until slightly softened.
- Add the kidney beans, diced tomatoes, tomato paste, chili powder, cumin, salt, and pepper, then stir to combine.
- Bring the chili to a simmer and stir to evenly distribute the spices.
- Cover the Dutch oven and cook for 35-40 minutes, stirring occasionally, until thick and bubbling around the edges.
- Ladle the chili into bowls while hot and top with shredded cheese, sour cream, and crackers.