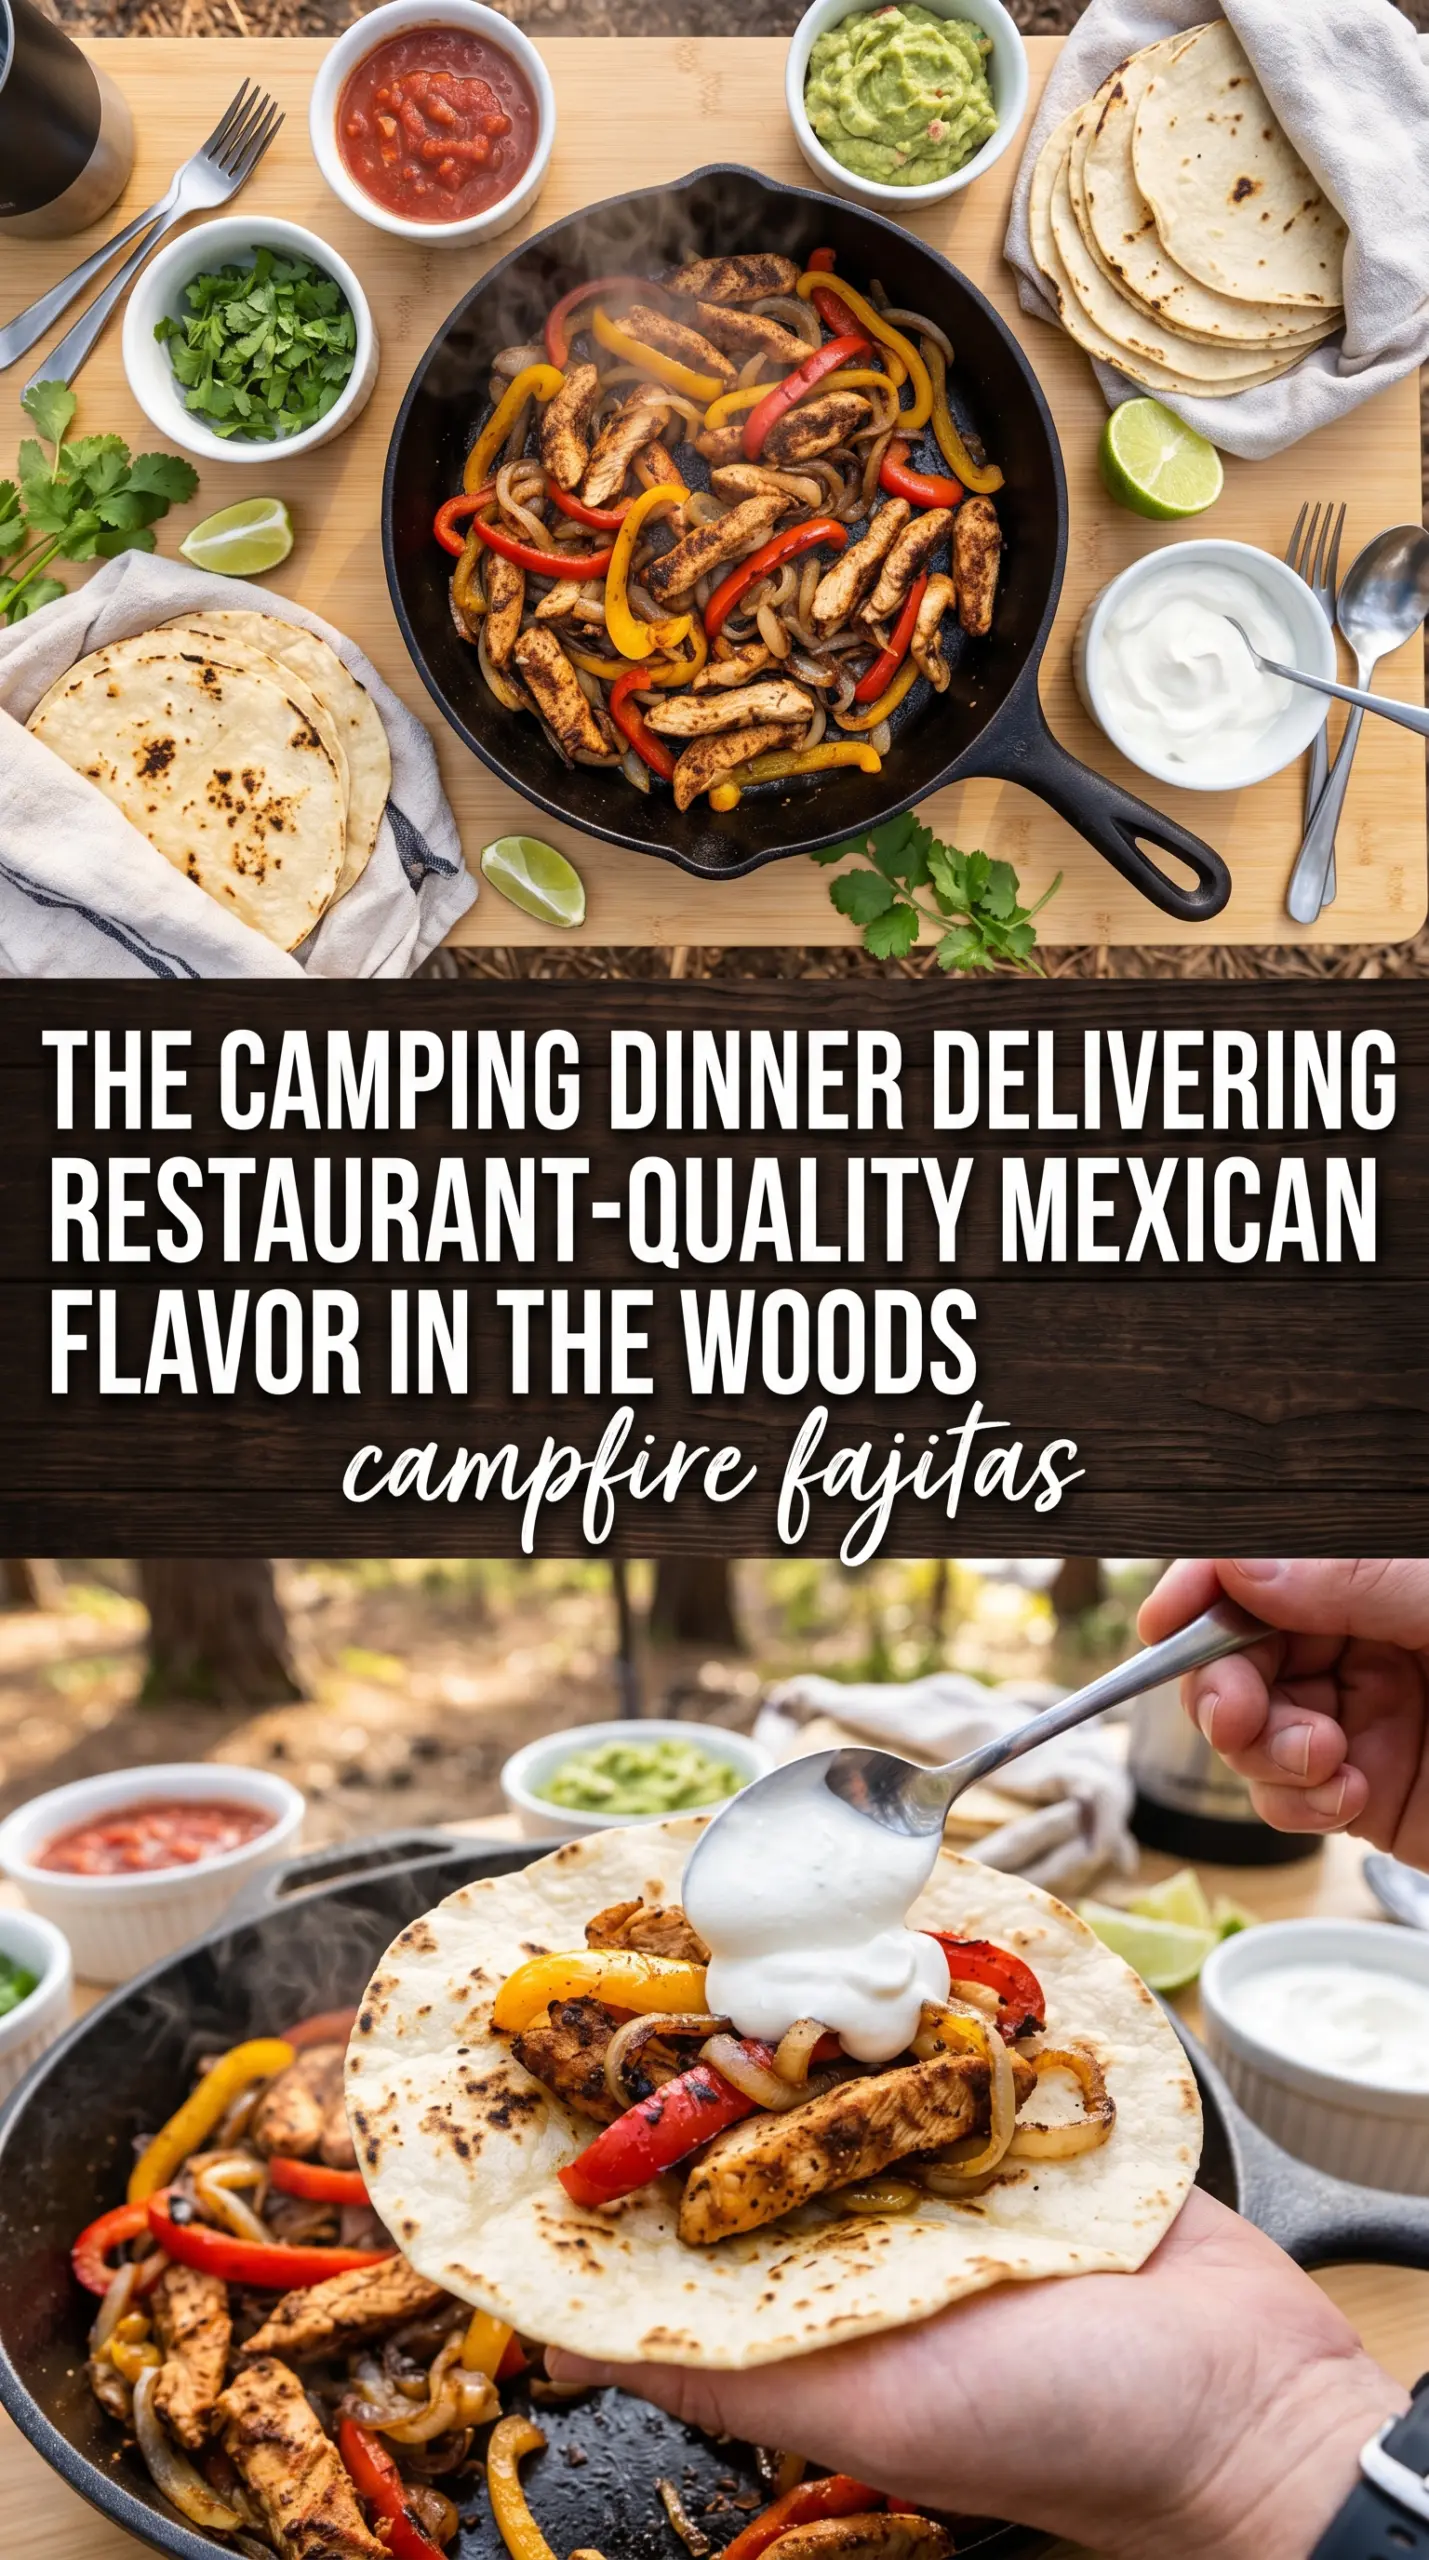
Sizzling campfire fajitas are the kind of dinner that disappears fast because the skillet does half the work and the fire does the rest. The meat picks up a smoky edge, the peppers soften just enough to stay crisp-tender, and the onions turn sweet around the charred edges. Everything lands on warm tortillas with lime and whatever toppings you’ve got packed, which is exactly why this meal earns a spot in the camping rotation.
This version works because the meat gets a head start in a hot cast iron skillet before the vegetables go in. That keeps the chicken or steak from steaming in the pepper juices and helps it brown instead of turning pale and soft. The peppers and onions cook in the same skillet, so they soak up the seasoning left behind and pick up those browned bits from the meat.
Below, I’ve included the timing cues that matter most over a campfire, plus a few ways to adapt the same skillet dinner if you’re cooking for a crowd or working with what’s already in your cooler.
The chicken browned beautifully in the cast iron and the peppers still had a little bite. The tortillas warmed right over the fire, and the whole skillet tasted like a proper camping dinner instead of just “food cooked outside.”
These campfire fajitas are worth saving for the night you want a smoky skillet dinner with tender meat, charred peppers, and warm tortillas.
The Fastest Way to Keep Fajita Meat Brown Instead of Watery
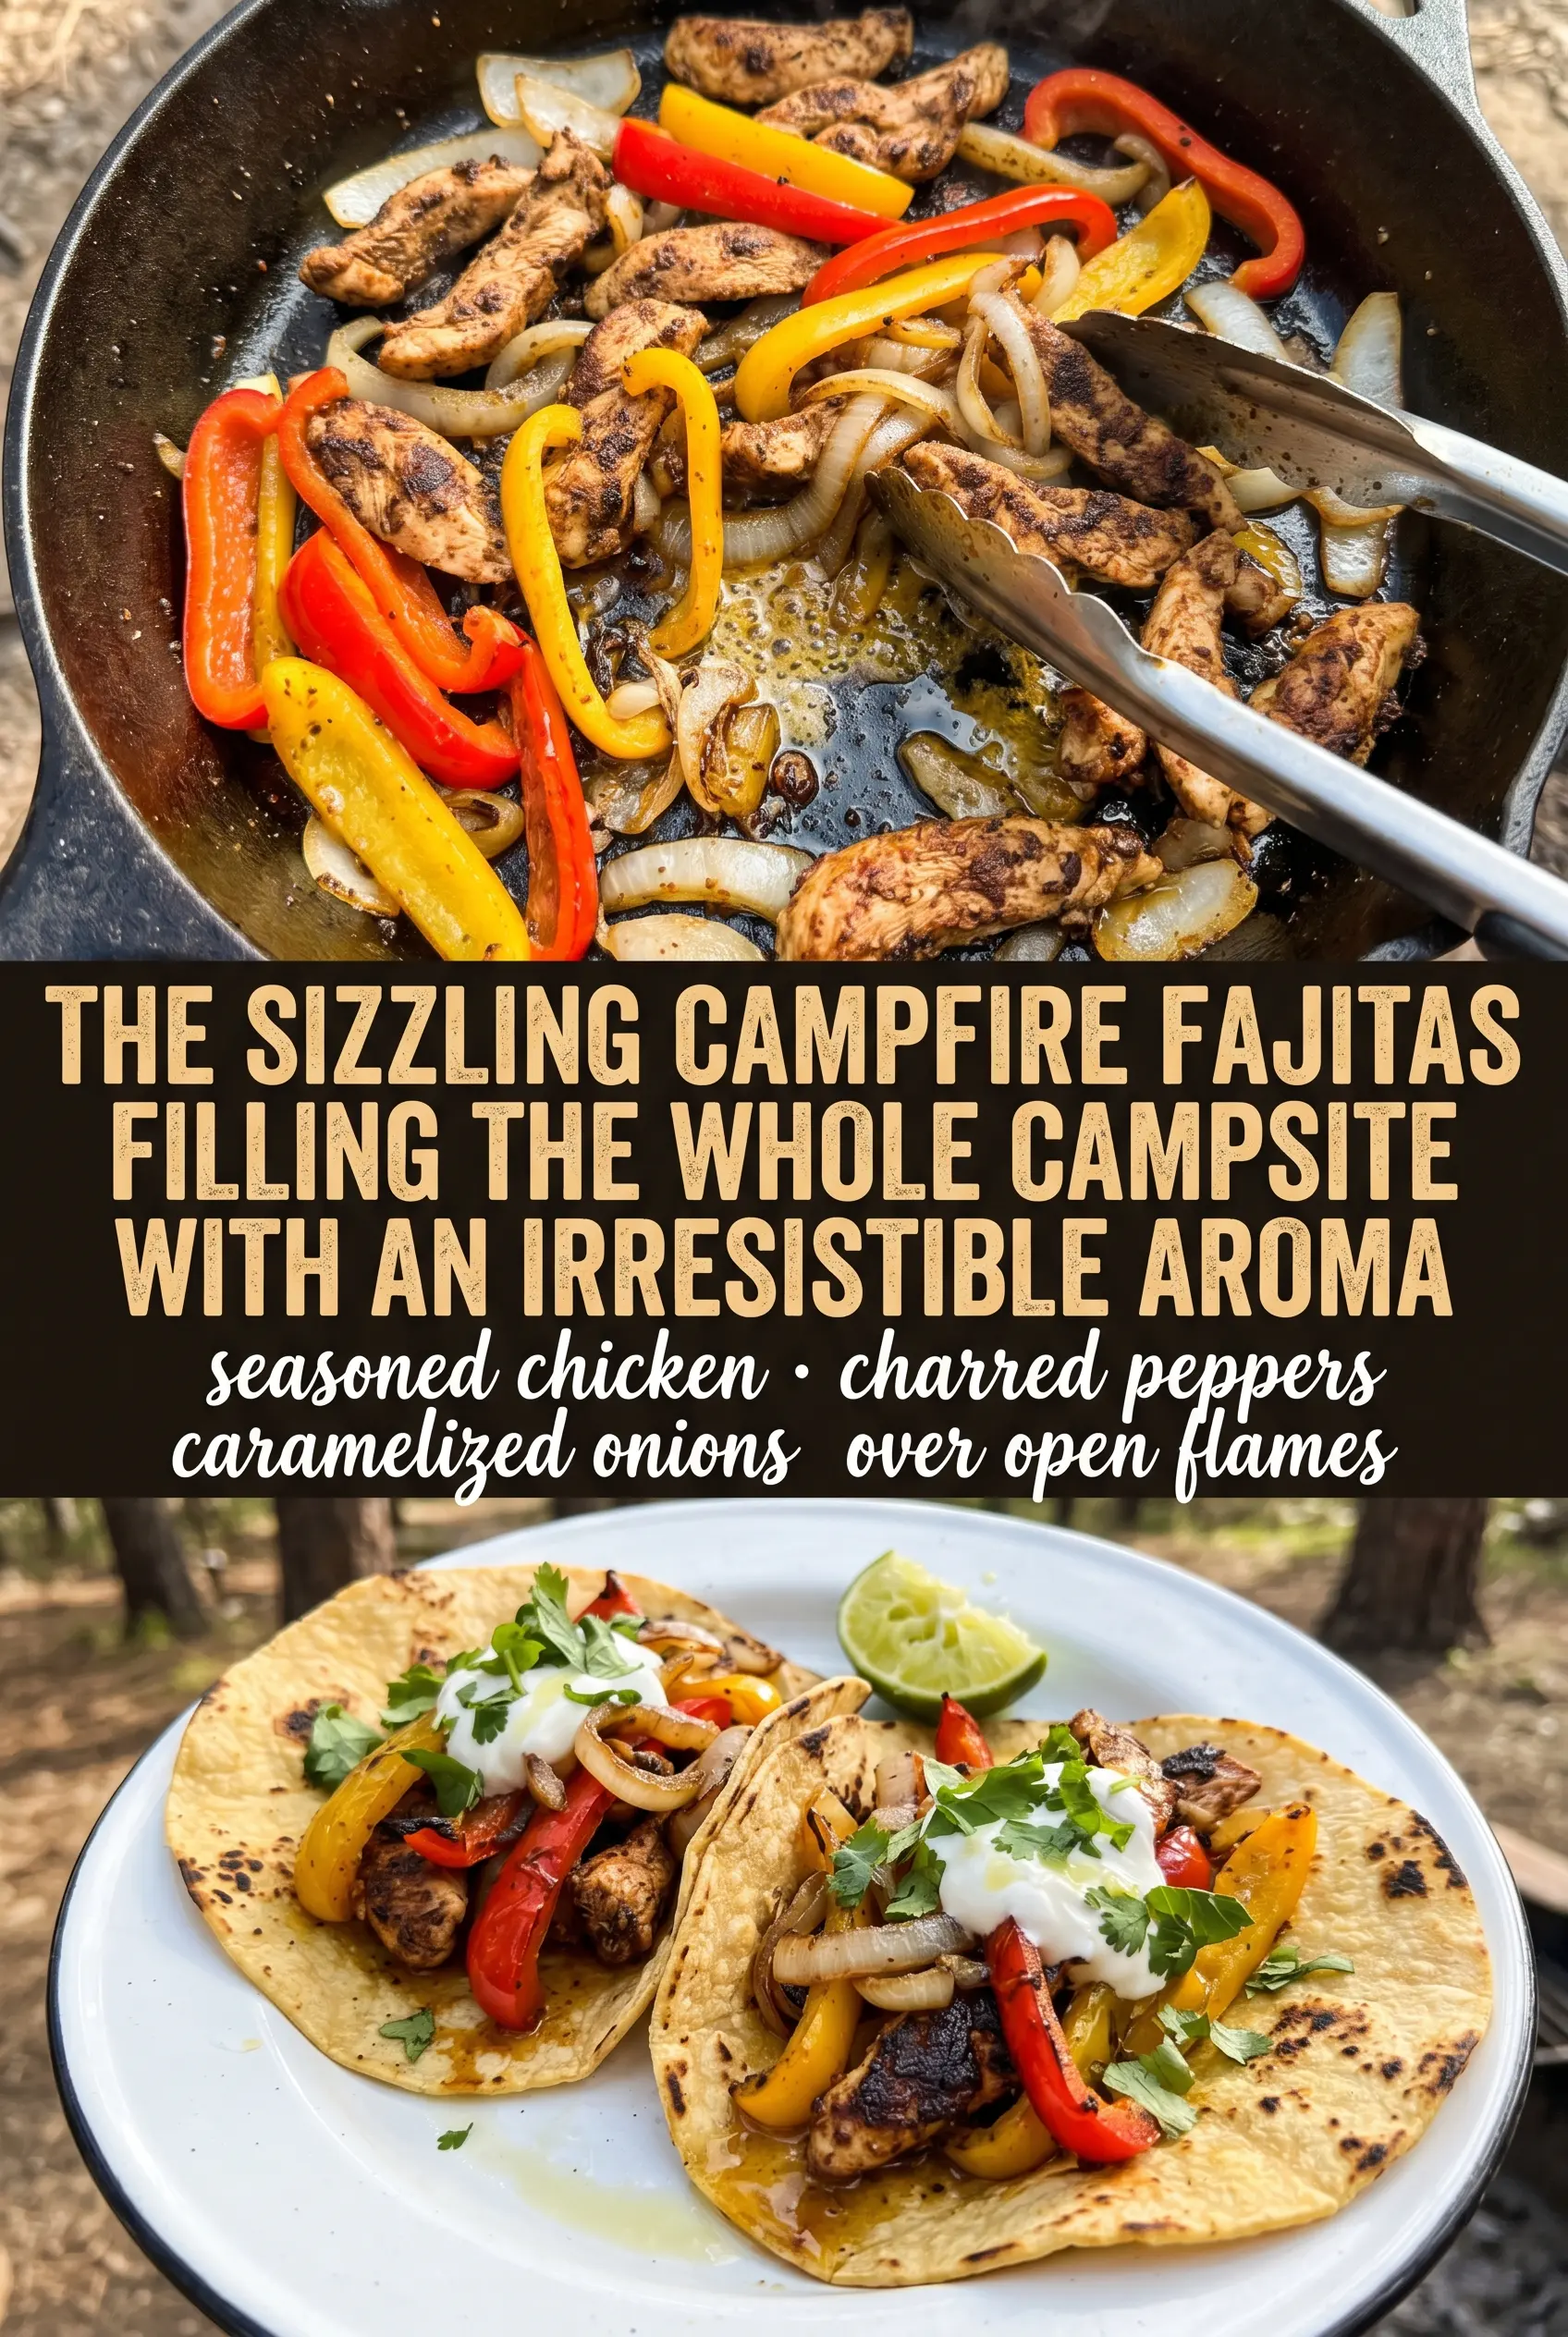
The main trap with fajitas over a campfire is overcrowding the skillet. Once too much meat or too many vegetables hit the pan, the temperature drops and everything starts releasing liquid instead of browning. Cast iron holds heat well, but it still needs a hot start and enough space for the ingredients to make contact with the pan.
That’s why the meat cooks first and comes out before the vegetables go in. The skillet stays hot enough to sear the chicken or steak, then the peppers and onions use the leftover fat and seasoning without dragging the temperature down too far. If the pan starts looking wet, keep cooking until the moisture evaporates and the edges begin to catch a little color again.
- Thin-sliced chicken breast or steak cooks fast and gives you more browned surface area. Slice against the grain for steak so it stays tender after the short cook time.
- Cast iron matters here because it keeps up with live fire better than a thin pan. If you use a lighter skillet, you’ll fight hot spots and uneven browning.
- Fajita seasoning brings the salt, spice, and smoke in one step. Homemade or store-bought both work, but a fine powder coats the meat more evenly than chunky blends.
- Bell peppers and onions need enough heat to soften and char at the edges without collapsing into mush. Slice them evenly so they finish at the same time.
What Each Ingredient Is Actually Doing in Campfire Fajitas
- Protein (quality, proper thickness) — Good quality protein tastes better. Even thickness ensures even cooking.
- Seasoning (bold, distributed throughout) — Don’t be shy with salt and pepper. Quality seasoning elevates everything.
- Oil or fat (protective and flavorful) — The fat helps develop crust and carries flavors. Use generously.
- Heat management (appropriate temperature for the protein) — Too high and the outside burns before the inside cooks. Too low and it steams.
- Technique (sear, then finish based on thickness) — Proper technique creates flavor. Sear for crust, then cook through gently.
- Aromatics and seasonings (garlic, herbs, spices) — These add complexity and depth. Distribute them throughout the cooking process.
- Resting time (let it rest before serving) — Resting allows juices to reabsorb. This keeps the protein moist and tender.
- Optional: finishing sauce or glaze — A light sauce adds richness without overwhelming. Apply at the very end.
Building the Skillet in the Right Order
Getting the Pan Hot Before the Meat Goes In
Set the skillet over a strong bed of campfire heat and let the oil shimmer before anything touches the pan. If the oil looks still and the meat goes in early, it will stick and stew. You want a quick sizzle the second the seasoned chicken or steak hits the surface. Let it sit long enough to pick up color before stirring, because constant tossing keeps it from browning.
Cooking the Meat Without Drying It Out
Cook the meat until it’s browned on the outside and just cooked through, then pull it out of the skillet. For chicken, that means no pink in the center and juices running clear. For steak, cook only until it’s done to your liking, because it will go back into the pan at the end and pick up a little more heat. If the pieces look pale, the fire probably isn’t hot enough or the pan is crowded.
Softening the Peppers and Onions
Add the peppers and onions to the same skillet and let them sit before stirring so they can catch a little char. They should turn glossy, slightly softened, and browned in spots, not limp and soggy. If they start to scorch too fast, move the skillet to a slightly cooler part of the fire. That slower edge of heat gives you tender vegetables with a smoky finish instead of bitter black spots.
Bringing Everything Back Together
Return the meat to the skillet and toss it with the vegetables just long enough to rewarm and coat everything in the pan drippings. This is the moment when the fajitas start tasting like one dish instead of separate parts. Warm the tortillas over the fire while the skillet finishes, then serve right away. If you wait too long, the vegetables lose their edge and the tortillas cool off before they hit the table.
What to Change When You’re Cooking Them at Camp
Make Them with Steak Instead of Chicken
Use thin-sliced skirt, flank, or sirloin for a deeper, beefier fajita. Steak gives you more char and a little more richness, but it can go dry if you leave it on the fire too long, so pull it as soon as it’s browned and still juicy.
Make It Dairy-Free Without Losing the Finish
Skip the sour cream and cheese and lean on guacamole, salsa, and extra lime instead. The fajitas still feel complete because the meat and vegetables carry enough seasoning on their own, and the avocado adds the creamy finish people usually expect from the dairy toppings.
Turn Them into Gluten-Free Fajitas
Use corn tortillas instead of flour tortillas and warm them carefully so they don’t crack over the fire. The filling stays the same, but corn tortillas bring a more rustic texture and a stronger corn flavor that works well with the smoky skillet filling.
Storage and Reheating
- Refrigerator: Store the meat and vegetables separately from the tortillas for up to 3 days. The peppers soften a bit more as they sit, but the flavor holds up well.
- Freezer: The cooked fajita filling freezes well for up to 2 months. Cool it completely first and pack it in a sealed container so the vegetables don’t pick up freezer burn.
- Reheating: Reheat the filling in a skillet over medium heat until hot. Don’t blast it in a microwave for too long or the meat will turn dry and the peppers will go mushy before the center is warm.
Answers to the Questions Worth Asking
Campfire Fajitas
Ingredients
Equipment
Method
- Heat the oil in a large cast iron skillet over the campfire until shimmering, then spread it evenly across the bottom.
- Season the sliced chicken breast or steak with fajita seasoning and add to the hot skillet in a single layer, then cook without moving for 8-10 minutes until browned and cooked through.
- Remove the browned meat and set it aside while you cook the vegetables.
- Add the bell peppers and onions to the skillet and cook for 8-10 minutes, stirring occasionally, until tender and slightly charred.
- Return the meat to the skillet and toss everything together for 30-60 seconds so flavors blend and the mixture sizzles again.
- Warm the flour tortillas over the fire until hot and pliable, turning once so they heat through without burning.
- Serve the fajita mixture in tortillas with desired toppings including sour cream, guacamole, salsa, cheese, cilantro, and lime wedges.