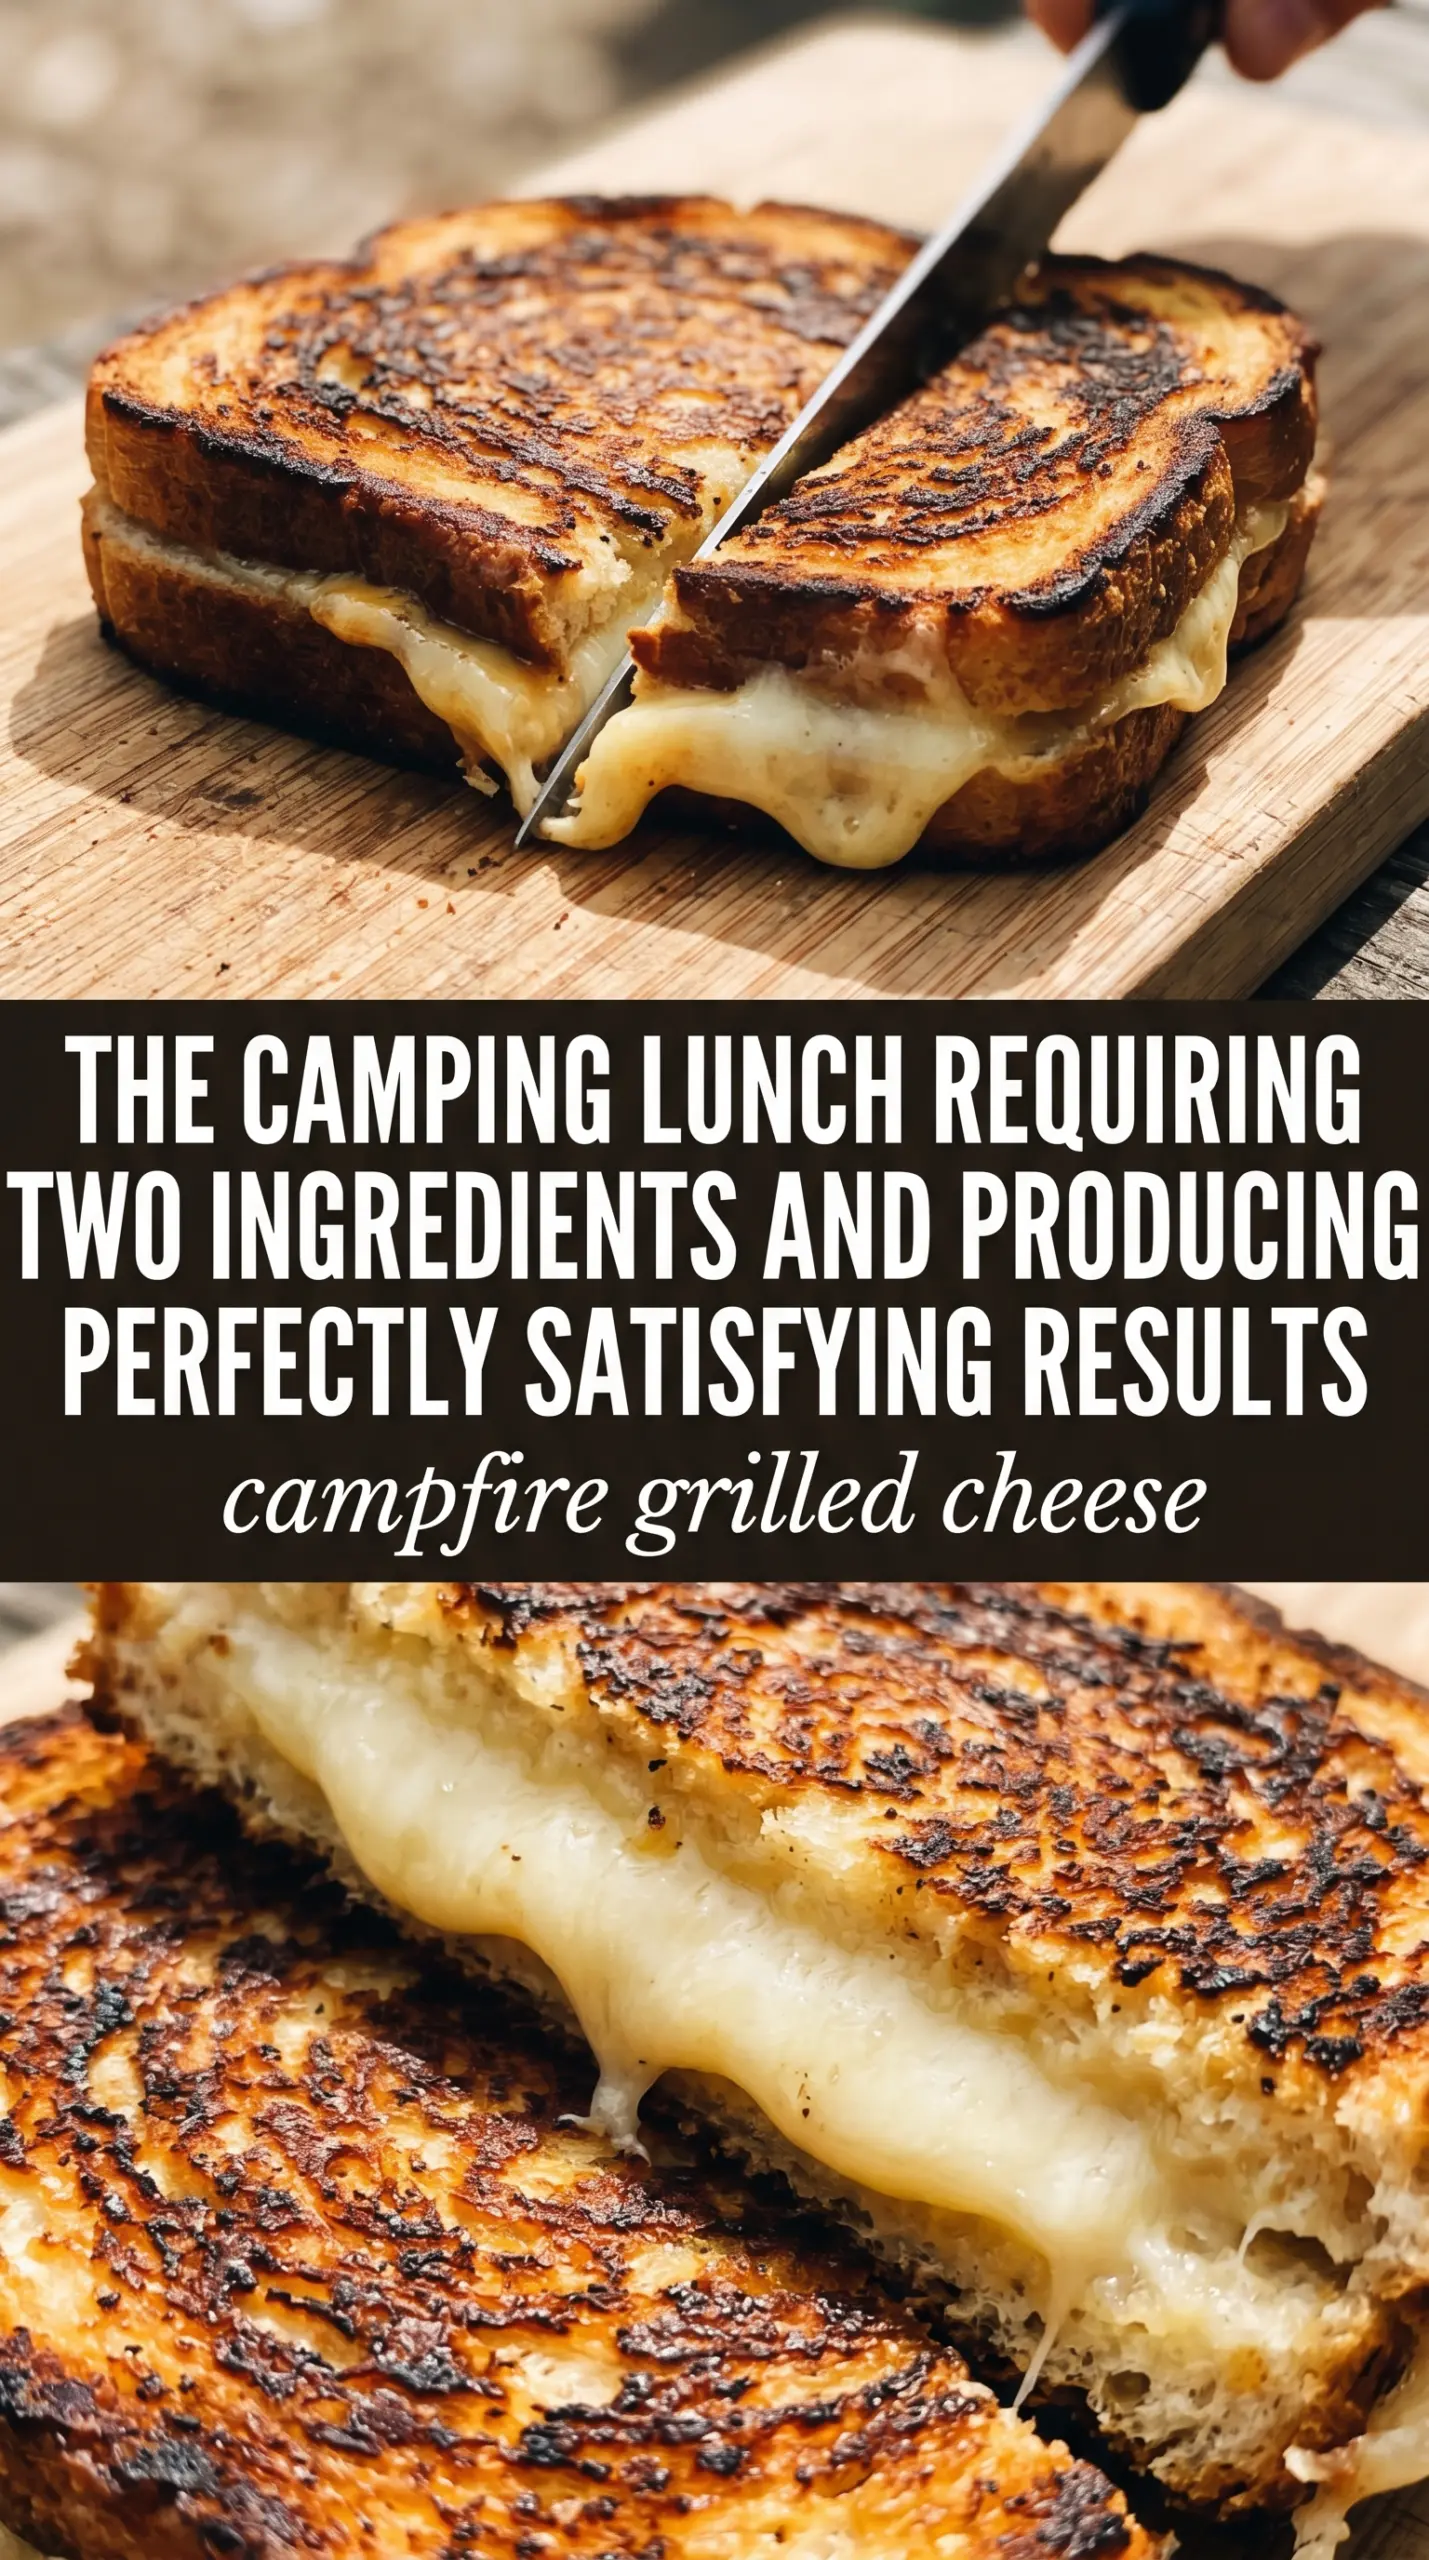
Campfire grilled cheese hits the table with crisp, buttery bread and a center that turns molten without losing its shape. The best versions have that audible crack when you bite in, then the kind of cheese pull that makes everyone at the fire lean in for a second look. When the bread gets golden before the cheese fully melts, the sandwich feels rushed. This version solves that by using steady medium heat and a little patience, which is exactly what grilled cheese needs over an open flame.
The trick is controlling the heat source, not the sandwich. Campfire cooking swings hot fast, so a grate or cast iron skillet gives you a buffer between the bread and the flame. Butter on the outside browns the bread evenly and helps protect it from drying out before the cheese softens. American melts the smoothest, cheddar brings more bite, and Swiss adds a nutty finish, so the cheese choice changes the personality of the sandwich without changing the method.
Below, I’ve included the timing cues I use so the bread lands golden instead of scorched, plus a few simple swaps if you’re building this with what you packed.
I finally got a grilled cheese with a crisp crust and fully melted center over the campfire. The cast iron kept the bread from burning, and the cheese was stretchy instead of greasy.
Like this campfire grilled cheese? Save it to Pinterest for the nights when you want a smoky, golden sandwich with a perfect cheese pull.
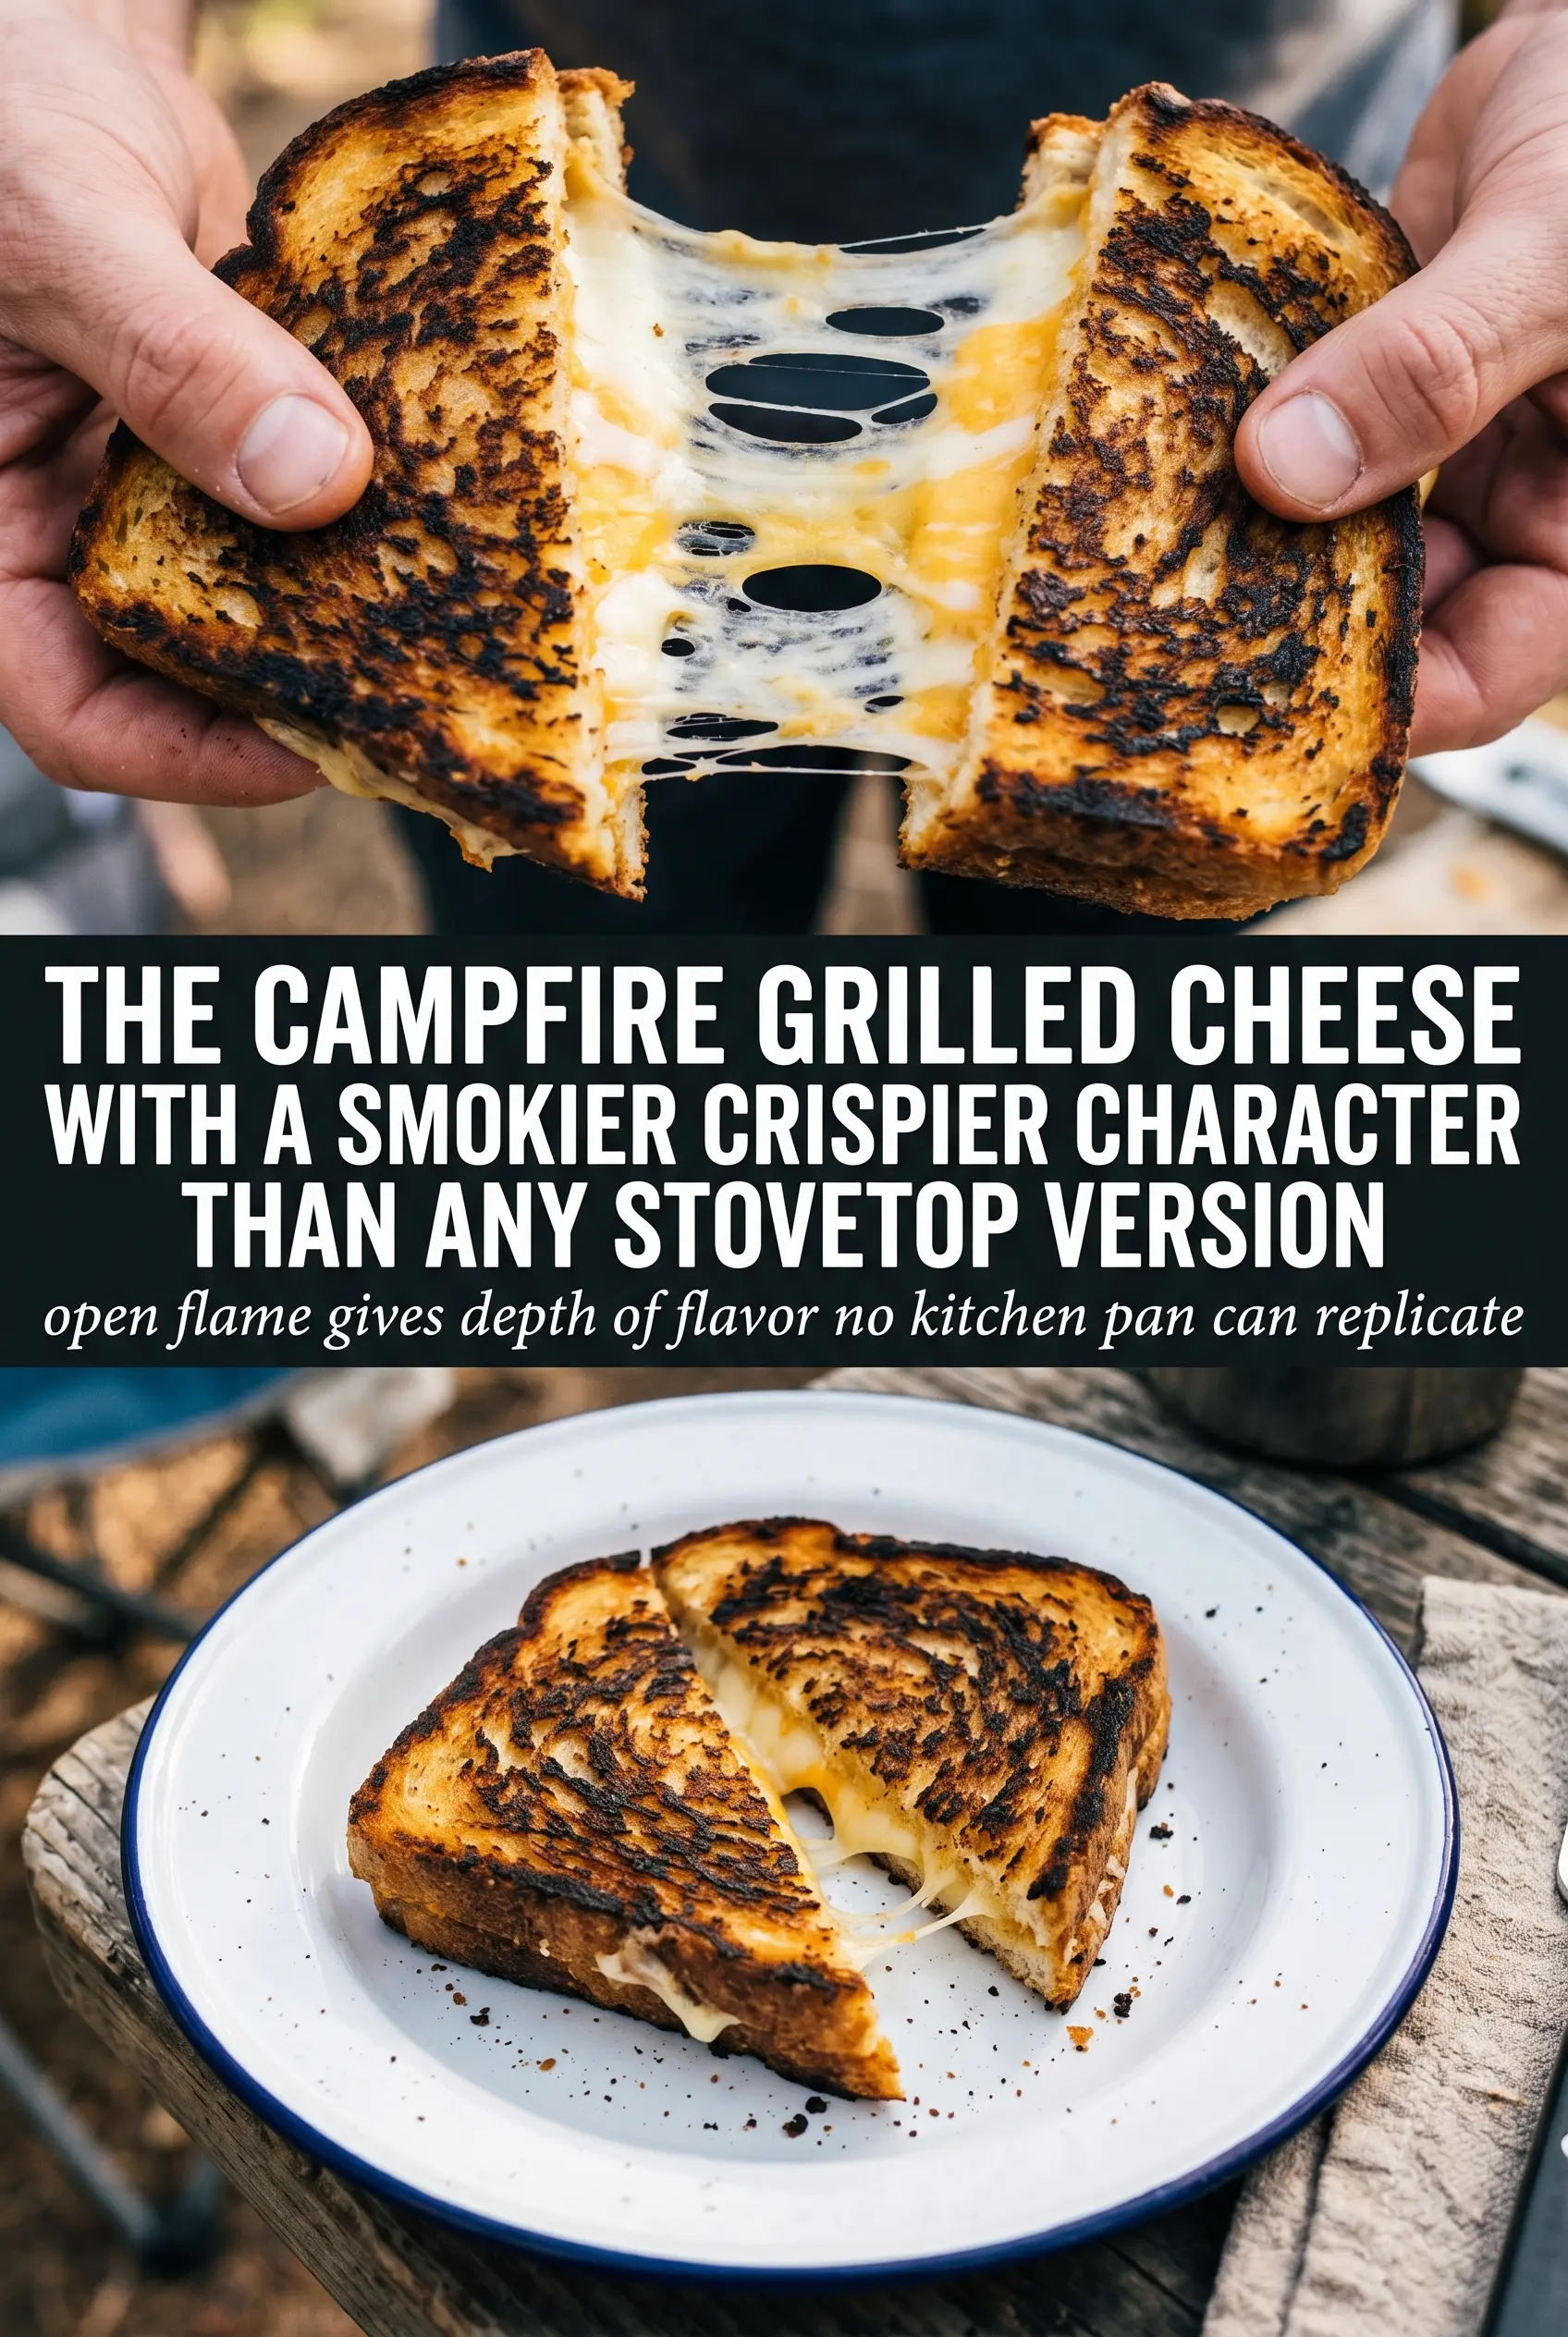
The Part That Keeps Campfire Grilled Cheese From Burning Before the Cheese Melts
The mistake most people make is parking the sandwich directly over lively flames. Bread browns fast over a fire, but cheese needs a little more time than that. Use medium heat over glowing coals or a skillet set on a grate, and give the sandwich room to cook gradually. If the bread is getting dark too quickly, move it off the hottest spot instead of flipping it over and over.
Butter on the outside does more than add flavor. It creates a barrier that helps the bread toast evenly and keeps the crust from turning dry while the cheese finishes melting. Slice the cheese thin enough that it softens all the way through in the same window that the bread turns golden. Thick slabs stay stubborn in the center, which is how you end up with toasted bread and a cold middle.
What Each Ingredient Is Actually Doing in This Sandwich
- Bread — A sturdy sandwich bread gives you the best balance of crunch and structure. Thin, soft bread can tear when you flip it, especially if the cheese starts to soften before the crust sets. Sourdough works well if you want more tang and a sturdier bite, but sandwich bread is the easiest path to an even golden finish.
- Cheese — American melts most smoothly, cheddar adds sharper flavor, and Swiss gives a nutty, mellow melt. The best result comes from slicing or stacking the cheese so it covers the bread edge to edge without huge gaps. If you use a firm cheddar, blend it with a meltier cheese so the center goes fully gooey before the bread overbrowns.
- Butter — Softened butter spreads in a thin, even layer and helps the outside cook into a crisp, rich crust. Cold butter tears the bread and leaves bare spots that toast unevenly. If you’re cooking for a crowd at camp, softened butter is worth packing because it makes assembly much faster.
How to Cook It So the Bread Browns First and the Cheese Follows
Build the Sandwich Carefully
Spread butter on one side of each bread slice, all the way to the edges. The outside needs full coverage or you’ll get pale patches that never crisp. Put the cheese between the unbuttered sides, then press the sandwich lightly so the layers sit flat and the filling is even. If the sandwich feels bulky, trim the cheese rather than forcing it to cook through a tall stack.
Set the Heat Before the Sandwich Goes On
Place the skillet or grate over medium heat, not roaring flames. You want steady heat that gives the bread time to turn golden while the cheese softens underneath. If you hear aggressive sputtering or smell the butter darkening almost immediately, the heat is too high and the outside will outrun the center. Let the fire calm down before you start cooking.
Cook Slowly and Watch the Edges
Lay the sandwich down and leave it alone for 4 to 5 minutes on the first side. Peek at the bottom edge before you flip; it should be a deep golden brown, not light tan. The sandwich is ready to turn when the bread releases easily and the cheese inside starts to look soft and slightly swollen. If you force the flip too early, the filling shifts and leaks.
Finish the Melt Without Scorching the Crust
After flipping, cook the second side until it matches the first and the cheese is fully melted. Pressing the sandwich with a spatula is fine if you do it lightly; smash it and the cheese squeezes out. Pull it off the heat when both sides are crisp and the center feels soft when you tap the top. Let it sit for a minute before cutting so the cheese settles instead of running out immediately.
How to Adapt Campfire Grilled Cheese When You Pack Different Ingredients
Dairy-Free Version
Use a plant-based butter and a dairy-free melt cheese that’s built for sandwiches, not a crumbly block-style alternative. The texture will be slightly softer and the flavor less rich, but the browning and cheese pull still work if you keep the heat moderate. Don’t cook it too fast, because dairy-free cheese needs a little more time to soften evenly.
Gluten-Free Bread Swap
Choose a gluten-free sandwich bread that toasts well and holds together when flipped. Many gluten-free breads brown faster and can dry out, so keep the heat a touch lower and watch the first side closely. A sturdier loaf gives you the best chance at a crisp crust without crumbling at the edges.
Add-Ins That Travel Well
Thin tomato slices, cooked bacon, or a little sliced ham work well here, but keep the filling light. Too much filling makes the sandwich harder to flip and slows the melt in the center. If you add juicy ingredients like tomato, pat them dry first so the bread stays crisp instead of steaming.
For a Sharper Cheese Flavor
Mix cheddar with a small amount of Swiss or American to keep the melt smooth while adding more depth. Sharp cheddar alone can tighten up before it gets fully gooey, especially over camp heat. Blending cheeses gives you better texture and a stronger flavor without making the sandwich fussy.
Storage and Reheating
- Refrigerator: Store leftovers for up to 2 days wrapped tightly. The bread will soften, but it still reheats well.
- Freezer: Freezing isn’t the best choice here. The bread turns a little soggy after thawing and the cheese texture loses that clean melt.
- Reheating: Reheat in a skillet over low to medium-low heat until the bread crisps again and the center warms through. The common mistake is blasting it in a hot pan, which burns the outside before the cheese loosens up.
Questions I Get Asked About This Recipe
Campfire Grilled Cheese
Ingredients
Equipment
Method
- Butter one side of each bread slice generously so the outside browns as it cooks.
- Place cheese between two slices of bread with butter on the outside to form 4 sandwiches.
- Place the sandwiches on a campfire grate or in a cast iron skillet over medium heat, keeping them centered so the heat reaches the edges.
- Cook for 4-5 minutes per side until the bread is golden brown and the cheese is melted, flipping once for even browning.
- Remove from heat, cut in half, and serve hot so you get a visible cheese pull when it’s opened.