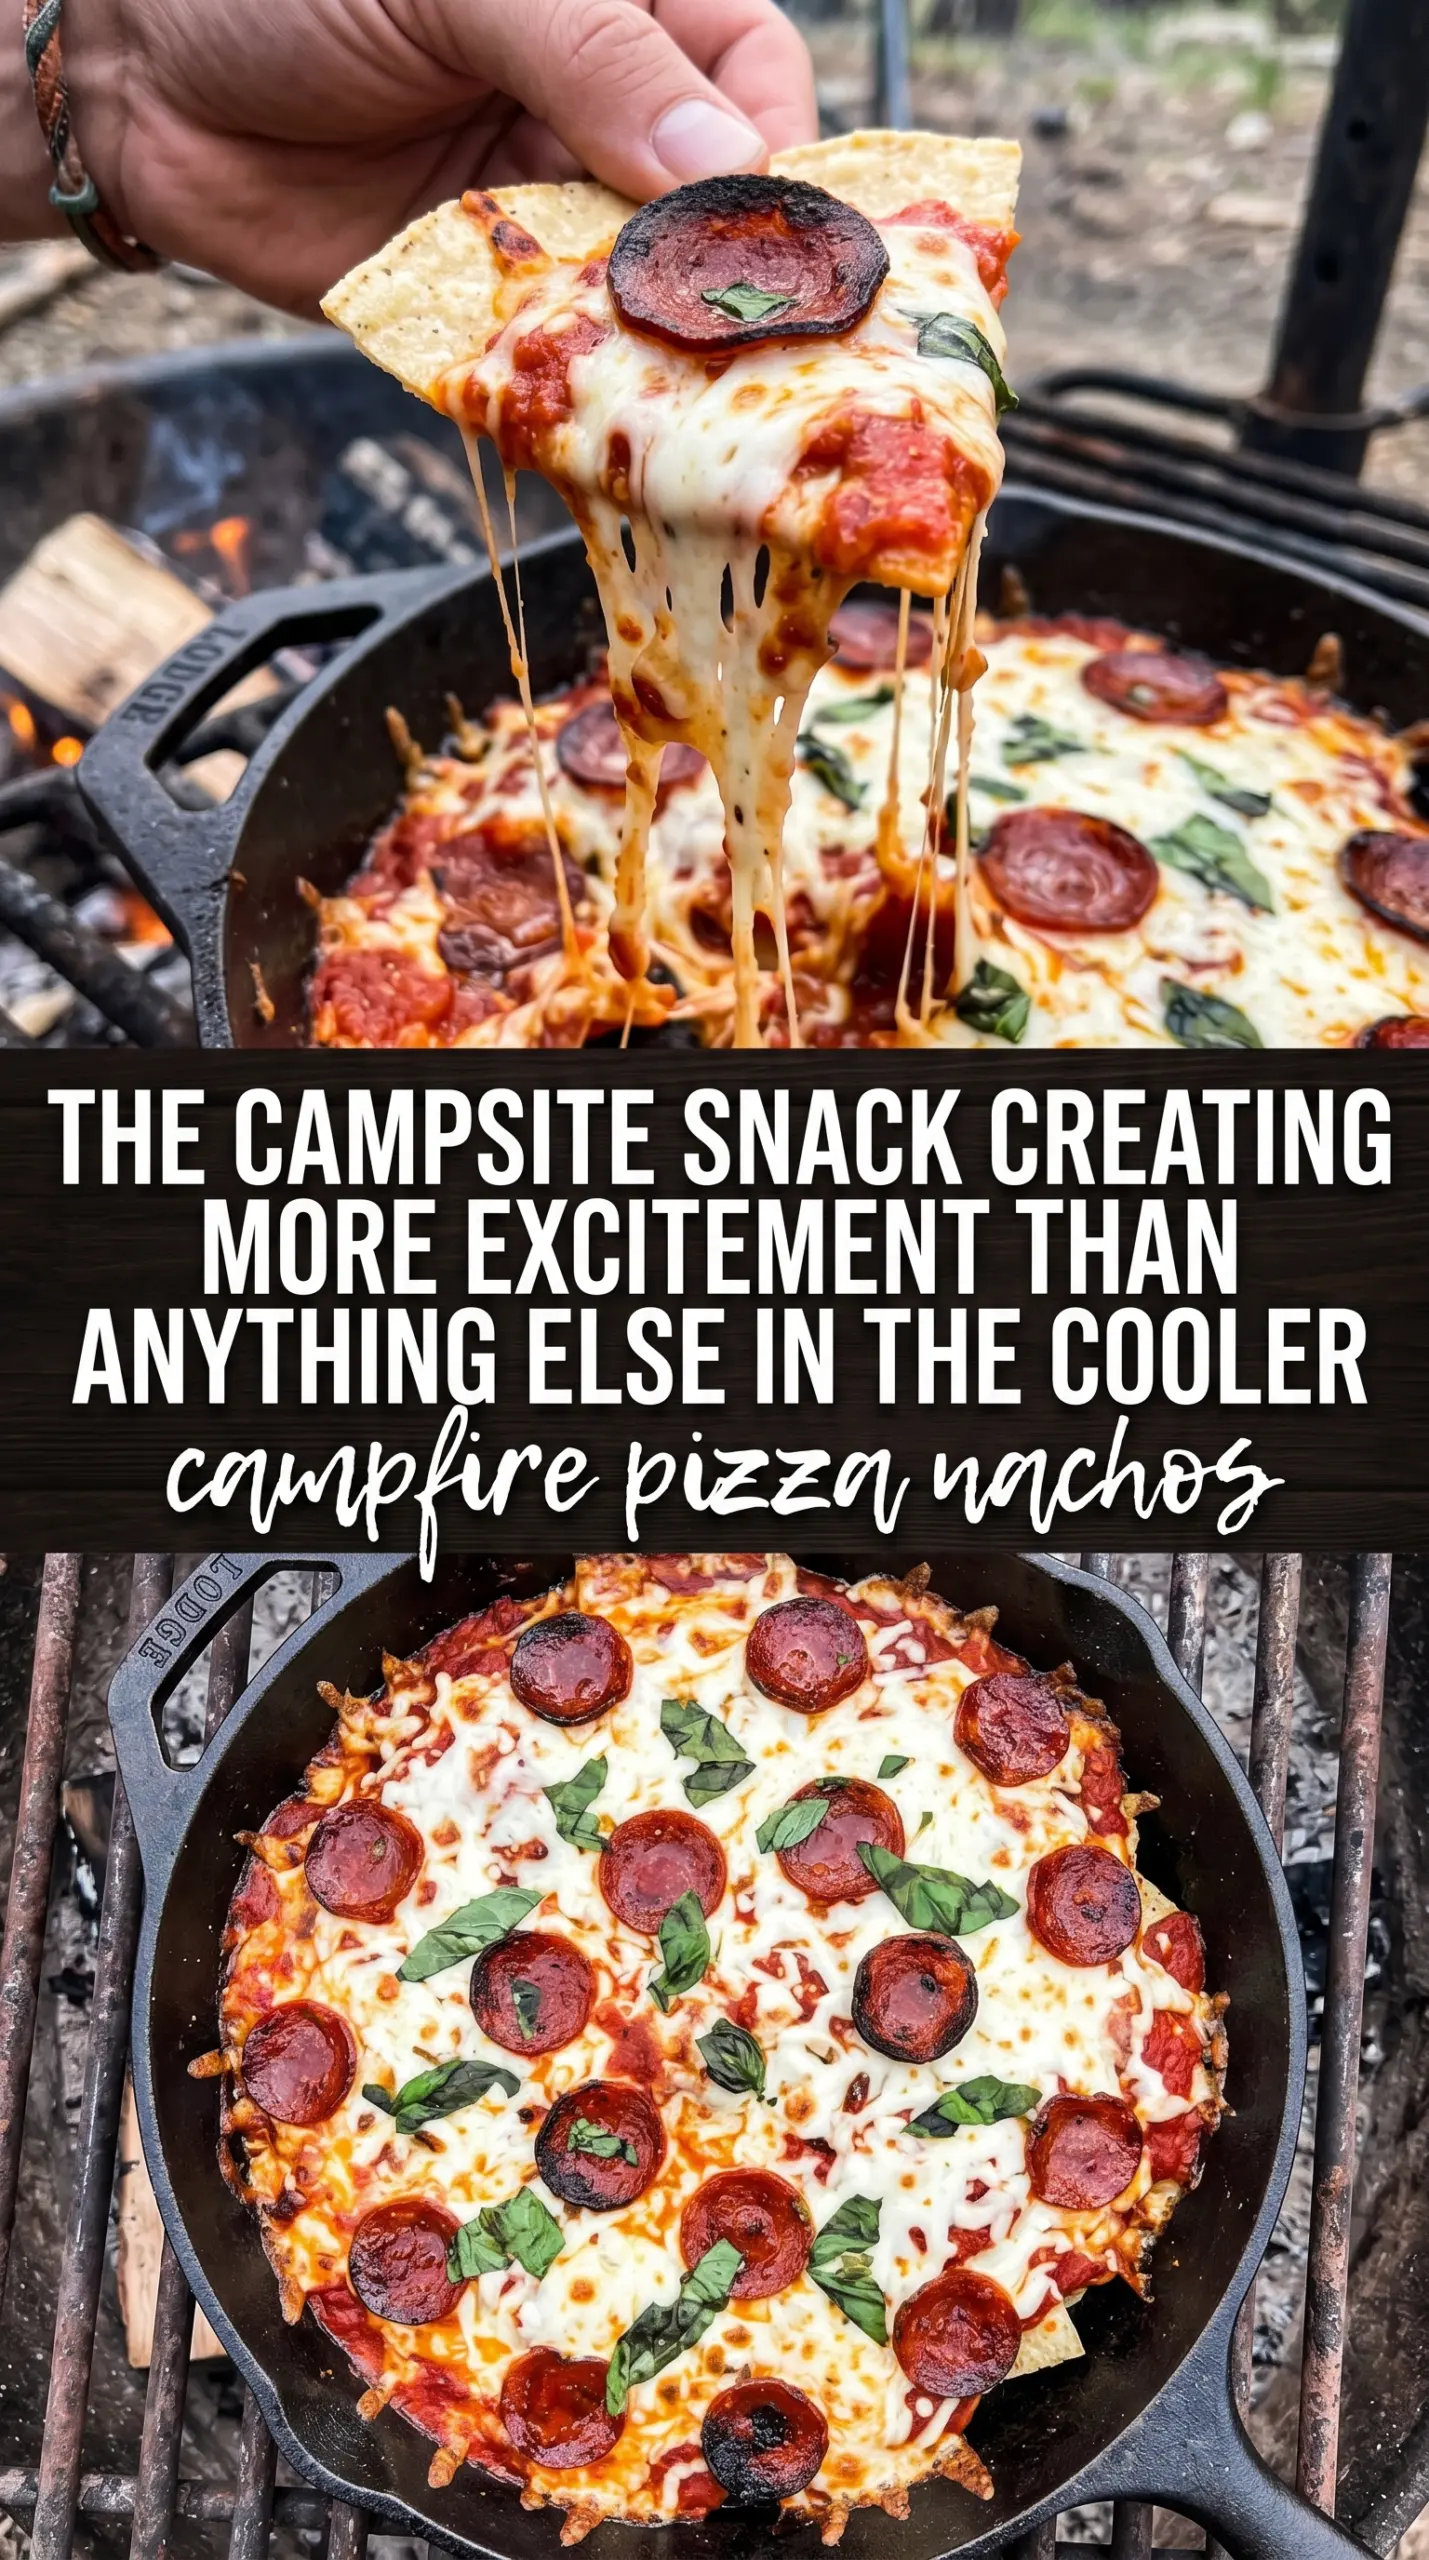
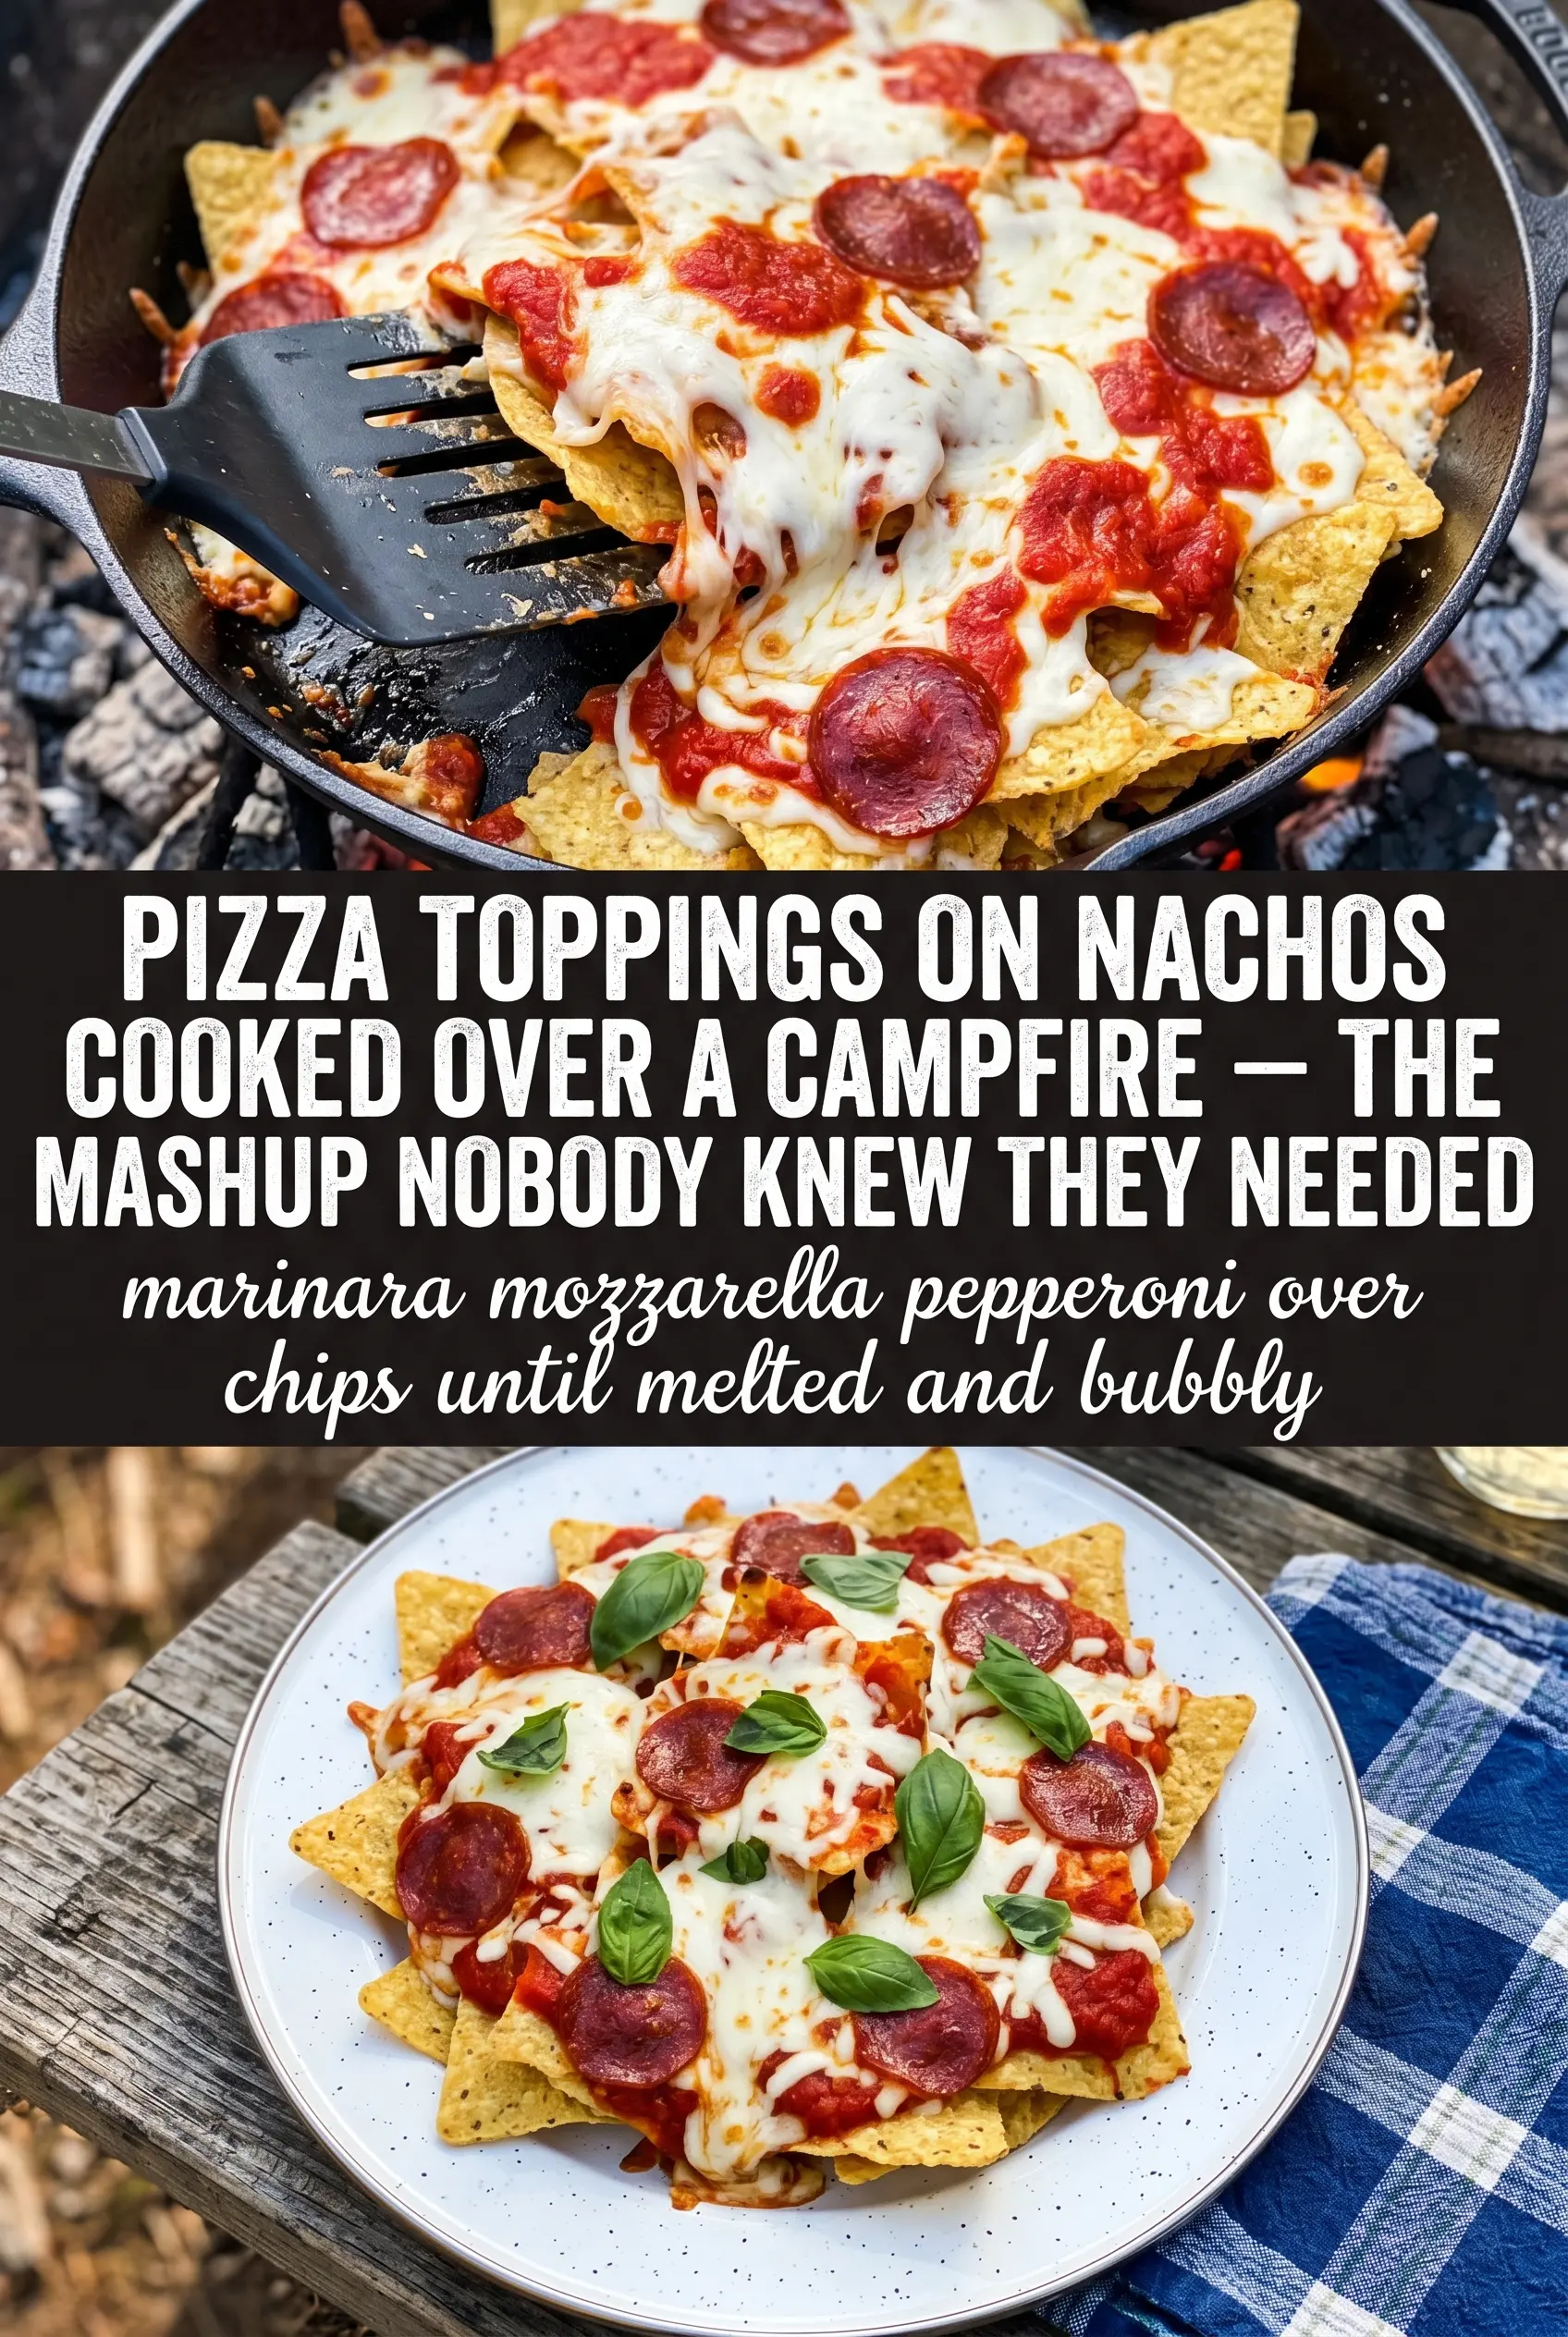
Tortilla chips, melted mozzarella, and pepperoni turn into the kind of campfire snack people hover around before the pan even leaves the fire. These pizza nachos hit that sweet spot between messy and practical: crisp enough at the edges, gooey in the middle, and loaded with the toppings that make pizza feel familiar even when it’s cooked outdoors. The pizza sauce on the side keeps the chips from going soft too fast, which matters more here than it would in an oven-baked version.
The trick is layering in two rounds instead of dumping everything on top at once. That gives you pockets of cheese throughout the pan, so the bottom chips aren’t just along for the ride. A disposable aluminum pan helps the heat move evenly and makes cleanup painless, and pre-cooked sausage is the right move because the campfire is only doing the melting and finishing, not the full cook.
Below, I’ve included the small things that keep these from turning into a greasy pile, plus a few smart swaps for making them your own around the fire.
The One Move That Keeps Campfire Nachos Crisp Instead of Soggy
Nachos cooked over a fire can go wrong fast when the chips sit under wet toppings for too long. The fix is simple: build them in layers and keep the pizza sauce on the side. That way the chips stay crunchy, the cheese melts into the gaps, and nobody ends up with a pan of soft, collapsed tortillas.
The other thing that matters is heat control. Medium campfire heat gives you melted cheese without scorching the bottom layer before the top even warms through. If the flames are licking the pan, the chips at the edge will brown before the center is ready. You want steady heat and a lid or foil only if your fire is running hot enough to threaten the cheese before it melts.
- Tortilla chips Sturdy restaurant-style chips hold up best here. Thin chips break down fast once the cheese starts melting, so pick a chip with some backbone.
- Mozzarella Low-moisture shredded mozzarella gives you the best stretch. Pre-shredded is fine, though freshly shredded melts a little smoother if you’ve got the time.
- Pizza sauce Keep it for dipping, not layering. Once sauce goes under the cheese, it starts softening the chips almost immediately.
- Italian sausage Cook it all the way through before it hits the pan. Raw sausage won’t have time to finish properly over campfire heat.
- Parmesan A light sprinkle adds salt and a little sharpness. It’s not there for melt; it’s there for that pizza-shop finish.
What Each Ingredient Is Actually Doing in Campfire Pizza Nachos
- Protein (quality, proper thickness) Good quality protein tastes better. Even thickness ensures even cooking.
- Seasoning (bold, distributed throughout) Don’t be shy with salt and pepper. Quality seasoning elevates everything.
- Oil or fat (protective and flavorful) The fat helps develop crust and carries flavors. Use generously.
- Heat management (appropriate temperature for the protein) Too high and the outside burns before the inside cooks. Too low and it steams.
- Technique (sear, then finish based on thickness) Proper technique creates flavor. Sear for crust, then cook through gently.
- Aromatics and seasonings (garlic, herbs, spices) These add complexity and depth. Distribute them throughout the cooking process.
- Resting time (let it rest before serving) Resting allows juices to reabsorb. This keeps the protein moist and tender.
- Optional: finishing sauce or glaze A light sauce adds richness without overwhelming. Apply at the very end.
Layering the Pan So Every Chip Gets Some Cheese
Building the First Base
Start with half the chips in a disposable aluminum pan, then scatter half the cheese and toppings over them. Don’t pile everything into one thick mound or the heat will only melt the top while the bottom stays dry. The first layer should look uneven on purpose, with some chips peeking through so the toppings can settle between them.
Repeating the Layers
Add the second half of the chips and repeat the toppings. This is what keeps the pan from eating like a giant top layer and a sad bare bottom. If you have a few chips that are already broken, tuck them toward the middle where the cheese can glue them together instead of letting them burn at the edge.
Melting Over the Fire
Set the pan on a grill grate over medium campfire heat and cook for 8 to 10 minutes. Watch for the cheese to melt fully and look glossy, with a few spots bubbling at the edges. If the bottom starts to char before the cheese is loose and stretchy, lift the pan a little higher from the heat or move it to a cooler part of the grate.
Finishing and Serving
Pull the pan off the fire as soon as the mozzarella is melted and the pepperoni has curled. Let it sit for a minute so the cheese settles; straight off the fire, it can slide everywhere the second someone scoops in. Serve with warm pizza sauce on the side so people can dip without turning the whole pan into mush.
Make It Meat-Only for a Heavier Crowd
Skip the bell peppers and olives and double the pepperoni and sausage. The result is richer and saltier, with less moisture in the pan, which also helps the chips stay firmer a little longer over the fire.
Vegetarian Campfire Pizza Nachos
Leave out the pepperoni and sausage and add more peppers, olives, or mushrooms that have been pre-cooked and drained. The flavor stays bold, but you’ll want to keep an eye on moisture so the chips don’t soften before the cheese melts.
Gluten-Free and Naturally Outdoor-Friendly
Use certified gluten-free tortilla chips and check that your sausage and pizza sauce are gluten-free too. The method doesn’t change, and this version keeps the same crisp edges and stretchy cheese without any extra fuss.
Storage and Reheating
- Refrigerator: Store leftovers in an airtight container for up to 2 days. The chips will soften, but the flavor still holds.
- Freezer: I don’t recommend freezing these. The chips and melted cheese don’t thaw back into a good texture.
- Reheating: Warm leftovers in a skillet or on a sheet pan in a hot oven until the cheese loosens again. The common mistake is microwaving them, which turns the chips chewy and unevenly heats the toppings.
Answers to the Questions Worth Asking
Campfire Pizza Nachos
Ingredients
Equipment
Method
- Spread half the tortilla chips in a disposable aluminum pan to form an even base layer. Keep chips loose so they stay crunchy at the edges.
- Layer with half the mozzarella, pepperoni slices, Italian sausage, black olives, and diced bell peppers. Distribute toppings evenly so every scoop has melt and flavor.
- Add remaining chips and repeat toppings with the rest of the mozzarella and pizza toppings. Press lightly only if needed to help toppings adhere.
- Sprinkle with Parmesan cheese and Italian seasoning over the top layer. Make sure the seasoning reaches the corners of the pan.
- Place the pan on the grill grate over medium campfire heat and cook for 8-10 minutes. Look for melted, bubbling cheese with visible stretch and pepperoni starting to curl.
- Remove from the heat and serve immediately with warm pizza sauce for dipping. Plate carefully since the chips will be hot and the cheese will be molten.