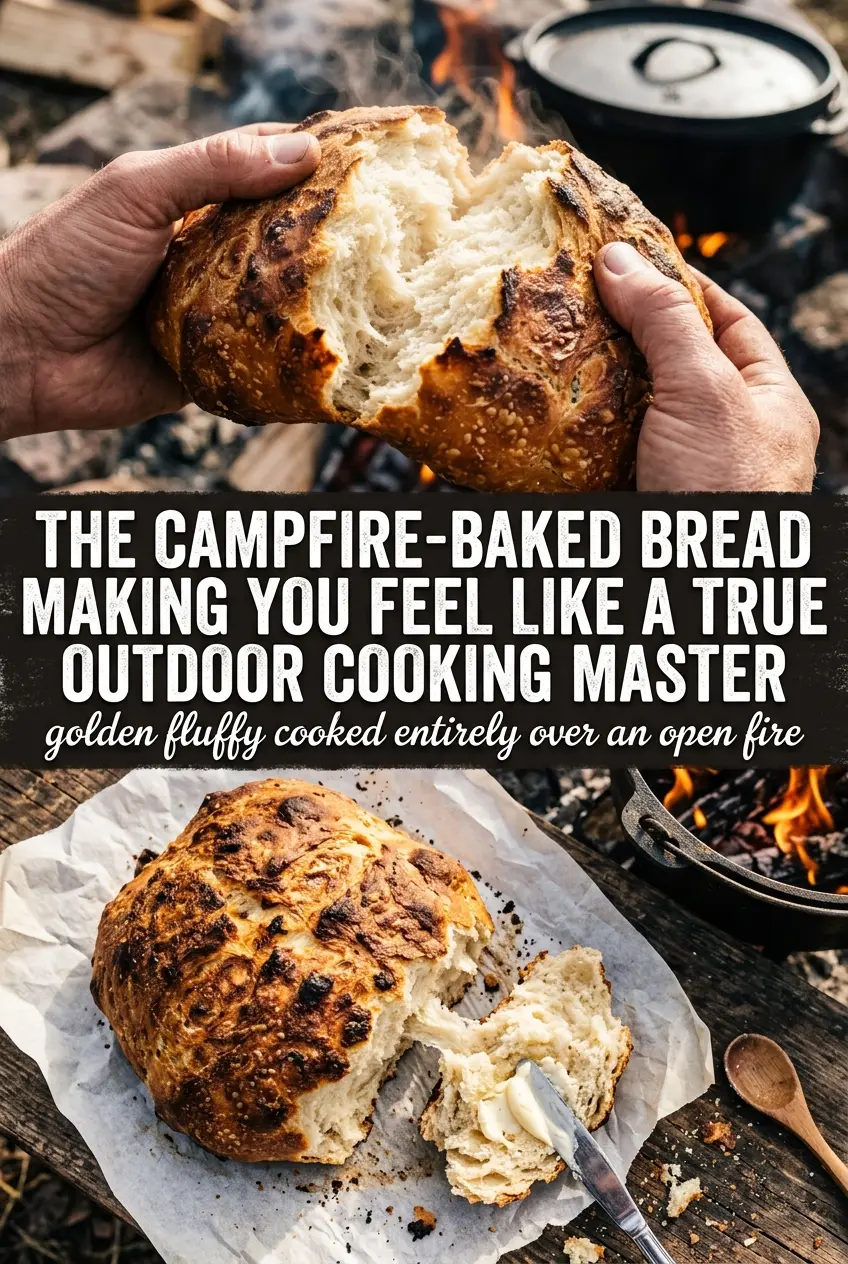
Fluffy campfire bread comes off the fire with a crisp, golden outside and a soft, steamy center that pulls apart in warm layers. It’s the kind of bread that disappears fast because it feels a little special even though the ingredient list is basic pantry stuff.
The texture depends on keeping the dough just mixed and the fire at coals, not licking flames. Too much kneading makes the bread tight. Too much direct heat burns the outside before the middle has time to cook, so the sweet spot is a steady rotation over glowing embers until the crust is evenly browned and the dough sounds hollow when tapped.
Below, I’ll show you the small adjustments that make stick bread cook evenly, plus the one thing that helps the dough stay easy to handle when you’re shaping it outdoors.
The dough came together fast in the bag, and the bread cooked up with a fluffy middle instead of a raw, doughy center. Rotating it over the coals made the crust even all the way around.
Save this fluffy campfire bread for your next night around the fire when you want a crisp, golden crust and a soft center on a stick.
The Reason Campfire Bread Cooks Evenly Instead of Burning on the Outside
The biggest mistake with stick bread is holding it too close to flames. The outside turns dark before the center has a chance to set, and then you end up peeling off charred edges to find wet dough underneath. Coals give you gentler, steadier heat, which is what this bread needs to puff and bake through at the same pace.
This dough also stays tender because it’s enriched with butter and milk, but it still depends on a light touch. Stir it just until it comes together. Once the flour hydrates, stop. Overworking it makes the bread tougher and harder to wrap cleanly around the stick.
What the Flour, Butter, and Milk Are Doing Here

- All-purpose flour — This gives the bread enough structure to hold its shape on the stick without turning dense. Bread flour makes a chewier dough, which isn’t what you want here.
- Baking powder — This is the lift. Since there’s no yeast or long rise, baking powder is what keeps the interior light instead of flat and gummy.
- Butter — Melted butter adds richness and helps the dough brown. You can use oil in a pinch, but the bread loses that soft, bakery-style flavor.
- Milk — Milk makes the dough more supple than water would. If you need a substitute, use any unsweetened milk you have on hand and keep the dough soft but not sticky.
- Sugar — Just enough sugar helps the crust brown and gives the bread that lightly sweet campfire taste. It’s not enough to make the dough taste like dessert.
- Roasting sticks — A clean, sturdy stick matters because the dough wraps and releases more easily. If you’re using wooden skewers, soak them first so they don’t scorch.
How to Shape and Roast the Dough So It Cooks Through
Mixing the Dough Without Overdoing It
Put the dry ingredients in a zip-top bag, add the melted butter and milk, then knead just until you don’t see dry flour anymore. The dough should feel soft and a little tacky, not wet enough to smear inside the bag. If it feels stiff, add a splash more milk; if it feels sticky, dust in a little flour. The goal is a dough that rolls cleanly without snapping back too much.
Wrapping the Rope Around the Stick
Divide the dough into equal pieces and roll each one into a long rope. Wrap it around the end of the stick with a little overlap, pressing the seams gently so it clings while it bakes. If the rope is too thick, the center stays doughy; if it’s too thin, it dries out before the outside browns. Even thickness is what gives you that fluffy middle and crusty shell.
Roasting Over Coals, Not Flames
Hold the bread over glowing coals and keep it moving. Slow rotation is what builds an even crust instead of one burnt stripe. In about 10 to 12 minutes, the outside should be deep golden and the dough should feel set all the way around. If the crust darkens too fast, lift it farther from the heat and keep turning until the center cooks through.
Sliding It Off and Serving It Warm
Let the bread cool just enough to handle, then slide it off the stick while it’s still warm. That’s when the texture is best — crisp outside, soft inside, and easy to split open for butter, jam, or honey. If you wait too long, the crust can firm up around the stick and make removal messy.
How to Change Campfire Bread for Different Camps and Different Eaters
Dairy-Free Version
Swap the butter for melted plant-based butter or a neutral oil, and use an unsweetened non-dairy milk. Oil makes the crust a little less rich, while plant-based butter keeps the closest flavor and browning. The dough still needs to stay soft, so add the milk gradually.
Sweeter Breakfast-Style Bread
Add another tablespoon of sugar and serve it with butter and honey. The crust will brown a little faster, so keep the bread farther from the hottest coals. This version leans more toward a sweet breakfast bun than a classic savory camp bread.
Savory Herb Twist
Mix dried rosemary, garlic powder, or shredded parmesan into the dry ingredients. Herbs and cheese work best when added before the liquid so they distribute evenly through the dough. This turns the bread into a better side for soup, chili, or grilled meat.
Gluten-Free Swap
Use a cup-for-cup gluten-free flour blend that includes xanthan gum. The dough may be a little more delicate, so handle it gently when shaping and keep the ropes slightly thicker for support. The texture will be softer and a touch more crumbly than the original, but it still works well over coals.
Storage and Reheating
- Refrigerator: Store leftover bread in an airtight container for up to 2 days. It softens as it sits, so the crust won’t stay crisp.
- Freezer: Freeze fully cooled bread wrapped tightly for up to 1 month. Thaw before reheating so the center warms evenly.
- Reheating: Warm it in a 325°F oven for a few minutes or over very low heat near coals. High heat dries the bread out fast and can make the outside tough before the middle warms.
Questions I Get Asked About This Recipe
Fluffy Campfire Bread
Ingredients
Method
- Combine all-purpose flour, baking powder, salt, and sugar in a large zip-top bag, squeezing out large lumps as you mix. Keep the mixture dry and evenly colored so the dough rises uniformly.
- Add the melted butter and milk to the bag, seal it, and knead until a cohesive dough forms. The dough should feel soft and slightly tacky, pulling together as you knead.
- Divide the dough into 8 portions. Each portion should be roughly equal so the stick bread finishes at the same time.
- Roll each portion into a long rope and wrap it around the end of a roasting stick. Leave a tight spiral with no big gaps so the bread cooks through.
- Hold each stick over campfire coals and rotate constantly for 10-12 minutes until golden brown and cooked through. Look for a crisp, browned exterior while the center stays fluffy when pulled apart.
- Slide the bread off the stick and serve warm. The bread should release cleanly and be airy inside with a crusty outer layer.