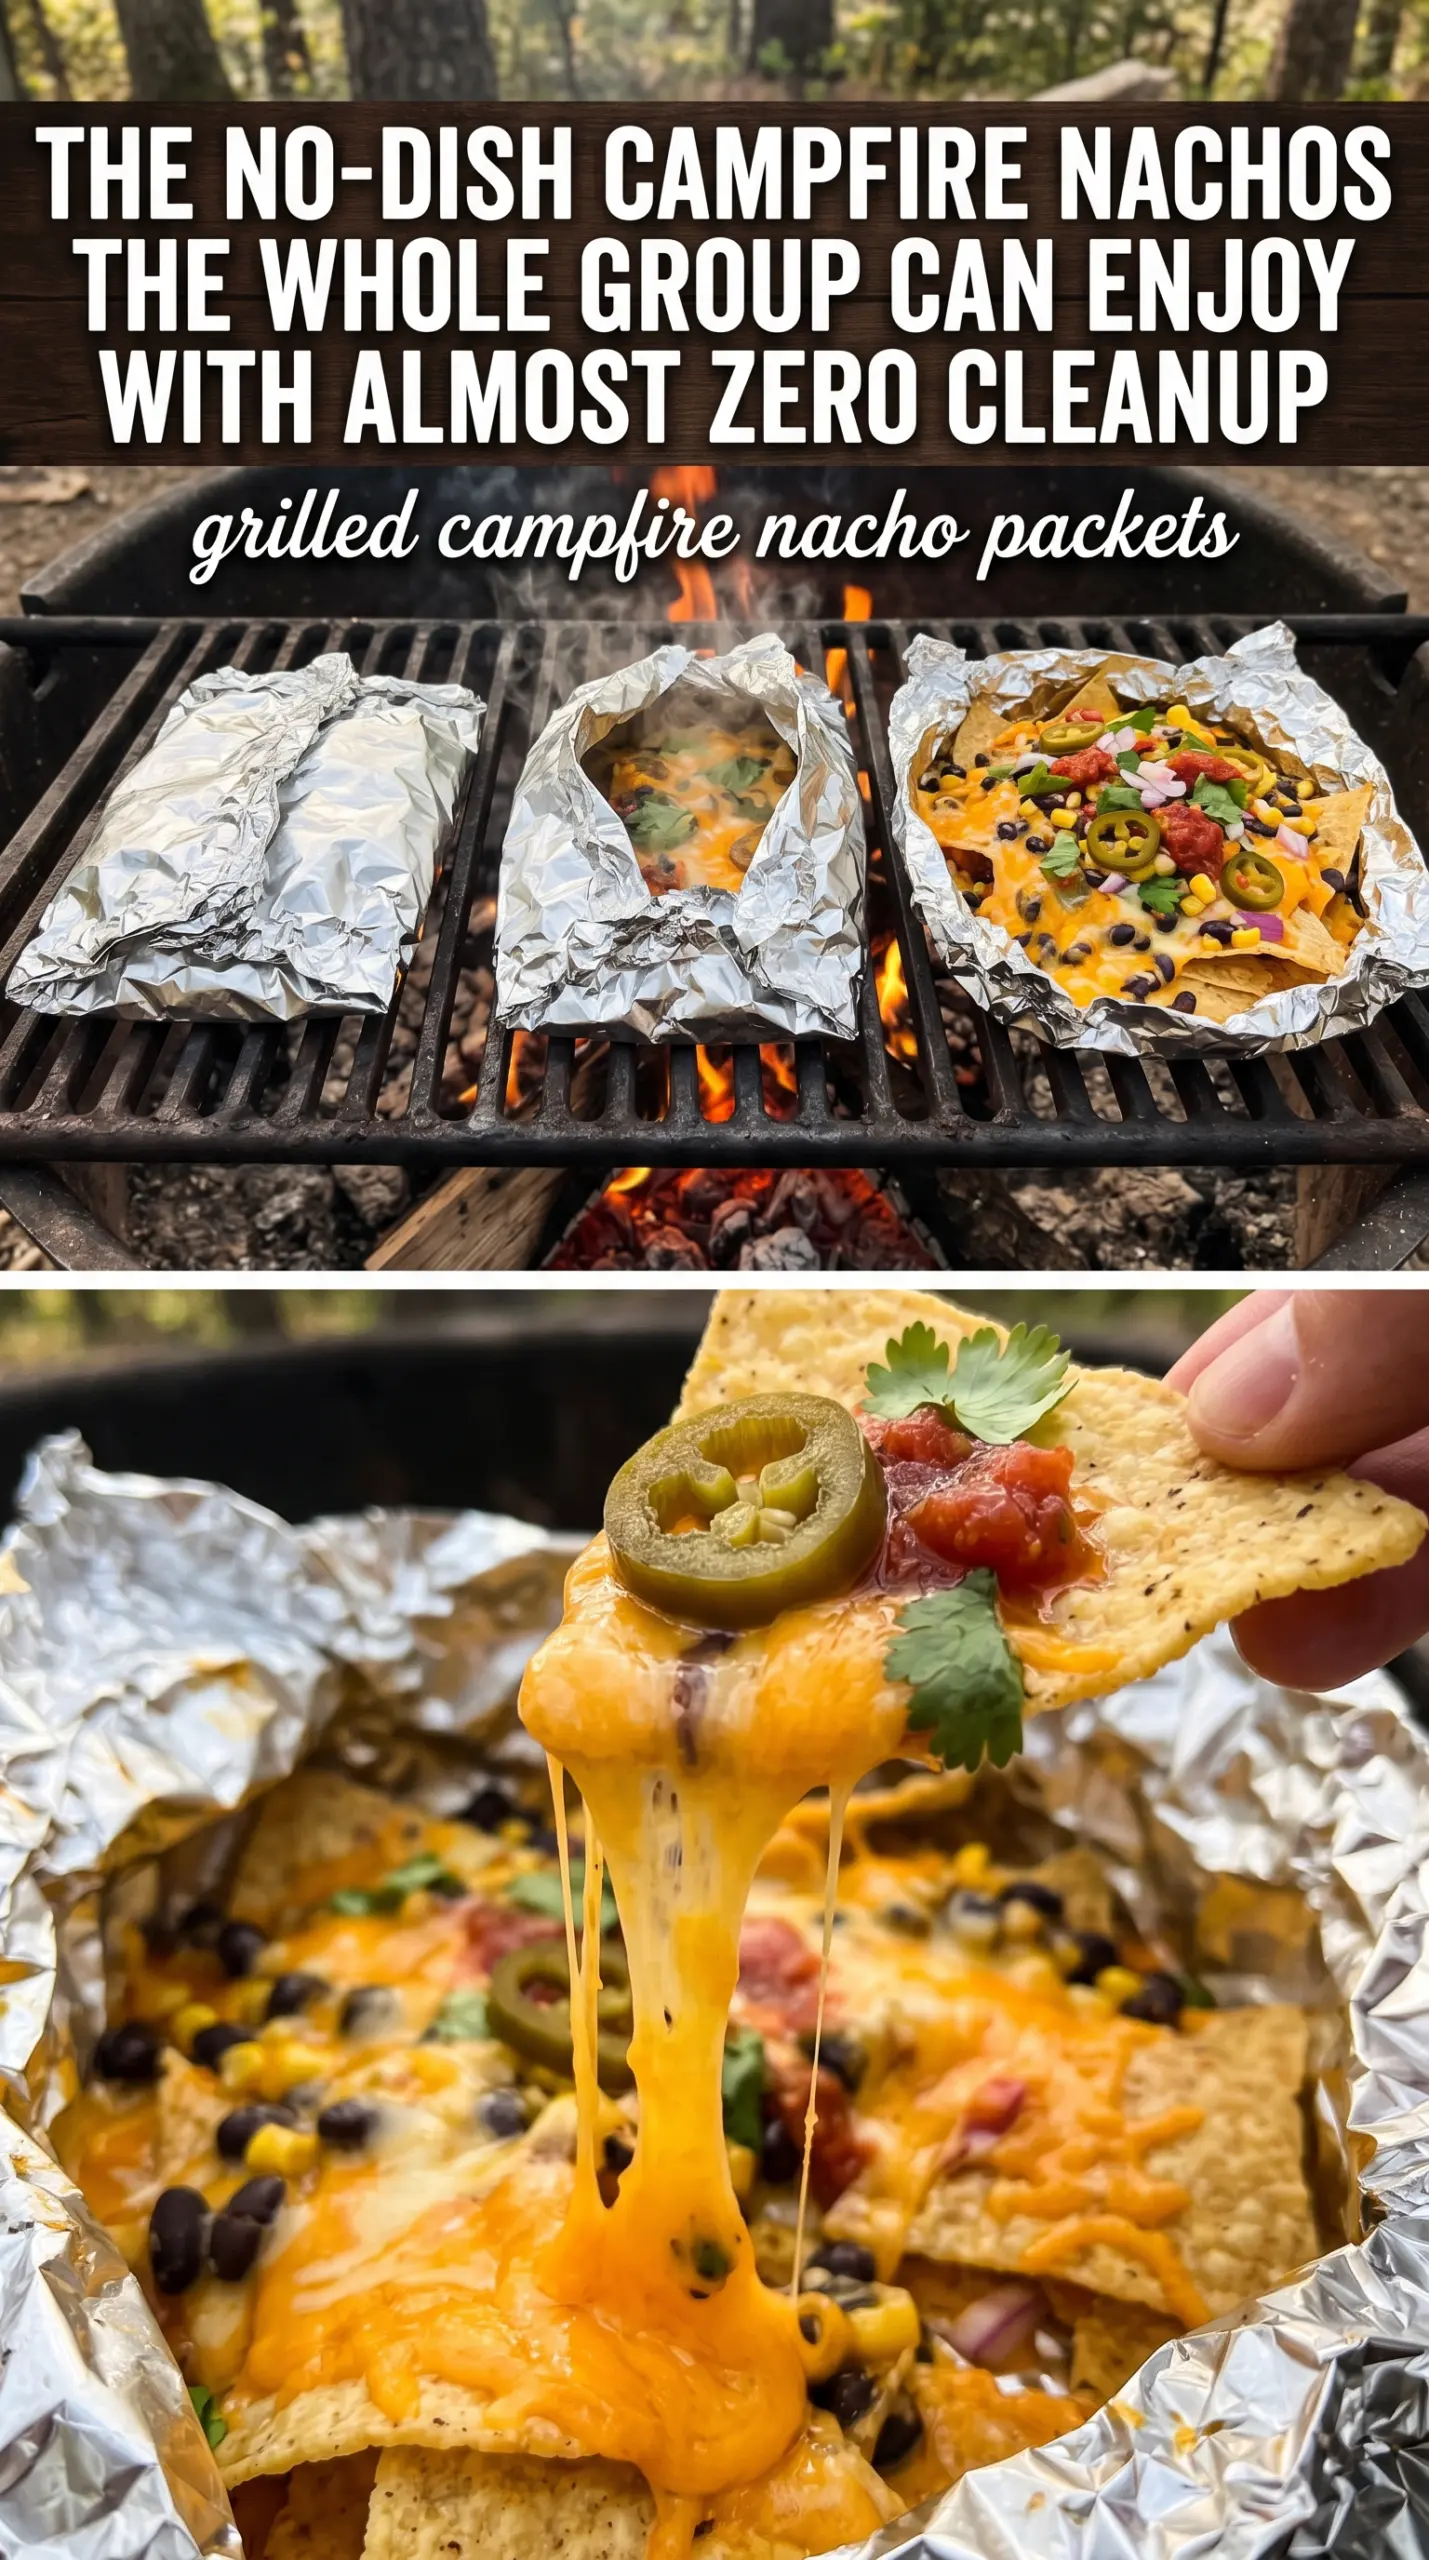
Grilled campfire nacho packets hit the sweet spot between smoky, melty, and a little bit messy in the best possible way. The chips soften just enough under the cheese and toppings to turn into something closer to loaded nachos than a pile of snacks, while the foil keeps everything contained until the second you open the packet.
What makes this version work is the layering. The chips go in first so they catch melted cheese and juices instead of sitting directly against the foil, and the packets stay loosely sealed so the heat can circulate without steaming everything into one soggy sheet. Heavy-duty foil matters here, because thin foil tears when you try to open a packet full of hot chips and bubbling cheese.
Below, I’ve included the small details that keep the packets from burning, plus a few swaps for making them meatless or scaling them up for a crowd. If you’ve ever lost half your nachos to the grill grate, this method fixes that problem fast.
Save these grilled campfire nacho packets for smoky foil-packet nachos with melty cheese and easy cleanup.
The Trick to Keeping Campfire Nachos Crispy Enough to Eat
Nacho packets fail when the chips sit in direct contact with moisture for too long. Beans, salsa, and even the steam from melting cheese can turn the bottom layer soft fast, which is why the order matters more here than it does in a sheet-pan version. The goal is not to keep every chip shatter-crisp; it is to protect enough texture that the packet still eats like nachos instead of dip.
Medium heat is the other piece people miss. Campfire grates run hotter than they look, and a packet set over high flame can scorch on the bottom before the cheese in the center melts. Give the packets a little space on the grate and let them cook until the foil puffs slightly and the cheese looks fully softened when you peek inside.
- Heavy-duty foil: Regular foil tears too easily when the chips press against the seams. Heavy-duty sheets hold their shape better and make the packets safer to open at the table or around the fire.
- Mexican cheese blend: A mix with Monterey Jack and cheddar melts more evenly than straight cheddar. Pre-shredded cheese works fine here because the anti-caking agents don’t matter much once the packets are sealed.
- Black beans: They add bulk and a creamy bite that balances the crunch. Drain them well so extra liquid doesn’t pool in the packet.
- Cooked ground beef or chicken: Use meat that’s already cooked and seasoned before it goes in. Raw meat won’t cook through in the short packet time, and that’s not a safe shortcut to try.
- Jalapeño slices: Fresh jalapeños bring heat without adding liquid. If you want milder nachos, remove the seeds and ribs before slicing.
What Each Ingredient Is Actually Doing in Grilled Campfire Nacho Packets
- High heat (essential for browning) High heat creates crust and caramelization. Medium heat just cooks without developing flavor.
- Oil or fat (for browning and flavor) The fat helps transfer heat and create crust. It also carries seasonings.
- Salt and seasoning (bold, applied before) Season confidently. The high heat cooking mellows flavors slightly.
- No moving it around (let it sit) The food needs time to develop crust. Constant flipping and moving prevents browning.
- Timing (watch carefully) High heat cooks fast. Check doneness frequently to avoid overcooking.
- Optional: finishing sauce or glaze Apply in the last minute for flavor without burning. Heavy sauces applied early can char.
- Resting time (5-10 minutes before serving) Resting allows juices to reabsorb. Cutting right away lets them run out.
- Optional: smoke or char flavor (if available) Wood smoke or char adds depth. Build the fire strategically for the flavor you want.
Building the Packets So the Bottom Layer Doesn’t Turn Mushy
Start with the chips, not the wet toppings
Divide the chips first so each packet gets its own base. You want a shallow layer rather than a tall mound, because stacked chips trap steam and make the center dense before the cheese finishes melting. A few broken chips are useful here since they catch the melted cheese and beans in little pockets.
Layer the cheese where it can melt into everything else
Scatter the cheese over the chips before the beans and meat go on top. That lets the cheese act like glue, holding the toppings in place and coating the chips as it melts. If the cheese goes on the very top only, it can brown before the lower layers warm through.
Seal loosely and cook over steady heat
Fold the foil into a tight packet, but leave a little room inside for steam to circulate. That trapped heat is what melts the cheese all the way through without drying out the toppings. Cook for 12 to 15 minutes over medium heat, and open one packet carefully before removing the rest if you want to check the melt before serving.
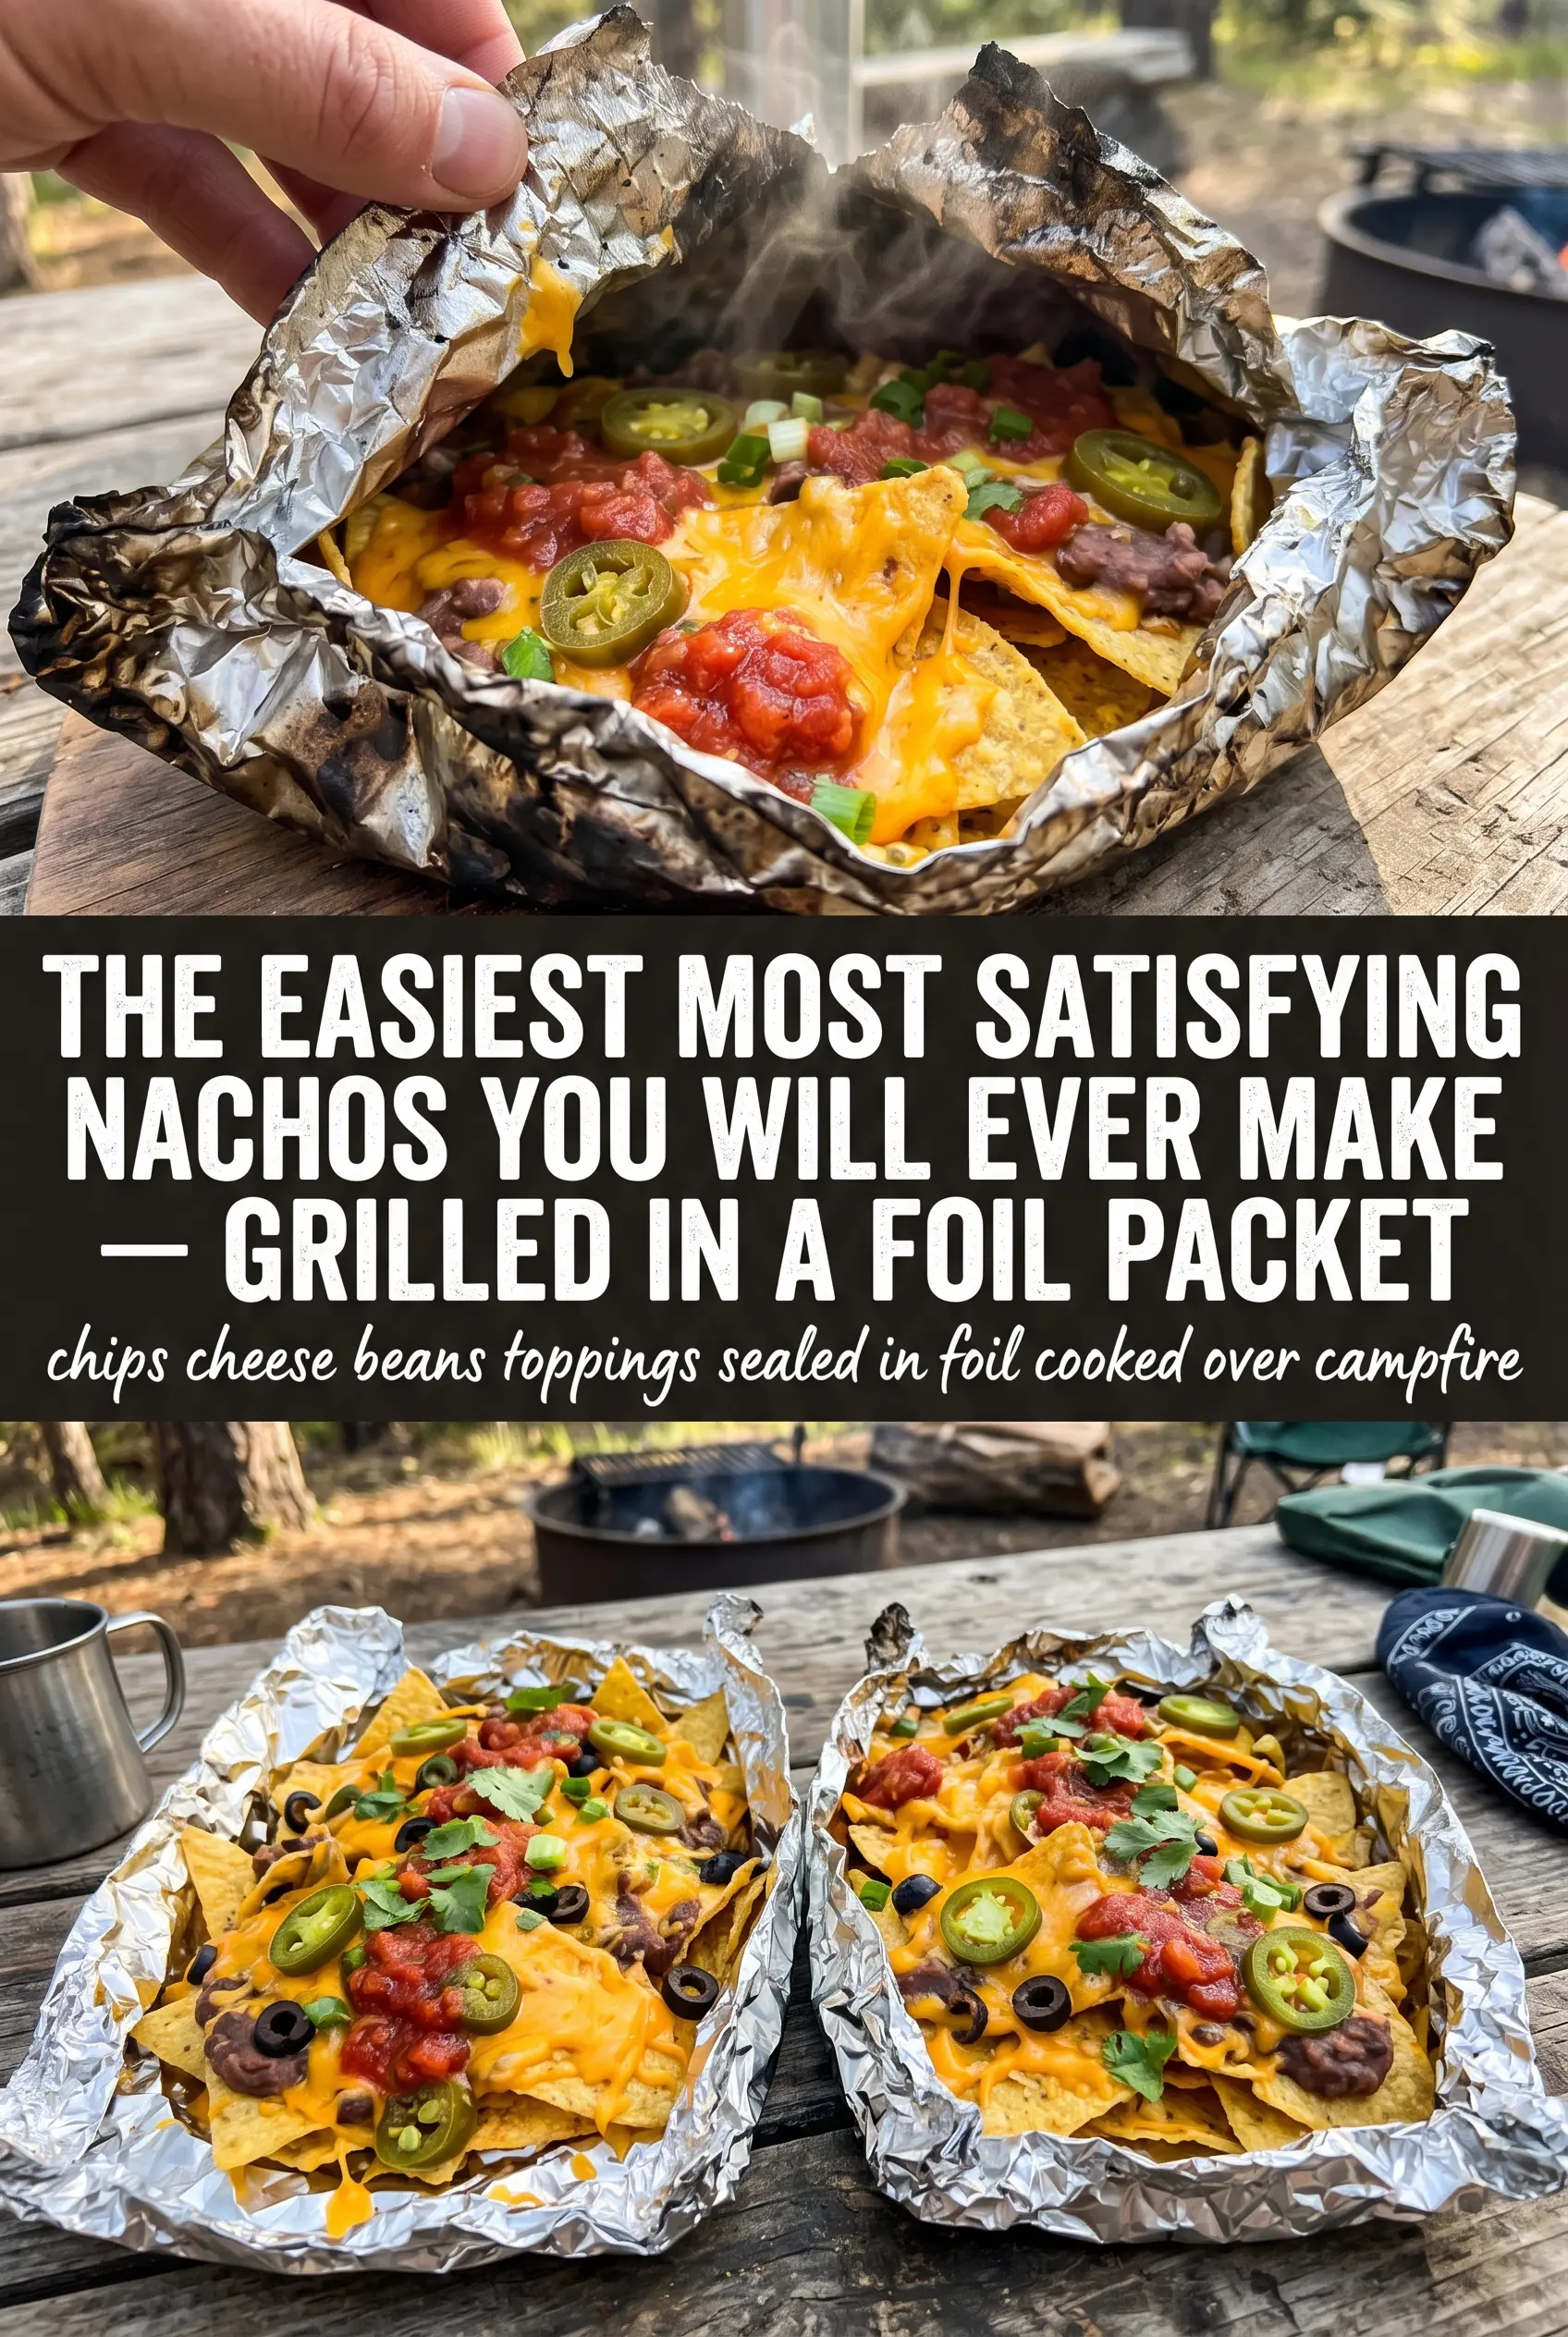
Open from the top and add the cold toppings last
Use tongs and open the packet away from your face, because the steam inside comes out fast. Once the cheese is melted and the edges of the chips have softened, spoon on salsa, sour cream, and guacamole. Those fresh toppings give the packets the contrast they need so every bite isn’t just warm, salty cheese.
Three Ways to Make These Campfire Nacho Packets Fit Your Night
Vegetarian skillet-night version
Skip the meat and add extra black beans or a handful of pinto beans. The packets still feel substantial, and the beans pick up enough seasoning from the cheese and salsa to keep them from tasting like an afterthought.
Spicier campfire nachos
Add pickled jalapeños or a pinch of crushed red pepper to the filling before sealing the packets. Pickled peppers bring sharp heat and a little tang, while fresh peppers keep the flavor cleaner and more direct.
Gluten-free by default
These packets are naturally gluten-free as long as your chips and toppings are labeled that way. It’s an easy one to serve to a mixed group because the foil keeps the gluten-free portions separate from everything else.
Make-ahead camp prep
You can portion the chips, cheese, beans, meat, and jalapeños into the foil sheets a few hours ahead, then fold and chill the packets until you’re ready to cook. Hold back the salsa, sour cream, and guacamole until serving so the chips don’t soften before they hit the fire.
Storage and Reheating
- Refrigerator: Leftovers keep for 2 days, though the chips will soften as they sit.
- Freezer: I don’t recommend freezing assembled nacho packets. The chips lose their texture and the toppings turn watery when thawed.
- Reheating: Warm leftovers in a dry skillet over medium-low heat or in a 350°F oven until the cheese remelts. Microwaving works in a pinch, but it makes the chips soft fast.
Questions I Get Asked About This Recipe
Grilled Campfire Nacho Packets
Ingredients
Equipment
Method
- Divide tortilla chips among 4 heavy-duty aluminum foil sheets, layering so each sheet gets an even portion.
- Top each portion with shredded Mexican cheese blend, black beans, cooked ground beef or chicken, and sliced jalapeño so every packet has toppings to melt.
- Fold foil into sealed packets, leaving a little space for heat circulation so the chips can crisp slightly as the cheese melts.
- Place packets on a campfire grate over medium heat for 12-15 minutes, until the cheese is melted and bubbling.
- Remove from heat and carefully open the packets, keeping the nachos in the foil to avoid steam burns.
- Top immediately with salsa, sour cream, and guacamole before serving for a loaded, fresh finish.