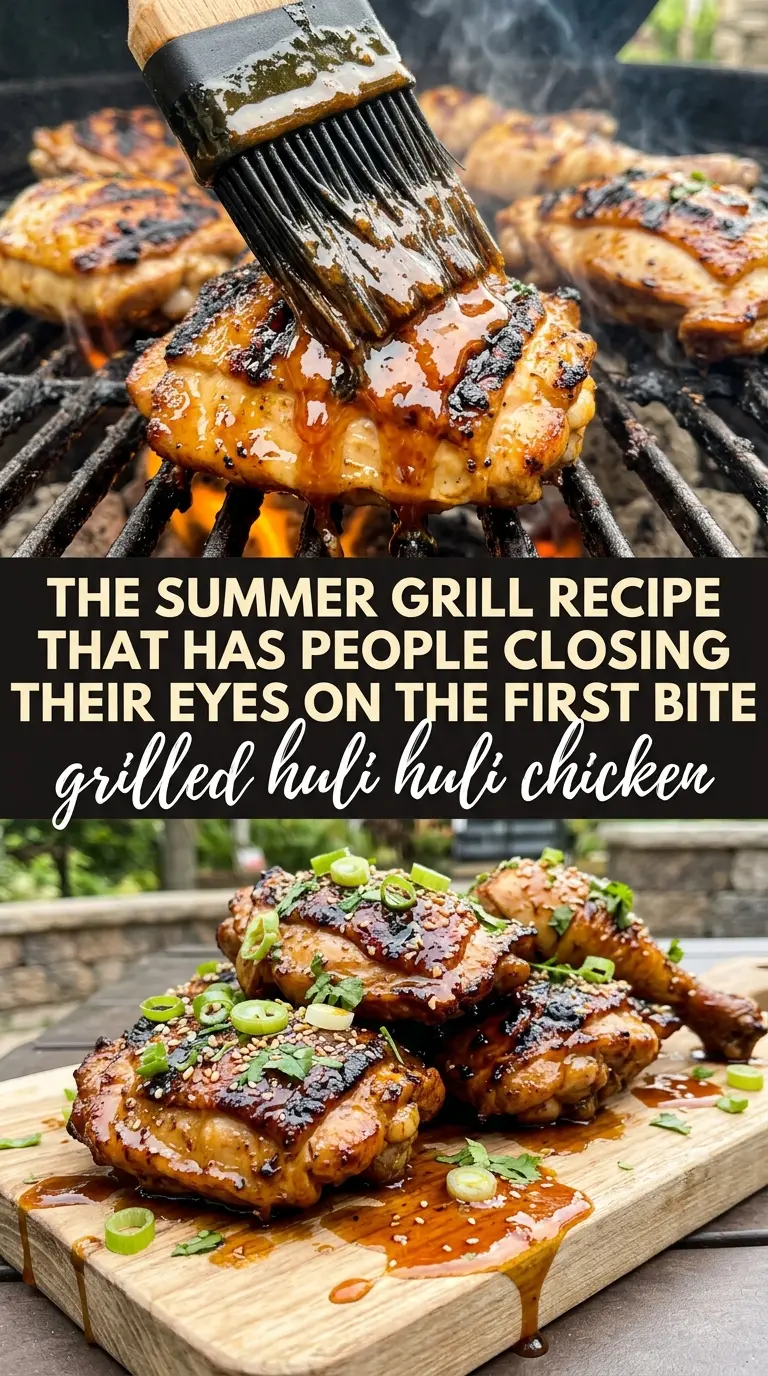
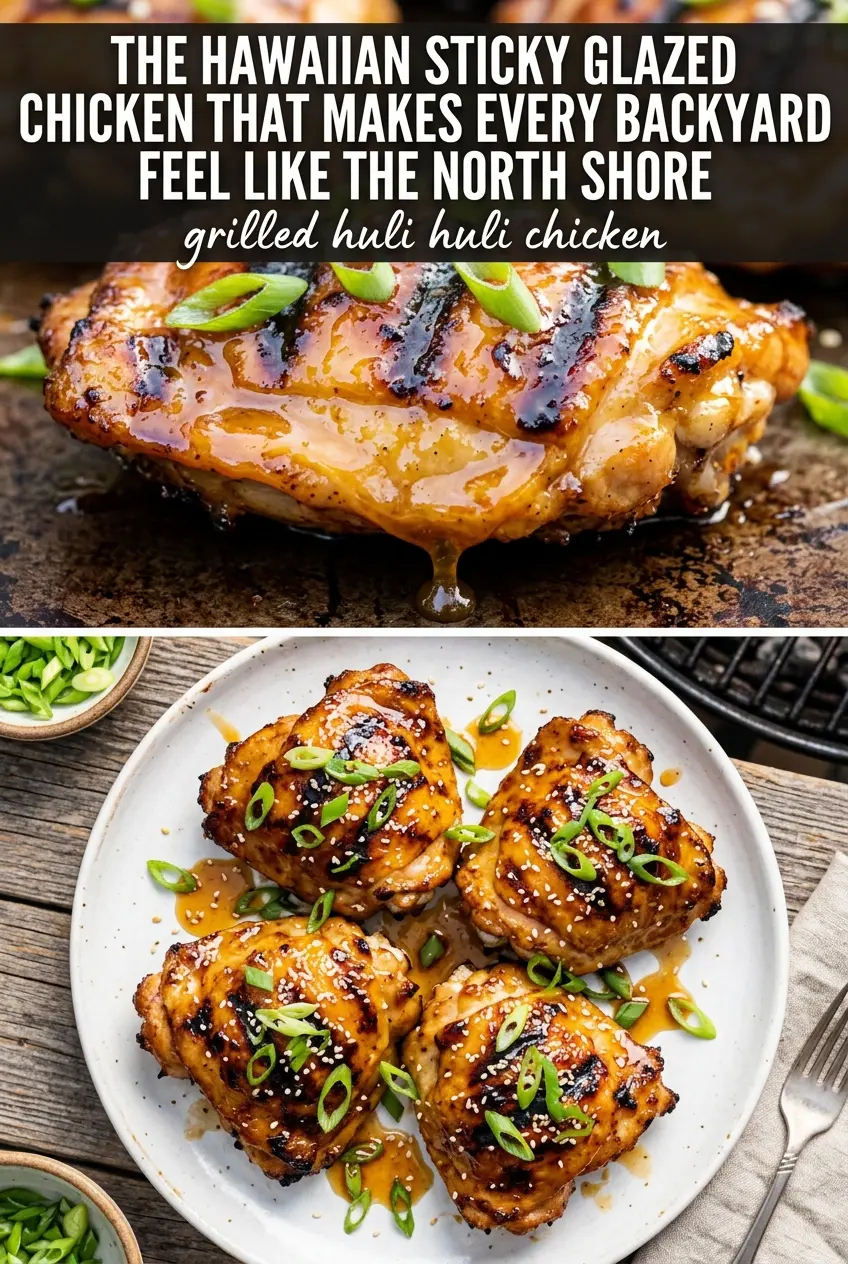
Sticky, charred Grilled Huli Huli Chicken is the kind of dinner that disappears before it even makes it to the table. The glaze cooks down into a deep mahogany sheen, clinging to the chicken in sweet-savory layers with just enough tang from pineapple and soy to keep every bite lively. When the skin picks up grill marks and the edges turn lacquered and crisp, you get that perfect mix of smoky, juicy, and caramelized.
What makes this version work is the balance in the marinade and the way it gets handled on the grill. Brown sugar and ketchup bring body and shine, while pineapple juice and ginger keep the sweetness from flattening out. Reserving part of the marinade for basting means the chicken keeps building flavor as it cooks, but that reserved portion has to stay separate from the raw chicken. Frequent turning is the real trick here; it keeps the glaze from scorching and gives you that classic huli effect instead of a burnt, sticky mess.
Below, you’ll find the small details that matter most: how to keep the glaze from burning, which chicken cuts handle the grill best, and the swaps that still give you that Hawaiian barbecue feel when you need to work with what’s in the pantry.
The marinade thickened up on the grill and gave the chicken that sticky, shiny coating I was hoping for. I used thighs and basted every few minutes, and the edges turned caramelized without drying out.
Save this Grilled Huli Huli Chicken for the nights when you want a sticky island-style glaze and smoky grilled edges.
The Marinade Works Because It Balances Sugar, Salt, and Acid
Huli Huli chicken can go wrong when the glaze leans too sweet or burns before the chicken is cooked through. This version keeps the marinade in balance so it tastes layered instead of syrupy, and the pineapple juice gives the grill glaze a little brightness without making the meat mushy. The soy sauce seasons deeply, while the brown sugar and ketchup help the surface caramelize into that glossy finish people expect from this dish.
The other mistake is treating the grill like a one-way blast of heat. Medium heat is what you want here. That gives the chicken time to cook through while the sugars darken gradually, and turning it often keeps the sticky coating from blackening before the center is done.
What Each Ingredient Is Actually Doing in the Glaze
- Chicken thighs or legs — Dark meat stays juicy over a longer grill time and handles repeated basting better than breasts. Thighs give you the most forgiving result, and legs work well if you want a more traditional barbecue feel.
- Soy sauce — This is the backbone of the marinade. Use a regular soy sauce here unless you need low-sodium, because too-light seasoning makes the finished glaze taste flat after the sugar cooks down.
- Brown sugar — It does more than sweeten. It melts into the marinade and helps form the sticky lacquer on the outside of the chicken. Packed brown sugar matters more than the exact brand.
- Pineapple juice — It adds brightness and the classic Hawaiian note that makes Huli Huli chicken taste like Huli Huli chicken. Don’t swap in extra sugar water or the marinade loses its edge.
- Fresh ginger and garlic — These keep the glaze from tasting heavy. Fresh is worth it here because dried ginger and jarred garlic don’t give the same sharp, fragrant lift.
- Sherry or chicken broth — Sherry adds a little depth, but broth works fine if that’s what you have. The point is to loosen the marinade enough that it coats the chicken evenly and bastes cleanly.
- Sesame oil — A small amount goes a long way. It rounds out the glaze and adds a toasted note that makes the whole thing taste more complete.
Turning and Basting Are What Give You That True Huli Finish
Building the Marinade
Whisk everything together until the sugar is mostly dissolved and the mixture looks smooth rather than grainy. If the brown sugar is left in clumps, it tends to settle and stick to the bottom of the bowl instead of coating the chicken evenly. Pull off half a cup before the chicken goes in so you have a clean basting sauce later; once raw chicken touches the marinade, that portion is done for anything except the grill.
Marinating for Deep Flavor
Two hours is enough to season the chicken well, and up to eight hours gives you a stronger glaze flavor without changing the texture too much. Go much longer and the pineapple juice can start to soften the surface more than you want. Keep the chicken covered and refrigerated while it marinates, then let the excess drip off before it hits the grill so the sugars don’t flare up instantly.
Grilling Over Medium Heat
Lay the chicken over medium heat and turn it often. That constant movement is what the name huli refers to, and it also keeps the sugar from scorching on one side while the center stays undercooked. If you see hard, black patches forming too fast, the fire is too hot. Move the chicken to a cooler spot and keep going; the glaze needs time to darken, not blast to a bitter finish.
Finishing to a Sticky, Safe Internal Temperature
Baste during the last stretch of cooking, when the chicken is already mostly done and the glaze has a chance to cling instead of burn. You’re looking for an internal temperature of 165°F, plus a surface that looks lacquered and a little tacky, not wet. Let the chicken rest a few minutes before serving so the juices settle back into the meat instead of running onto the cutting board.
How to Adapt This When You Need a Different Cut or a Simpler Pantry
Use chicken breasts without drying them out
You can use breasts, but they need more attention because they dry out faster on the grill. Pound them to an even thickness and start checking temperature early; pull them as soon as they reach 165°F. You’ll lose some of the juicy, forgiving texture you get from thighs, but the glaze still works.
Make it gluten-free
Swap the soy sauce for tamari or another gluten-free soy sauce. Keep the amount the same, and taste the marinade before it goes on the chicken because some gluten-free versions are saltier than standard soy sauce. The texture and caramelization stay the same.
Use broth instead of sherry
Chicken broth gives you the same loosened marinade without the extra sweetness or alcohol note from sherry. The finished glaze will taste a little cleaner and less deep, but it still caramelizes beautifully. This is the easiest swap when you’re cooking from a basic pantry.
Skip the grill and finish under the broiler
If the weather won’t cooperate, roast the chicken until nearly done, then broil it briefly to blister and darken the glaze. Watch it closely because the sugar moves from browned to burnt fast under direct heat. You won’t get the same smoky flavor, but you’ll still get sticky, caramelized chicken.
Storage and Reheating
- Refrigerator: Store leftovers in an airtight container for up to 4 days. The glaze will firm up a bit as it chills.
- Freezer: It freezes well for about 2 months. Wrap portions tightly or freeze in sealed containers, and thaw overnight in the refrigerator.
- Reheating: Warm gently in a covered skillet over low heat with a splash of water or broth, or reheat in a 325°F oven until hot. High heat will dry out the chicken and make the sugar on the outside hard and sticky in the wrong way.
Questions I Get Asked About This Recipe
Grilled Huli Huli Chicken
Ingredients
Equipment
Method
- Whisk together soy sauce, brown sugar, ketchup, pineapple juice, sherry or chicken broth, ginger, garlic, and sesame oil until the sugar dissolves and the glaze looks smooth.
- Reserve 1/2 cup marinade for basting so you have enough sauce during grilling.
- Marinate chicken for 2-8 hours in the refrigerator, turning occasionally so thighs or legs stay evenly coated.
- Preheat the grill to medium heat and arrange the chicken on the grates.
- Grill for 25-30 minutes, turning (huli) frequently and basting with the reserved marinade as it reduces and thickens.
- Continue cooking until the internal temperature reaches 165°F and the surface is caramelized, charred, and sticky.