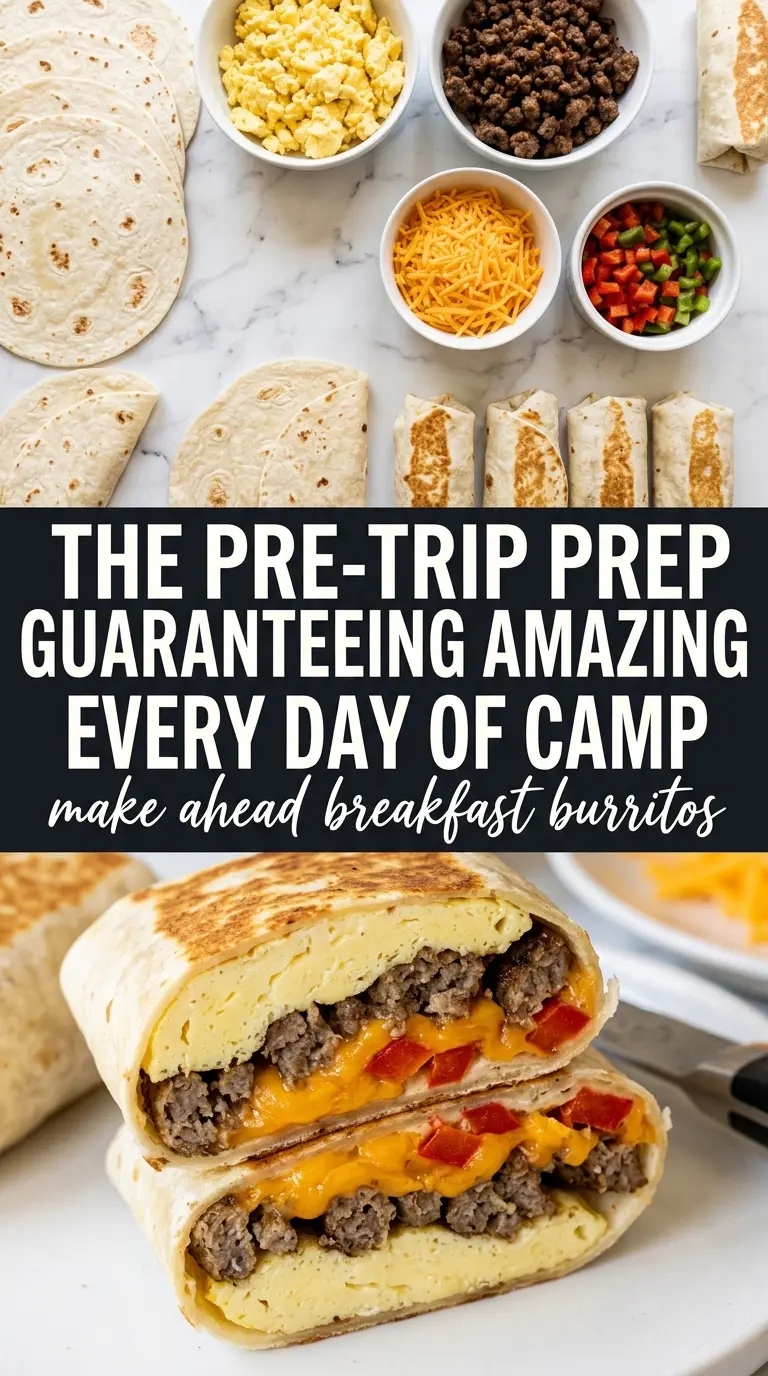
Make ahead breakfast burritos are the kind of freezer meal that earns a permanent spot in the rotation because they reheat into a real breakfast, not a sad compromise. The tortilla stays tender, the eggs stay fluffy enough, and the sausage, cheese, and hash browns give every bite enough heft to feel like breakfast was handled.
The trick is keeping the filling warm enough to taste good later without making the burritos soggy before they ever hit the freezer. Scrambled eggs should still be soft, not dry, and the hash browns need to be fully cooked and cooled enough that they don’t steam the tortilla from the inside. A little salsa goes a long way here; too much and the burrito turns slippery when you try to roll it.
Below you’ll find the small details that make these freezer burritos hold together, the best way to wrap them for long storage, and how to reheat them at camp or at home without ending up with a cold center and overcooked tortilla.
Make these freezer breakfast burritos once, then grab a wrapped one anytime you need a fast breakfast with eggs, sausage, and hash browns.
The Reason These Burritos Don’t Turn Soggy in the Freezer
The biggest mistake with breakfast burritos is treating them like a fresh skillet meal and packing in too much moisture. Salsa, undercooked eggs, and steaming-hot potatoes all work against you once the burrito is wrapped. The filling needs to be cooked through and dry enough to hold together, but not so dry that it eats like cardboard after reheating.
Warm tortillas matter more than most people think. A cold tortilla cracks when you roll it, which creates a weak seam that opens in the freezer or on the grill. The other thing that helps is layering the ingredients in a tight mound instead of spreading them all over the tortilla; that makes rolling cleaner and keeps the center from sliding around when you bite into it later.
- Eggs: Scramble them just until set. They finish warming later, and if you cook them hard now, they’ll turn rubbery after reheating.
- Breakfast sausage: This brings the salt and fat that make the burrito taste complete. Drain it well so the filling doesn’t get greasy.
- Hash browns: These add body and keep the burrito from eating like plain scrambled eggs in a tortilla. Cook them until crisp around the edges before adding them.
- Salsa: Use just enough for flavor. If yours is watery, spoon off a little liquid before adding it, or the tortilla will soften too much in the freezer.
- Flour tortillas: Large, soft tortillas roll best and hold up better in the freezer than smaller ones. If yours feel stiff, warm them briefly in a dry skillet or wrapped in a damp towel.
What Each Ingredient Is Actually Doing in Make Ahead Breakfast Burritos
- Protein (quality, proper thickness): Good quality protein tastes better. Even thickness ensures even cooking.
- Seasoning (bold, distributed throughout): Don’t be shy with salt and pepper. Quality seasoning elevates everything.
- Oil or fat (protective and flavorful): The fat helps develop crust and carries flavors. Use generously.
- Heat management (appropriate temperature for the protein): Too high and the outside burns before the inside cooks. Too low and it steams.
- Technique (sear, then finish based on thickness): Proper technique creates flavor. Sear for crust, then cook through gently.
- Aromatics and seasonings (garlic, herbs, spices): These add complexity and depth. Distribute them throughout the cooking process.
- Resting time (let it rest before serving): Resting allows juices to reabsorb. This keeps the protein moist and tender.
- Optional: finishing sauce or glaze: A light sauce adds richness without overwhelming. Apply at the very end.
Rolling and Wrapping So the Burritos Stay Tight
Warm the Tortillas First
Heat each tortilla just until it becomes flexible and stops resisting when you bend it. A few seconds in a dry skillet or a short wrap in the microwave is enough. If you skip this, the tortilla will split at the fold and the filling will leak out during freezing or reheating.
Build the Filling in the Center
Spoon the eggs, sausage, hash browns, cheese, and salsa into a compact line a little below the center of the tortilla. Keep the filling modest; overstuffing is what causes most burritos to tear before they are even wrapped. The cheese helps bind everything together, so let it sit between the warm filling and the wetter salsa.
Fold, Roll, and Seal
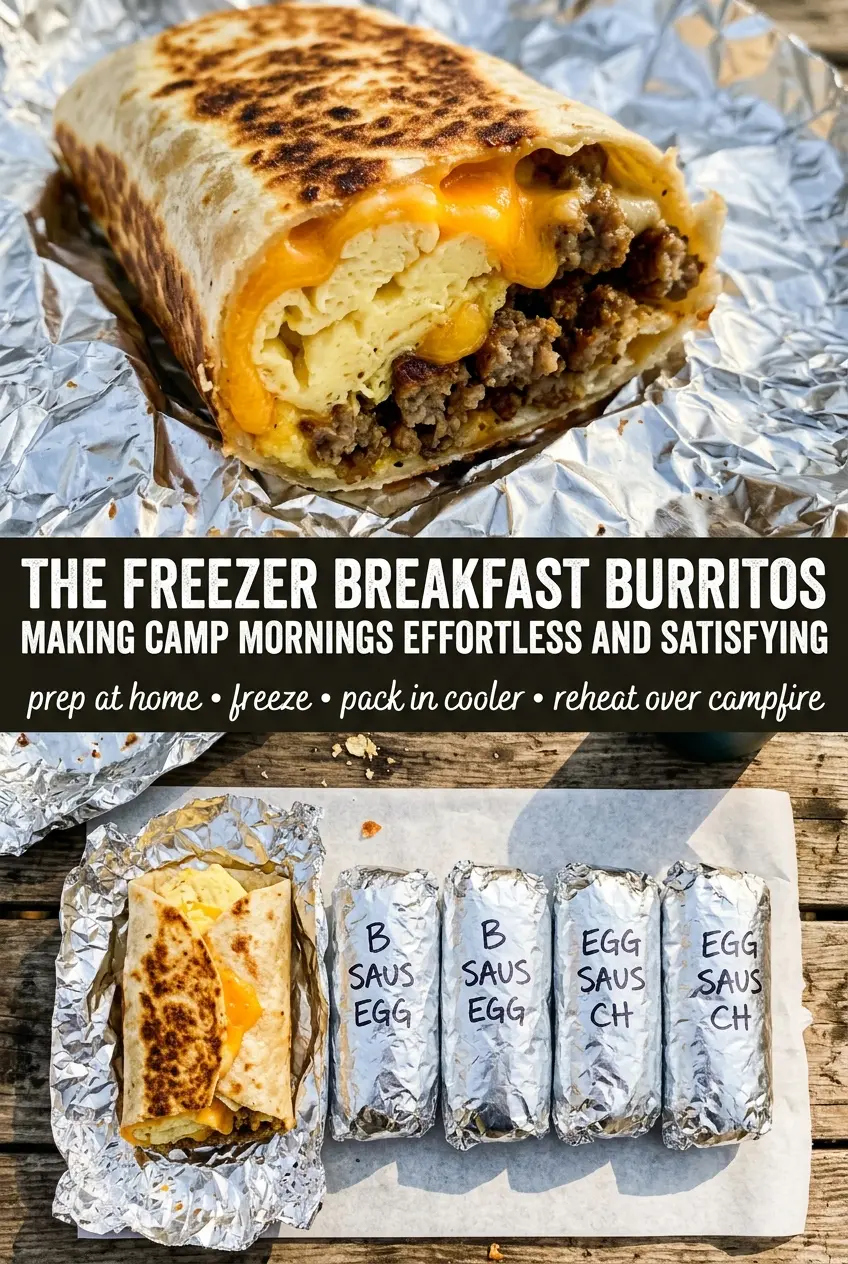
Fold the sides in first, then roll from the bottom up while keeping the filling tucked in with your fingers. The burrito should feel firm, not loose or puffy. Wrap each one individually in foil or plastic wrap, pressing the seam side down as you go so the roll stays closed in the freezer.
How to Adapt These Burritos for Your Freezer or Camp Stove
Make Them Vegetarian
Skip the sausage and add seasoned black beans, sautéed peppers, or extra hash browns. You lose some of the savory richness from the meat, so use a little more cheese or a spoonful of thick salsa to keep the filling satisfying.
Dairy-Free Burritos
Use a dairy-free shredded cheese that melts well and keep the salsa amount modest. The burritos still freeze nicely, but the texture will be a little less creamy, so don’t overcook the eggs or they’ll eat dry.
Freezer-to-Camp Reheating
For camp, keep the burritos wrapped in foil until you’re ready to reheat, then place them on a grill grate over medium heat and turn them occasionally for 10 to 15 minutes. The mistake is blasting them over high heat, which scorches the tortilla before the center is hot.
Breakfast Meal Prep for the Week
Keep a few burritos in the fridge for the next 3 to 4 days instead of freezing the whole batch. They reheat faster in the microwave or a skillet, and the tortilla stays softer than it does after a long freeze.
Storage and Reheating
- Refrigerator: Store wrapped burritos for up to 4 days. The tortilla softens a little, but the filling stays sturdy.
- Freezer: Freeze for up to 3 months, wrapped individually and then placed in a freezer bag if you want extra protection from freezer burn.
- Reheating: Unwrap the burrito and microwave it from thawed for 1 to 2 minutes, or heat it from frozen on a grill grate or in a skillet over low to medium heat until the center is hot. High heat burns the outside before the middle is ready.
Answers to the Questions Worth Asking
Make Ahead Breakfast Burritos
Ingredients
Equipment
Method
- Scramble the eggs in a cast iron skillet over medium heat and season with salt and pepper until set, about 8-10 minutes, stirring frequently. The eggs should look soft and slightly glossy as they finish.
- Warm the tortillas to make them pliable in the same skillet for about 20-30 seconds per side, working in batches if needed. Stack them covered with a towel as you warm them to prevent drying.
- Fill each warmed tortilla with scrambled eggs, cooked sausage, cooked hash browns, shredded cheese, and salsa in the center. Keep the filling in a neat line so the burrito rolls tightly.
- Fold in the sides and roll each tortilla tightly into a burrito shape. Press lightly at the seam so it stays closed.
- Wrap each burrito in foil or plastic wrap individually. Leave the foil/film snug so the burritos freeze without drying out.
- Freeze the wrapped burritos for up to 3 months. Stack them so they’re supported and easy to grab.
- To reheat at camp, unwrap the burrito and place it on the grill grate for 10-15 minutes, turning occasionally. Cook until the center is hot and the outside is lightly crisp.