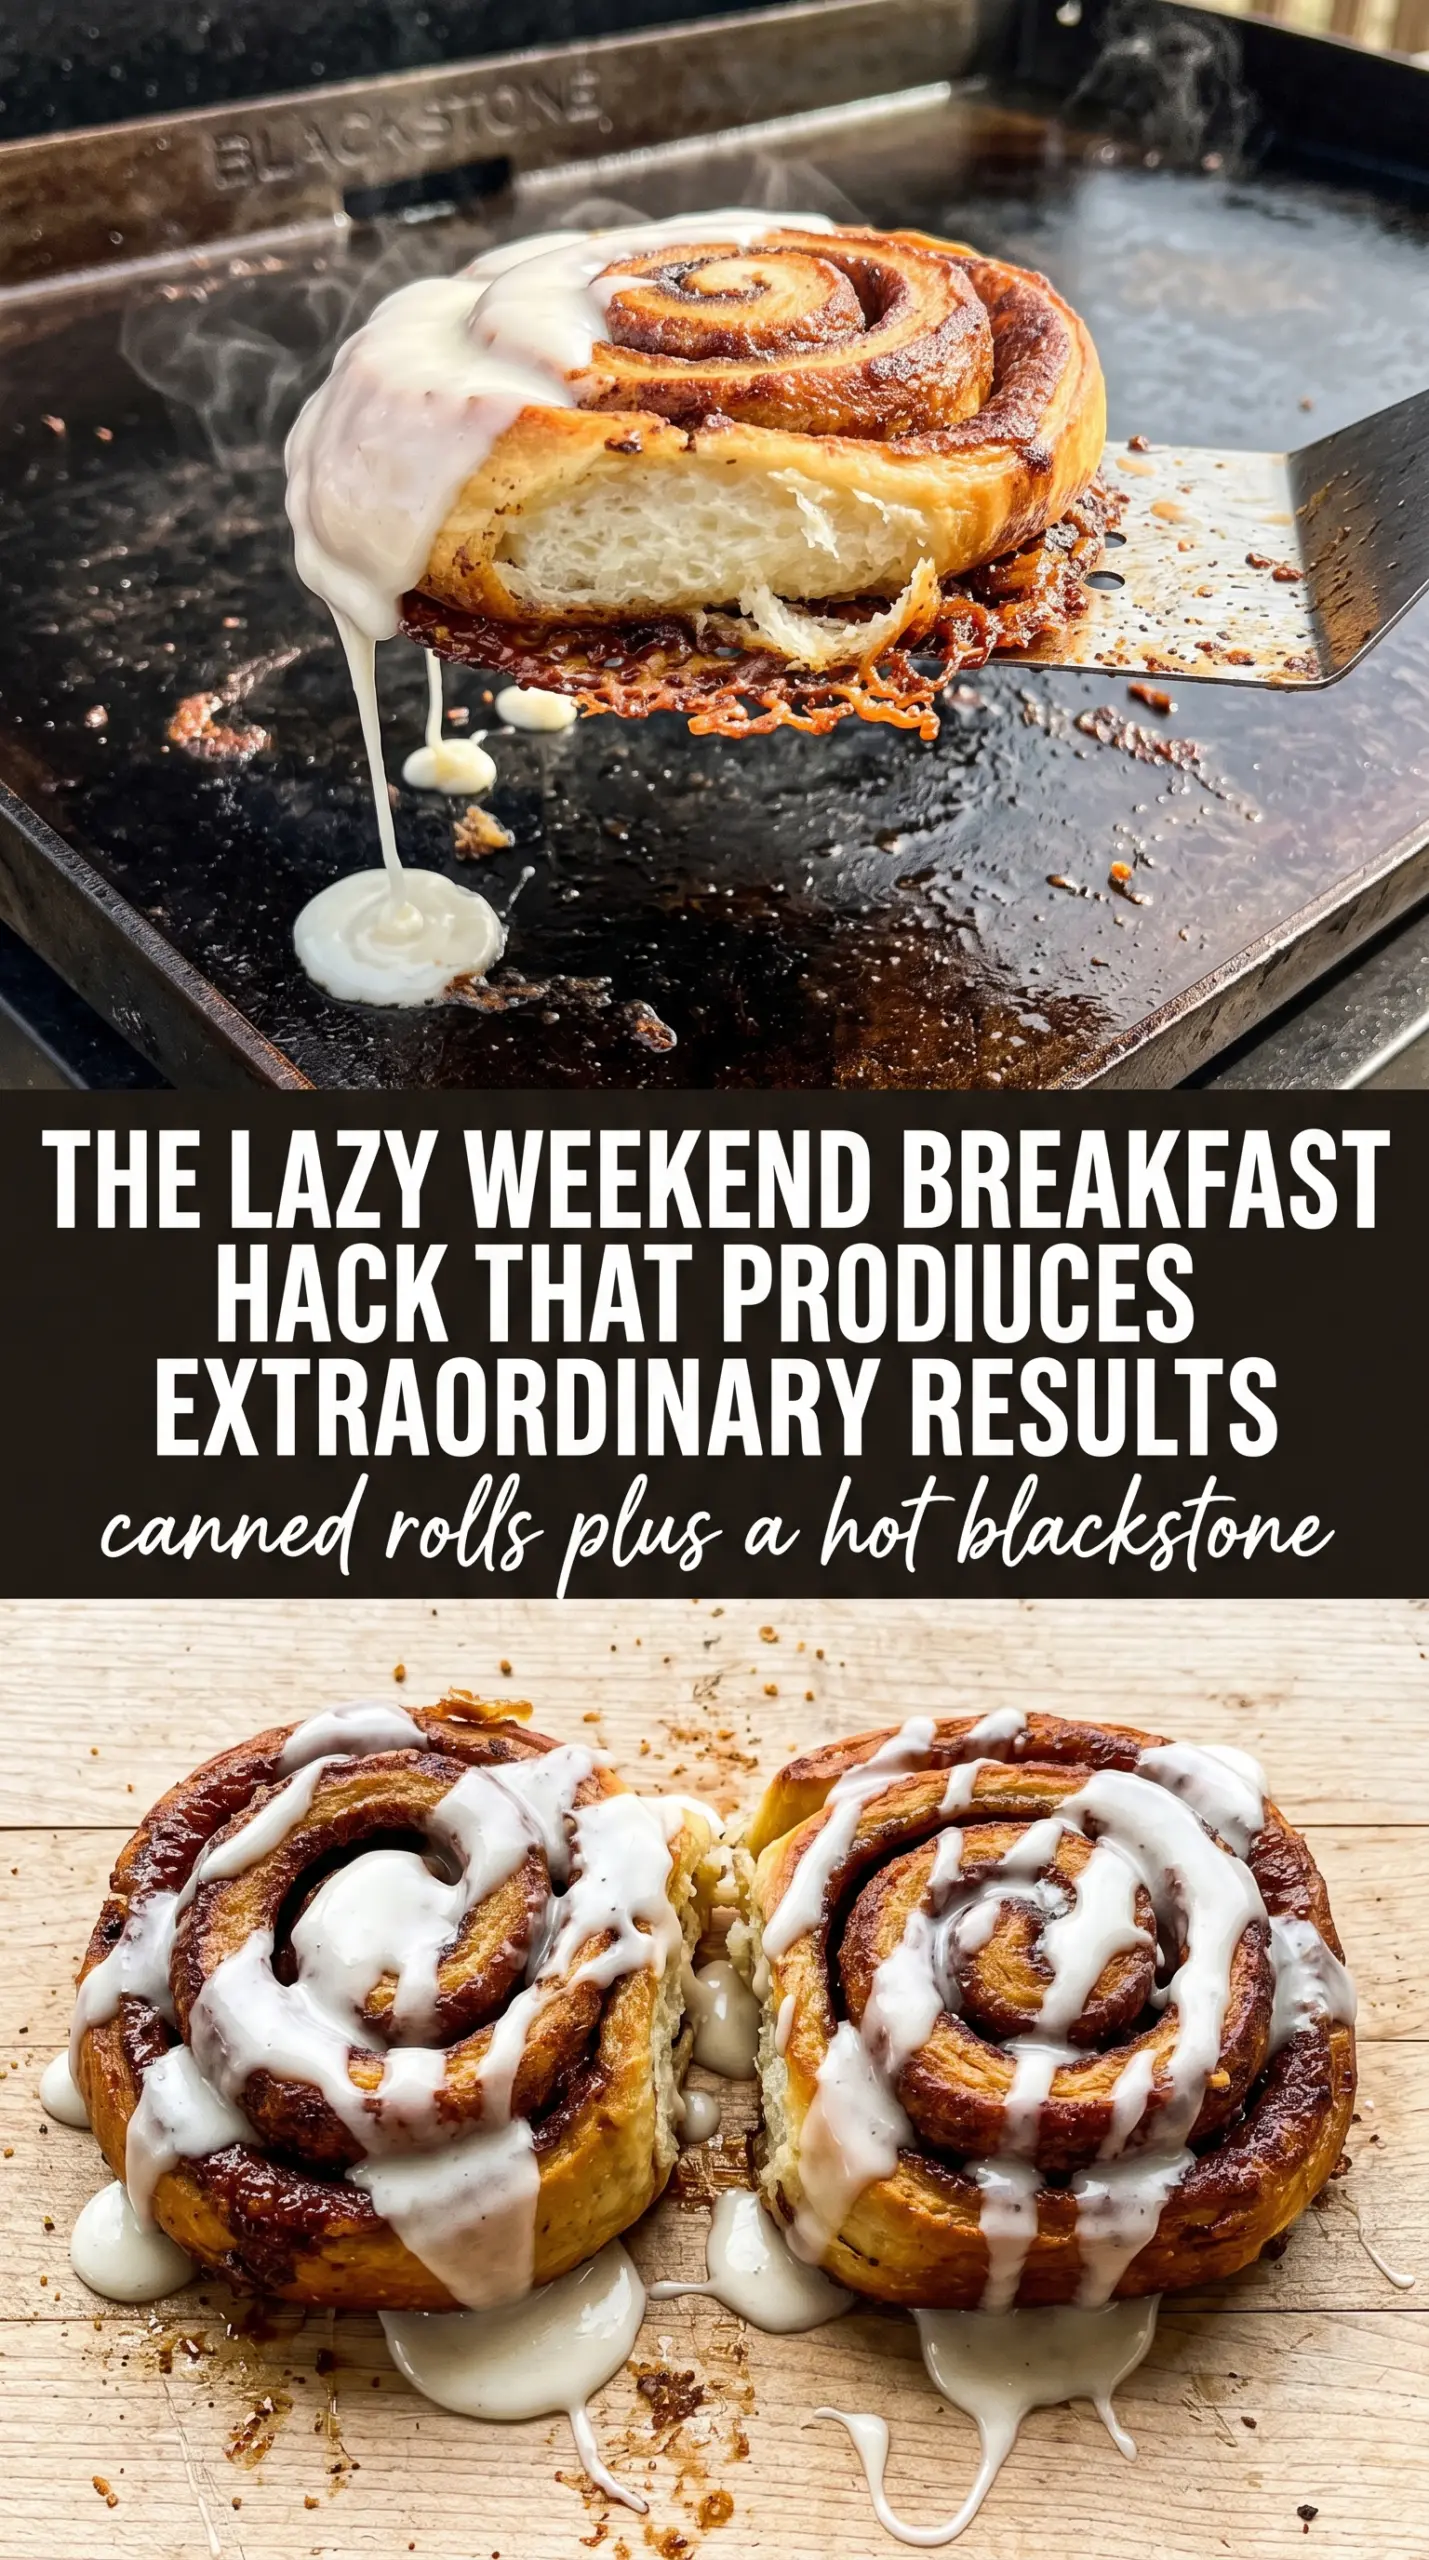
Caramelized edges, a soft center, and a glossy drizzle of icing make smashed Blackstone cinnamon rolls the kind of breakfast that disappears the second it hits the plate. Pressing the rolls flat on a hot griddle gives you more surface area, which means more crisped sugar, more buttery browning, and a finish that tastes closer to a griddle-fried pastry than a standard baked roll.
The trick is keeping the heat at medium-low and smashing the rolls firmly enough to widen them without tearing the dough. Refrigerated cinnamon rolls already come with enough sweetness and fat to brown well, so the griddle doesn’t need to run hot; it needs to stay steady. That slower heat lets the centers cook through before the outsides go too dark.
Below you’ll find the timing cues that matter, the best way to get those edges crispy without drying out the middle, and a few smart variations if you want to change up the icing or serve them for a bigger crowd.
The rolls got perfectly crisp on the outside and stayed soft in the middle, and that buttery cinnamon-sugar crust on the griddle was the best part. I used the cream cheese icing and it melted into every crack.
Smashed Blackstone cinnamon rolls are all about those caramelized griddle edges and the warm icing melt — save this one for a fast breakfast that feels special with almost no cleanup.
The Griddle Heat That Keeps the Centers Soft
Most people turn the griddle up too high because they want color fast. That works on the outside and fails in the middle. Cinnamon roll dough is thick and packed with sugar, so high heat darkens the bottoms before the centers have time to set. Medium-low heat gives you a golden crust, a cooked-through center, and enough control to flip the rolls without scorching them.
- Butter first, rolls second. The butter should melt and coat the surface before the dough goes down. That thin layer helps the bottoms brown evenly and keeps the smashed rolls from sticking when you press them flat.
- Use a firm smash, not a grind. Press once with a heavy spatula until the rolls spread out. If you keep pressing and dragging, the dough tears and the spiral filling leaks out too early.
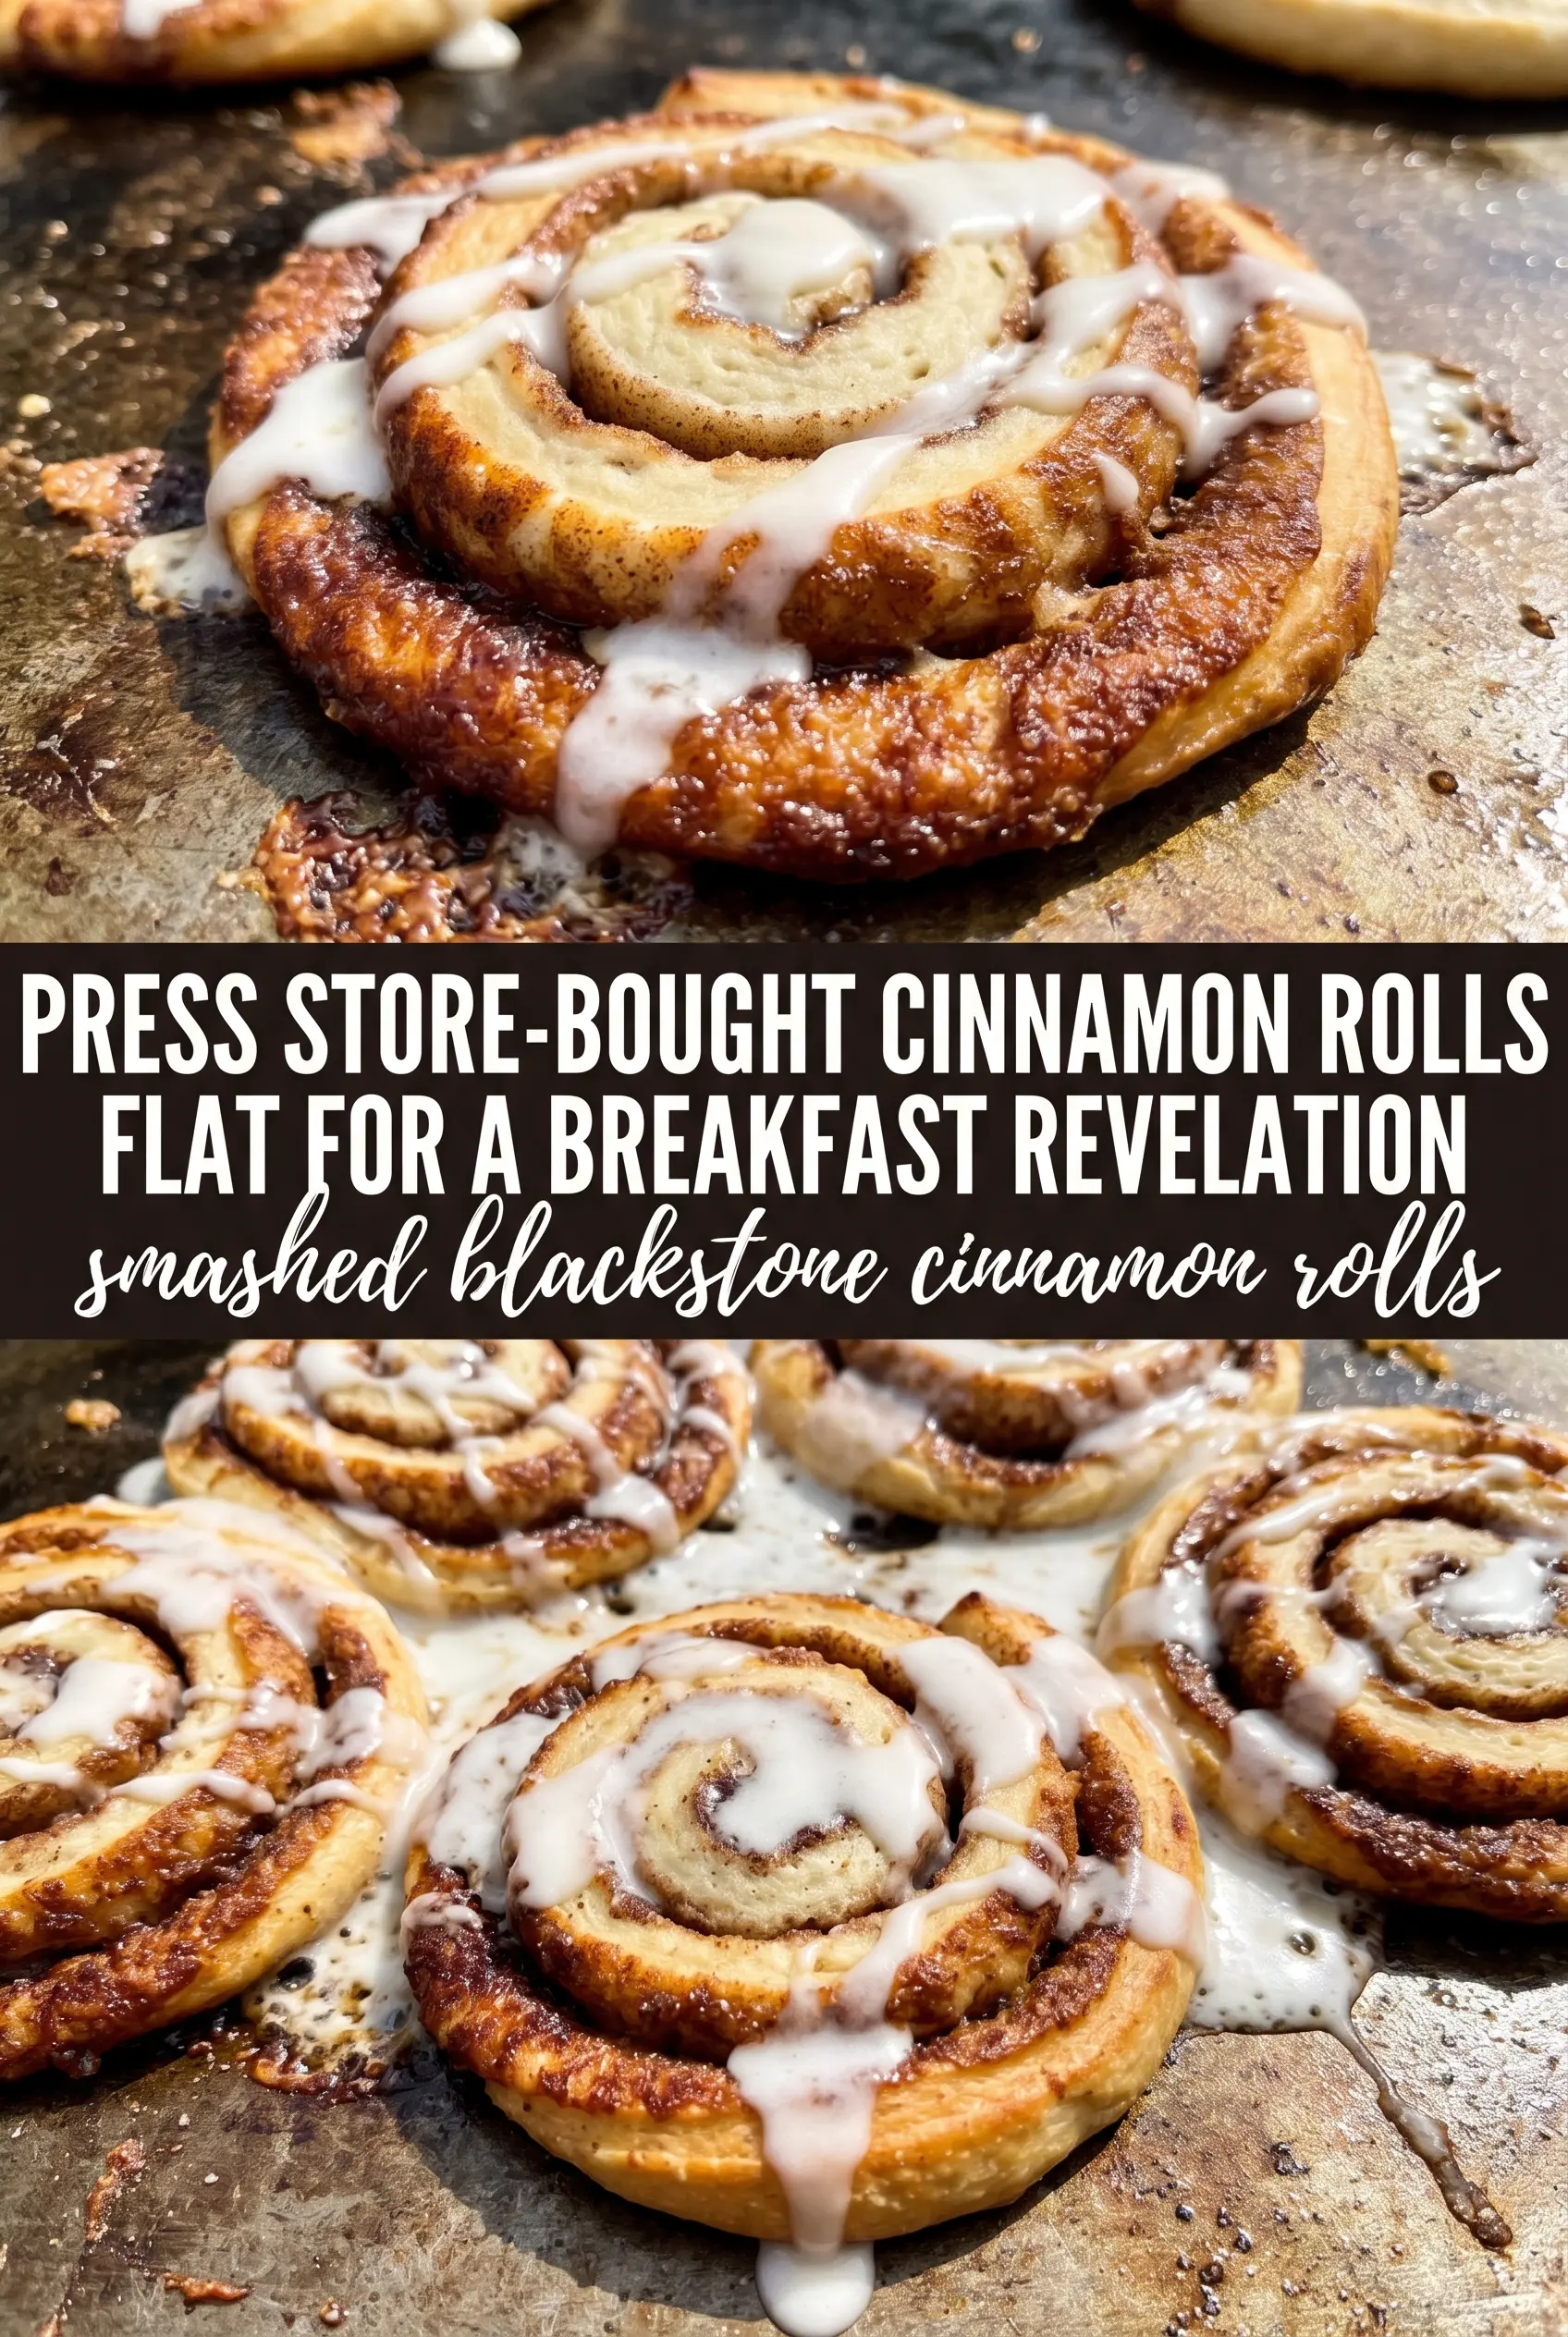
- Watch for the edges. You want the outer ring to look deep golden and a little crisp before you flip. If the bottom still looks pale, give it another minute; if it smells burnt, the heat is too high.
What the Butter, Icing, and Cinnamon Sugar Each Bring to the Party
- Refrigerated cinnamon rolls. These are the base that makes the whole recipe fast. A canned roll has the right amount of dough structure and filling to hold up on the griddle, and it browns better than homemade sweet dough would in this short cook time.
- Butter. This is more than a nonstick layer. It gives the griddle its flavor and helps the sugar in the dough caramelize instead of drying out. If you only have salted butter, use it; the slight saltiness actually works well here.
- Included icing or cream cheese icing. The packet icing is thin and glossy, which is great for soaking into the ridges. Cream cheese icing gives a thicker, tangier finish if you want something that tastes richer and less one-note.
- Cinnamon sugar. This is the extra finish that makes the tops taste bakery-style. Add it right after the rolls come off the griddle so it clings to the warm icing and doesn’t just slide off.
Press, Flip, and Finish While the Edges Are Still Hot
Heating the Griddle Evenly
Set the Blackstone to medium-low and let it fully preheat before the butter goes on. The surface should feel hot enough that the butter melts quickly and spreads, but not so hot that it foams and browns immediately. If the butter starts smoking, pull it back and let the griddle cool for a minute, because smoked butter will make the rolls taste bitter before the centers cook.
Smashing the Rolls Flat
Lay the rolls on the buttered surface with room between them, then press each one down with a heavy spatula. You want them noticeably wider and thinner, with the spiral still visible but the dough flattened enough to maximize contact with the griddle. If the dough sticks to your spatula, wait a few seconds and try again once the bottom has started to set.
Building the First Crust
Cook for 4 to 5 minutes until the bottoms are deeply golden and you can see the edges turning crisp. Resist the urge to move them around; any early lifting breaks the crust before it has time to form. The smell should be buttery and caramel-like, not raw doughy, and the underside should release cleanly when it’s ready.
Flipping and Finishing
Turn the rolls and cook the second side for another 3 to 4 minutes. The goal here is a light crunch on both sides, not a hard shell, so keep the heat steady and watch for overbrowning. The rolls are done when both sides are crisp, the centers feel set, and the middle no longer looks glossy or wet.
Drizzling While They’re Warm
Move the rolls off the griddle and ice them right away while they’re still hot. Warm pastry pulls the icing into the cracks, which is what gives you those glossy streaks and soft pockets of sweetness. If you wait too long, the icing just sits on top and the cinnamon sugar won’t stick as well.
How to Adapt Smashed Blackstone Cinnamon Rolls Without Losing the Good Parts
Cream Cheese Icing Upgrade
Use an extra cream cheese icing if you want the rolls to taste richer and a little tangier. The thicker icing clings to the rough griddle surface instead of disappearing into the pastry, so you get a more obvious finish on every bite.
Gluten-Free Swap
Use a gluten-free refrigerated cinnamon roll dough if you can find one, but expect a softer, more delicate structure. Press it a little less aggressively and give it an extra minute before flipping, since gluten-free dough can brown before it fully firms up.
Dairy-Free Version
Use plant-based butter and skip the cream cheese icing, then finish with the packet icing if it fits your needs. You’ll lose a little of the buttery depth, but the griddle caramelization still carries the recipe, and the cinnamon sugar helps replace some of that richness.
Serving a Crowd
Keep the finished rolls on a warm sheet pan in a low oven while you cook the rest in batches. Don’t stack them, or the steam will soften the crust you worked to build on the griddle.
Storage and Reheating
- Refrigerator: Store leftovers in an airtight container for up to 3 days. The crust will soften, but the flavor stays good.
- Freezer: Freeze after cooking, without icing if possible, for up to 1 month. Wrap tightly so they don’t pick up freezer smells.
- Reheating: Warm in a skillet or on the griddle over low heat for a few minutes, or use the oven at 300°F until heated through. The mistake most people make is microwaving them too long, which makes the dough rubbery and the sugar filling leak out.
Questions I Get Asked About This Recipe
Smashed Blackstone Cinnamon Rolls
Ingredients
Equipment
Method
- Heat a Blackstone griddle to medium-low heat and add butter until it melts and looks glossy.
- Place refrigerated cinnamon rolls with icing on the griddle and use a heavy spatula to smash them flat.
- Cook for 4-5 minutes until the bottom is golden and caramelized.
- Flip the rolls and cook another 3-4 minutes until both sides are crispy.
- Remove the rolls from the griddle and immediately drizzle with the included icing or additional cream cheese icing.
- Sprinkle with cinnamon sugar and serve warm.