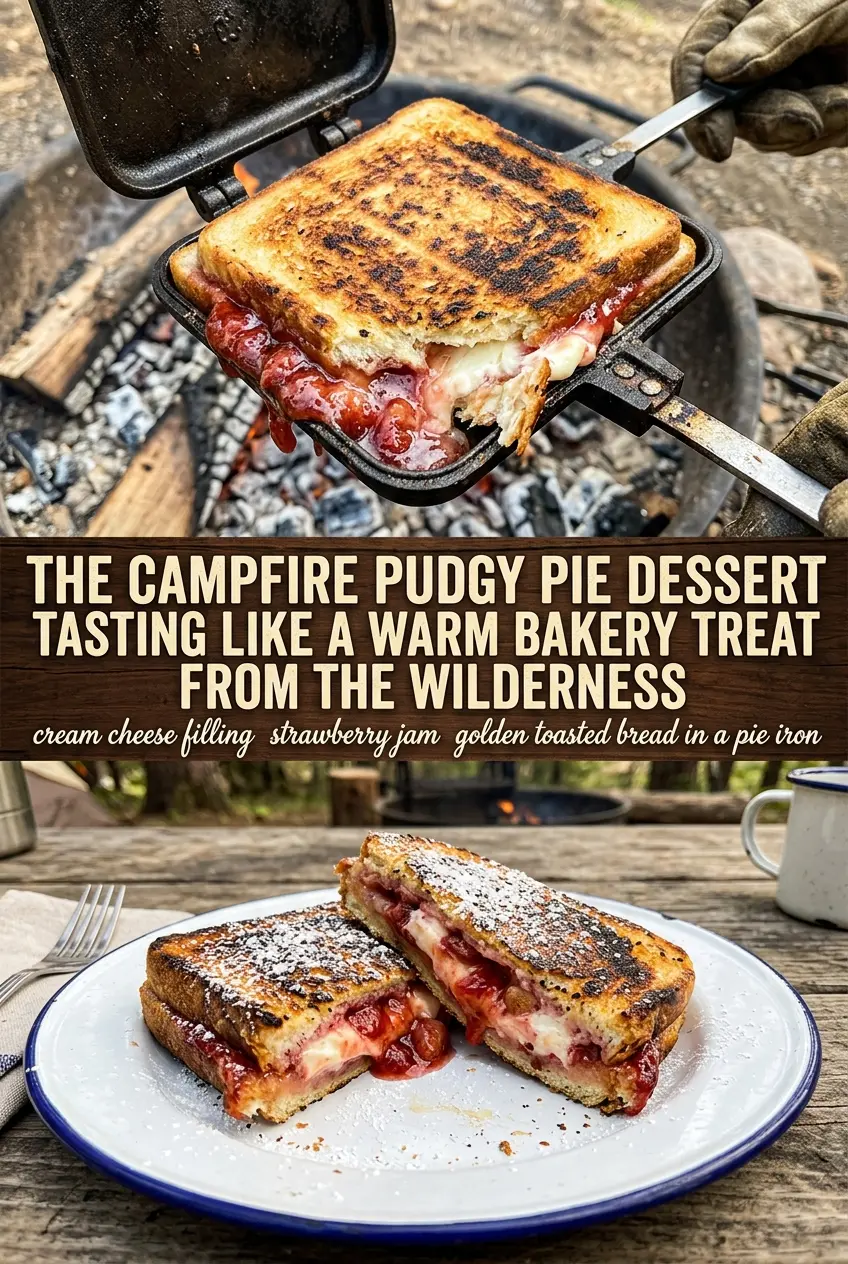
Golden, crisp bread wrapped around a warm strawberry cheesecake filling is the kind of campfire dessert that disappears fast. The outside goes toasted and buttery in the pie iron while the center turns creamy and jammy, with just enough structure to keep the filling from leaking out the second you cut into it. It tastes like a handheld dessert from a diner, only smokier and a lot more fun to make over coals.
This version works because the cream cheese layer is mixed smooth before it ever hits the bread. That keeps the filling from clumping and gives you a clean, rich base under the strawberry pie filling. Buttering the outside of the bread instead of brushing the iron itself also gives you better browning and that shattering, crisp edge everyone wants from a pudgy pie.
Below, I’m breaking down the small details that keep the filling inside the bread and the bread from burning before the center warms through. A few minutes of patience with the heat makes a big difference here.
The bread turned out perfectly golden in the pie iron and the strawberry cheesecake filling stayed thick instead of running everywhere. I made two batches and the second one cooked even better once I moved it a little farther from the coals.
Save this strawberry cheesecake pudgy pie for the next campfire night when you want a crisp, buttery dessert with a creamy strawberry center.
The Small Change That Keeps the Filling Inside the Bread
The biggest mistake with a pudgy pie is overfilling it. Strawberry pie filling looks harmless, but once it heats up, it loosens and wants to escape through every seam in the bread. A thin layer of cream cheese mixture under the fruit gives you a richer filling and helps hold everything in place.
Softened cream cheese matters here. If it’s still cold, you’ll end up with little lumps that never fully disappear, and those cold pockets can make the filling uneven. Mix until smooth before assembling, then spread it close to the edges without piling it on thick. That gives you a neat sandwich that cooks through before the bread scorches.
- White bread — Soft sandwich bread browns fast in a pie iron and seals better than thicker artisan slices. Pulling this off with sturdy bread is harder than it looks because the crust gets in the way of a clean seal.
- Cream cheese — Full-fat cream cheese gives the filling its tangy cheesecake taste and keeps the center rich. Reduced-fat versions work, but the filling won’t feel quite as lush.
- Strawberry pie filling — Pie filling is thicker than fresh berries, which is exactly what you want in a campfire sandwich. Fresh strawberries release too much juice and can make the bread soggy before it browns.
- Butter — Butter on the outside of the bread is what gives you that deep toasted crust. Margarine will brown, but the flavor is flatter and the finish isn’t as crisp.
What Each Ingredient Is Actually Doing in Strawberry Cheesecake Pudgy Pie

- Protein (quality, proper thickness) — Good quality protein tastes better. Even thickness ensures even cooking.
- Seasoning (bold, distributed throughout) — Don’t be shy with salt and pepper. Quality seasoning elevates everything.
- Oil or fat (protective and flavorful) — The fat helps develop crust and carries flavors. Use generously.
- Heat management (appropriate temperature for the protein) — Too high and the outside burns before the inside cooks. Too low and it steams.
- Technique (sear, then finish based on thickness) — Proper technique creates flavor. Sear for crust, then cook through gently.
- Aromatics and seasonings (garlic, herbs, spices) — These add complexity and depth. Distribute them throughout the cooking process.
- Resting time (let it rest before serving) — Resting allows juices to reabsorb. This keeps the protein moist and tender.
- Optional: finishing sauce or glaze — A light sauce adds richness without overwhelming. Apply at the very end.
Building the Pudgy Pie So It Browns Before It Burns
Mix the Cheesecake Layer First
Stir the softened cream cheese, powdered sugar, and vanilla until the mixture looks smooth and glossy. This is the layer that gives the filling its cheesecake character, so don’t rush it or leave streaks behind. If the mixture still looks grainy, keep mixing a little longer before you reach for the bread. Cold cream cheese is the main reason this filling turns patchy instead of creamy.
Butter the Bread, Not the Iron
Spread butter on one side of each bread slice, all the way to the edges. That outside layer is what crisps against the hot metal, so an even coat matters more than a thick one. Too much butter can drip into the iron and smoke before the bread browns, while too little leaves the crust dry and pale. The goal is a thin, even sheen.
Cook Over Gentle Coals
Close the pie iron and set it over campfire coals rather than open flame. Direct fire is too aggressive and burns the bread before the filling warms through. Flip every 3 to 4 minutes, then check for a deep golden color and a crisp surface. If the iron feels scorching hot, move it farther from the heat and give it another minute; patience here keeps the outside from blackening.
Let It Set Before You Open It
When the sandwich comes off the heat, let it rest for 2 minutes before dusting and serving. That short pause helps the filling settle so it doesn’t pour out the second you cut into it. If you open the pie iron too soon, the fruit layer will run and the bread can tear. A little cooling time gives you cleaner slices and less mess on your hands.
How to Make This Pudgy Pie Work at a Campsite or at Home
Swap the Pie Filling for Another Fruit
Blueberry, cherry, or apple pie filling all work with the same method. Each one changes the final dessert a little: cherry tastes sharper, blueberry feels a bit lighter, and apple leans more like a hand pie. Keep the amount the same so the sandwich still seals properly.
Use Gluten-Free Bread
Gluten-free sandwich bread works, but choose slices that are sturdy enough to hold up in the pie iron. Softer loaves can crack at the edges, so press the seams gently before cooking and don’t overload the filling. The texture will be a little more delicate, but the flavor still lands.
Make It Lighter on the Sweetness
Cut the powdered sugar to 2 tablespoons if you want the strawberry filling to stand out more. You’ll get a tangier, less candy-sweet dessert that tastes closer to cheesecake than frosting. This works best if your pie filling is already pretty sweet.
Make It Ahead for a Crowd
Mix the cheesecake filling at home and pack it in a small container so assembly at the campsite goes faster. Butter the bread and fill the sandwiches right before cooking, though, because bread gets soggy if it sits too long with the fruit inside. Prepping the filling ahead saves time without sacrificing texture.
Storage and Reheating
- Refrigerator: Store leftovers in an airtight container for up to 2 days. The bread softens as it sits, so the crisp shell won’t hold forever.
- Freezer: I don’t recommend freezing these. The filling and bread both turn mushy after thawing, and the texture that makes this dessert fun is gone.
- Reheating: Warm leftovers in a toaster oven or skillet over low heat until the outside crisps back up. The microwave will make the bread limp before the center is hot, which is the fastest way to lose the good part of a pudgy pie.
Questions I Get Asked About This Recipe
Strawberry Cheesecake Pudgy Pie
Ingredients
Equipment
Method
- Mix softened cream cheese, powdered sugar, and vanilla extract until smooth and spreadable. Stop when the mixture looks glossy with no visible lumps.
- Butter one side of each white bread slice. Brush lightly so the surface turns golden when toasted.
- Place one bread slice, butter-side down, in the pie iron and spread with the cream cheese mixture. Press gently so the filling reaches the edges for even oozing.
- Top with strawberry pie filling and cover with a second bread slice, butter-side up. Make sure the filling layer is even so it warms through without tearing the bread.
- Close the pie iron and cook over campfire coals for 3-4 minutes per side until golden brown and crispy. Look for crisp edges and toasted surfaces as the visual cue.
- Carefully remove the pudgy pie from the pie iron and let it cool for 2 minutes. The filling will thicken slightly as it cools, but it should still appear glossy.
- Dust with powdered sugar and serve warm. Finish right before eating so the toast stays crisp.