All the best parts of a cheeseburger land in one bowl here: juicy seasoned beef, crisp lettuce, sharp cheddar, pickles, tomatoes, avocado, and a burger sauce that pulls everything together. It eats like fast food in the best way, but without the soggy bun or the awkward attempt to keep toppings from sliding out of a sandwich.
The trick is treating the beef like a real burger patty for a minute before breaking it up. Worcestershire adds that deep savory note you usually miss in a bowl meal, and the hot skillet gives the meat those browned edges that make each bite taste finished instead of just cooked. The sauce matters too. A quick mix of mayo, ketchup, mustard, and relish gives you the tang and creaminess that make the whole bowl taste like an actual burger, not just chopped ingredients on lettuce.
Below, I’ll show you how to keep the beef flavorful, the lettuce crisp, and the bowl balanced so every bite has crunch, salt, and sauce in the right proportion.
The beef got those crispy little edges I was hoping for, and the burger sauce tied everything together without making the lettuce soggy. My husband said it tasted like the best part of a drive-thru burger, just in a bowl.
Love these loaded burger bowls? Save them to Pinterest for an easy low-carb dinner with crispy beef and burger sauce.
The Reason the Beef Needs a Hot Pan, Not a Gentle Sizzle
Burger bowls fall flat when the beef steams instead of browns. If the skillet is only lukewarm, the meat releases moisture, turns gray, and tastes like seasoned crumbles instead of something with actual burger character. A hot pan helps the beef develop those browned bits fast, which is where the deeper flavor lives.
Break the meat up as it cooks, but don’t stir it constantly from the start. Let it sit long enough to sear in spots, then chop it into chunks once the underside has color. That little pause is what gives you texture. The bowl needs contrast: crisp lettuce, cool toppings, warm beef, and a sauce that coats without drowning everything.
- Ground beef 80/20 — The fat keeps the meat juicy and helps it brown. Leaner beef works, but it eats drier and needs a little extra attention in the skillet.
- Worcestershire sauce — This adds the savory depth that makes the beef taste like a burger. There isn’t a perfect substitute, but soy sauce can stand in for a similar salty backbone if that’s what you have.
- Garlic powder and onion powder — These season the meat evenly without adding moisture. Fresh garlic is harsher here and can burn before the beef finishes.
What Each Topping Is Actually Doing in the Bowl
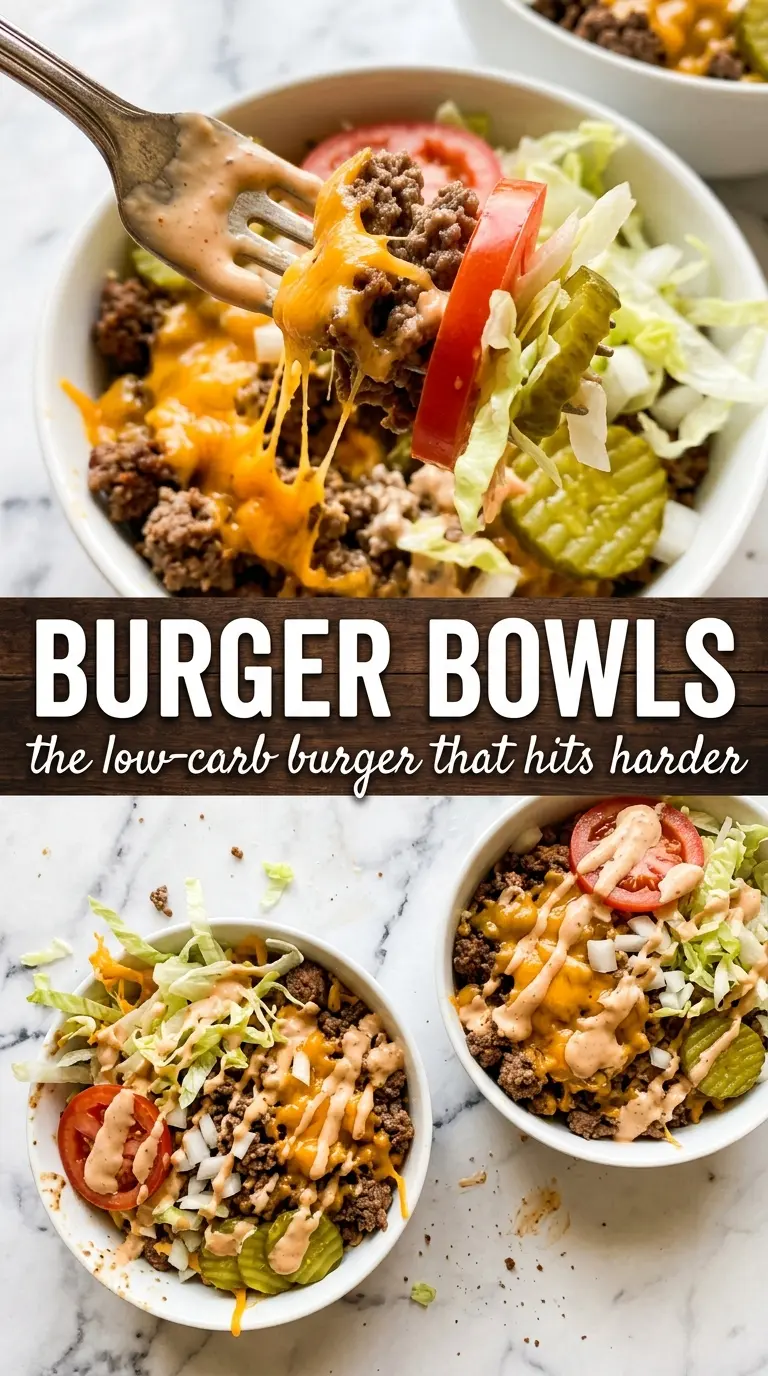
The toppings aren’t just decoration. Romaine gives you the cold crunch that keeps the bowl from feeling heavy, while cherry tomatoes add juiciness and a little acidity. Pickles and red onion bring the sharp bite that cuts through the beef and cheddar, and avocado softens the edges with creaminess.
Cheddar is the most flexible cheese here. Pre-shredded works fine, but freshly shredded melts a little cleaner and tastes less dusty. The burger sauce is where the whole thing clicks together, and the relish gives it that unmistakable burger-shop finish. If you want to swap the mayo, use a thick dairy-free mayo rather than a thin dressing, or the sauce will slide off the beef instead of clinging to it.
- Romaine lettuce — It holds up better than softer greens and gives the bowl structure. Chop it into bite-size pieces so it catches sauce instead of folding under it.
- Burger sauce — Mix it ahead so the ketchup and relish can mellow into the mayo. A quick chill helps the flavor come together and keeps the sauce from tasting one-note.
- Avocado — Add it at the end so it stays fresh and doesn’t get mashed by the warm beef. If yours is underripe, skip it rather than forcing it into the bowl; a hard avocado adds nothing.
Building the Bowl So the Lettuce Stays Crisp
Mix the Sauce First
Stir the mayo, ketchup, mustard, and relish together before you touch the beef. That gives the sauce time to settle into one balanced flavor instead of tasting like separate condiments. Put it in the fridge while you cook so it thickens slightly and tastes cleaner on the finished bowl.
Season and Brown the Beef
Mix the Worcestershire, garlic powder, onion powder, salt, and pepper into the ground beef, then cook it in a hot skillet over medium-high heat. Don’t crowd the pan if you can avoid it, because too much meat at once traps steam and keeps you from getting those browned edges. Break the beef into small chunks once it starts to color; that’s how you get a crumble that still tastes like burger meat.
Layer the Bowl Right Before Serving
Start with romaine, then add the beef while it’s still hot, followed by tomatoes, red onion, pickles, avocado, and cheddar. Drizzle the sauce at the very end. If you assemble too early, the lettuce softens under the heat and the sauce loosens the base before you even sit down.
Make It Dairy-Free
Skip the cheddar and use a dairy-free shredded cheese if you want the same melty-topping feel. For the sauce, choose a dairy-free mayo that’s thick enough to coat the beef. The bowl still eats like a burger, just with a cleaner, lighter finish.
Turn It Into a Low-Carb Dinner
This is already naturally low-carb if you keep the sauce modest and stick with the vegetable base. If you want even less sugar, use a no-sugar-added ketchup and a dill relish with no added sweetener. You’ll keep the burger flavor without changing the structure of the bowl.
Swap the Ground Beef for Turkey
Ground turkey works, but it needs a little extra help because it’s leaner and milder. Add a small drizzle of oil to the skillet and don’t overcook it, or it turns dry fast. You’ll get a lighter bowl, but the burger flavor needs the sauce and pickles even more.
Storage and Reheating
- Refrigerator: Store the beef and toppings separately for up to 4 days. The lettuce stays crisp longer this way, and the sauce won’t soak the whole bowl.
- Freezer: The cooked beef freezes well for up to 2 months. Freeze it plain or with the seasonings, then thaw in the fridge before reheating; don’t freeze the assembled bowls.
- Reheating: Warm the beef in a skillet over medium heat or in the microwave in short bursts. Reheat just until hot so it doesn’t dry out, then build fresh bowls with cold toppings.
Questions I Get Asked About This Recipe
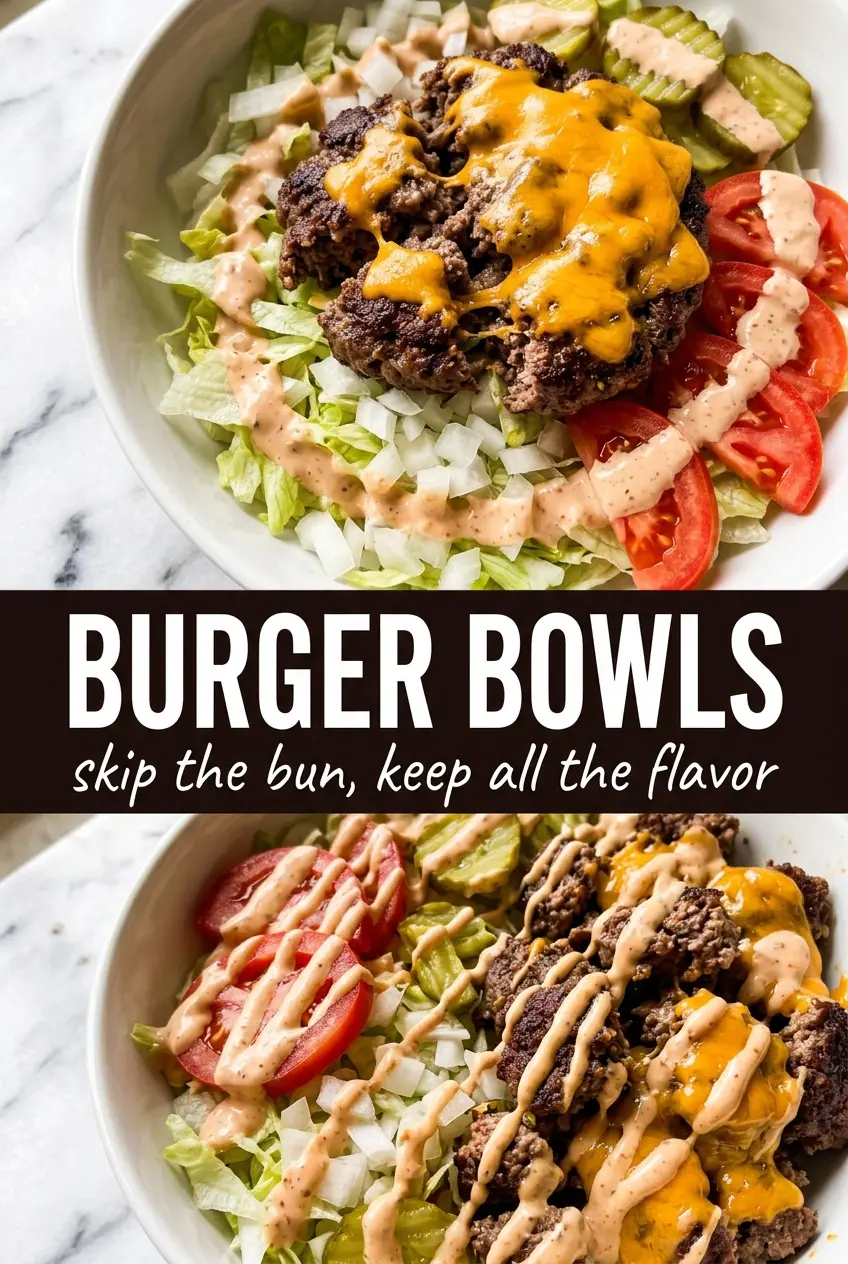
Burger Bowls
Ingredients
Equipment
Method
- Stir together mayo, ketchup, mustard, and relish until smooth, then refrigerate for about 5 minutes so it thickens slightly.
- In a cast iron skillet, combine ground beef with Worcestershire sauce, garlic powder, onion powder, salt, and pepper.
- Cook over medium-high heat, breaking the beef into small chunks, until cooked through and browned with crispy edges, about 8–10 minutes.
- Add romaine lettuce to 4 bowls as the base.
- Top each bowl with the cooked seasoned beef crumbles.
- Layer cherry tomatoes, diced red onion, avocado slices, and dill pickle slices over the beef.
- Sprinkle shredded cheddar on top, then drizzle burger sauce generously and serve immediately.