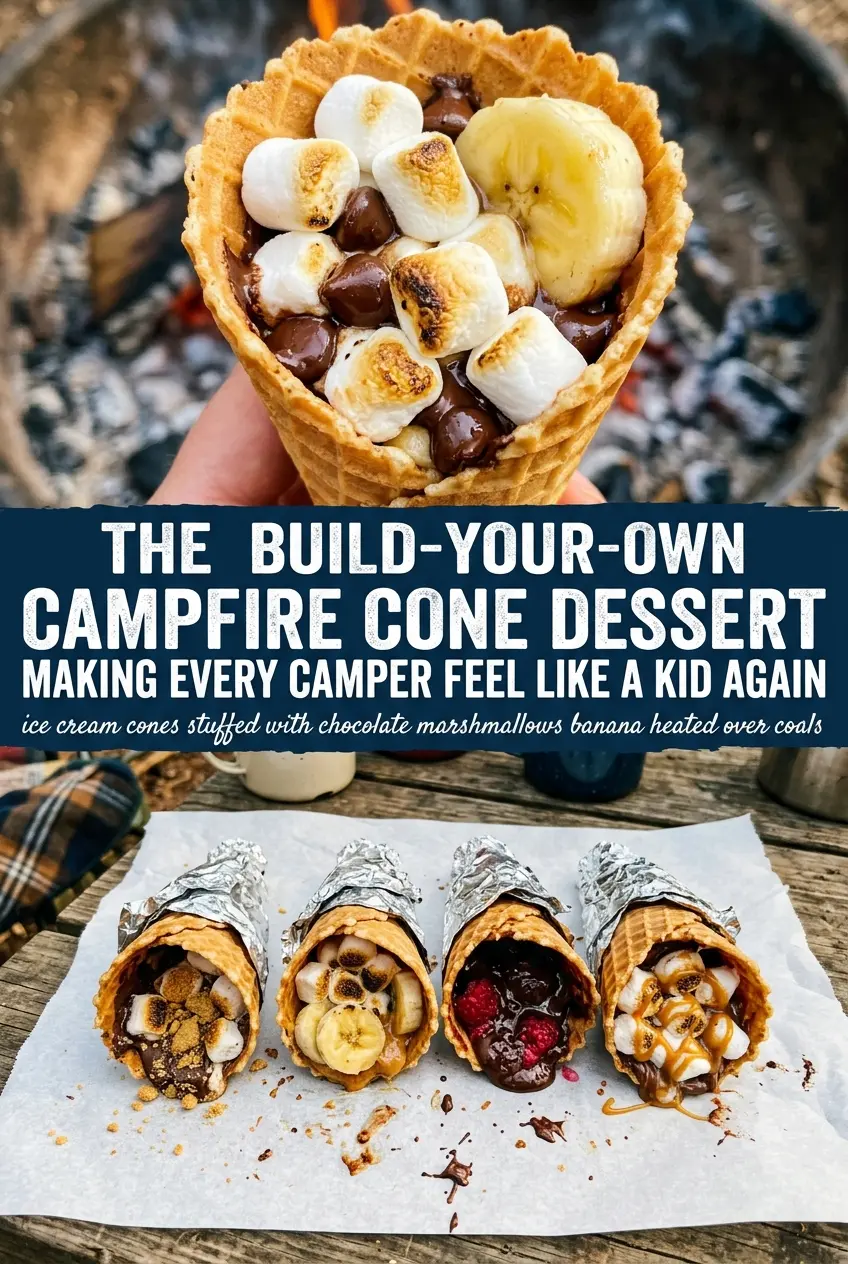
Campfire cones are the kind of dessert that disappears before the fire even dies down. The cone turns toasty at the edges, the marshmallows melt into the chocolate, and the fruit softens just enough to taste like part of the filling instead of an afterthought. You get all the best parts of a s’more, but in a handheld package that feels a little more fun and a lot less messy.
What makes this version work is the layering. The chocolate chips need to sit under the fruit and marshmallows so they melt from trapped heat instead of scorching on direct flame. The foil wrap matters too: it creates a little steam pocket that softens the fruit and keeps the waffle cone from burning before the center turns gooey.
Below you’ll find the timing that keeps the cones intact, a few smart swaps for different add-ins, and the one mistake that usually makes campfire desserts turn out dry instead of molten.
The foil wrapped cones came out perfectly melted in just a few minutes, and the bananas with the chocolate tasted like a warm s’more-meets-bananas-foster dessert. My kids loved opening them at the table.
Save these gooey campfire cones for the next time you want a foil-wrapped dessert with melted chocolate, marshmallows, and fruit over the fire.
The Part Most People Get Wrong: Heat Management in Foil-Wrapped Cones
The biggest mistake with campfire cones is putting them too close to the flames and expecting the filling to melt before the cone burns. Waffle cones are sturdier than sugar cones, but they still toast fast once the foil gets hot. Medium heat over a campfire grate gives the filling time to soften evenly while the cone stays crisp enough to hold together.
Rotation matters more than people think. The side facing the fire heats faster, and if you leave the cones in one spot, the chocolate can scorch on the bottom while the fruit stays cold in the center. Turn them occasionally and look for foil that feels hot all over, not just blistering on one side.
What Each Fill-In Is Doing for the Final Bite
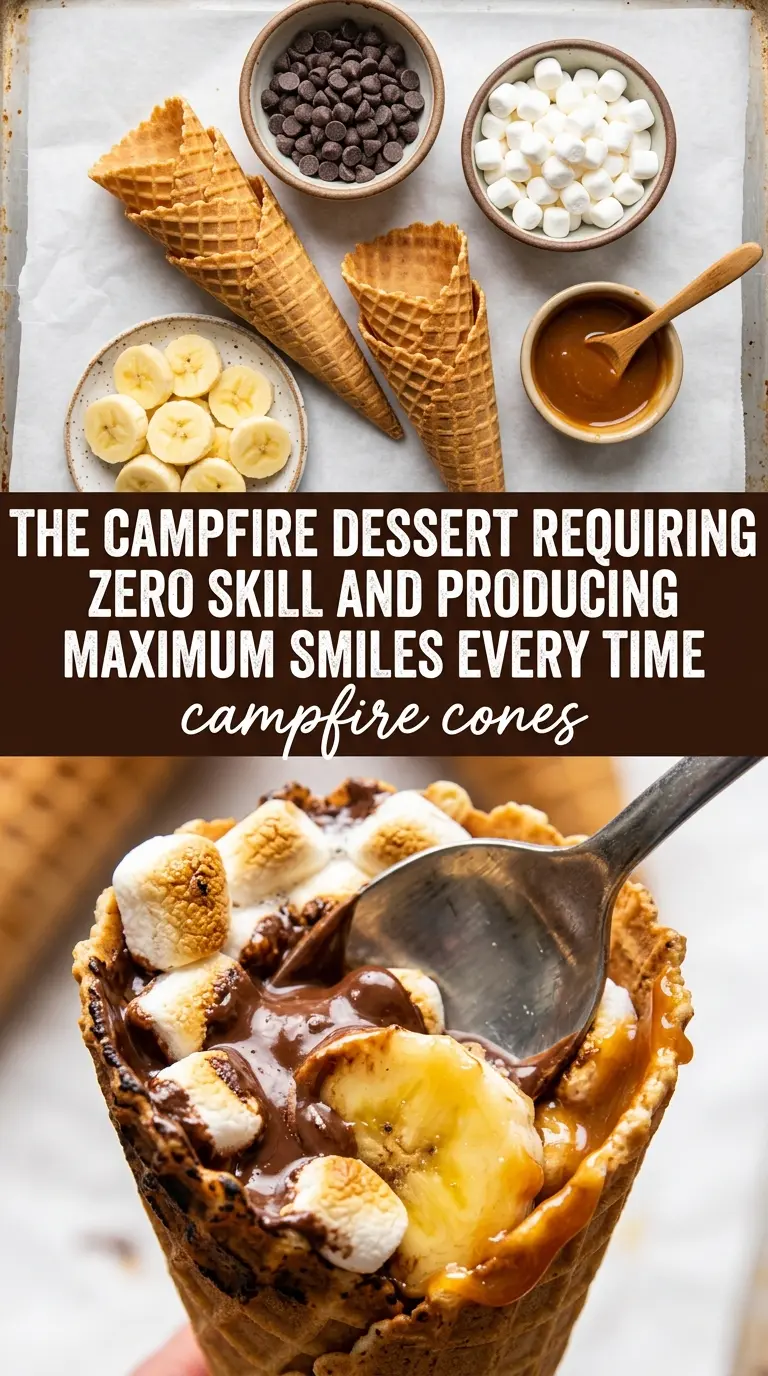
- Waffle ice cream cones — These hold up better than standard sugar cones and give you a little more structure for a generous filling. If all you have are sugar cones, use them, but handle them carefully because they crack sooner once the filling heats up.
- Mini marshmallows — These melt quickly and create the sticky, gooey base that ties the filling together. Big marshmallows can work if you cut them up, but minis distribute more evenly and melt faster.
- Chocolate chips — Chips are the best choice here because they hold their shape just long enough to melt into pockets of chocolate instead of disappearing completely. Semi-sweet keeps the dessert balanced, but milk chocolate gives you a sweeter, more classic campfire finish.
- Banana slices and strawberries — The fruit adds softness and a fresh note that keeps the cone from tasting one-note. Slice the banana thin so it warms through before the cone starts to get fragile, and dice the strawberries small so they release a little juice without flooding the cone.
- Graham cracker pieces — These bring the s’mores element and a little crunch against all that melted filling. Crush them lightly, not into dust, or you lose the texture that makes the topping worth including.
- Aluminum foil — This is what turns the filling from exposed to gently steamed. Wrap the cone completely with no gaps, or the top will dry out before the middle is ready.
Building the Filling So It Melts Without Collapsing
Layer the sturdier ingredients first
Start with a small spoonful of marshmallows, then tuck in chocolate chips, fruit, and graham cracker pieces. The goal is to keep wetter ingredients from sitting right against the cone wall, where they can soften it too quickly. If you dump everything in loosely, the filling settles unevenly and the top burns before the center has a chance to melt.
Wrap tightly before the cones hit the grate
Seal each cone completely in aluminum foil so heat circulates inside the packet. The foil should be snug, not crushed against the filling, or the cone gets flattened and breaks when you unwrap it. If you can see seams or gaps, steam escapes and the marshmallows take longer to melt.
Heat just until the filling loosens
Place the wrapped cones on a campfire grate over medium heat for 4 to 5 minutes, turning them occasionally. You’re looking for the foil to feel hot and the filling to shift when you gently press the packet with tongs. If you leave them in too long, the cone goes soft and the fruit starts to turn mushy instead of warm.
Let them rest before unwrapping
Give the cones 2 minutes to cool after you pull them off the fire. That short rest keeps the melted filling from blasting out the second you open the foil. Unwrap carefully and eat with a spoon, because the center stays molten longer than the cone will.
How to Adapt Campfire Cones for Different Camps and Crowds
Dairy-Free Campfire Cones
Use dairy-free chocolate chips and keep the rest of the filling the same. The texture stays just as gooey, and the fruit helps replace the richness you’d normally get from milk chocolate. Check the cone label too, since some waffle cones contain dairy.
No Fruit Version
Skip the banana and strawberries and add extra marshmallows plus more graham cracker pieces. The result tastes more like a classic s’more and holds its shape a little better in the foil, which is useful if you’re cooking over a fire that runs hotter than expected.
Gluten-Free Swap
Use gluten-free cones and gluten-free graham-style crumbs. The filling itself is naturally gluten-free, so this swap is mostly about making sure the cone and crunch element match your needs without changing the texture of the dessert.
Make-Ahead for a Crowd
Assemble the cones a few hours ahead, wrap them in foil, and keep them chilled in a cooler until you’re ready to cook. Don’t add them to the fire too early, because the cone gets soggy if it sits too long with fruit inside. This approach makes it easy to hand people their own packet without scrambling at the fire ring.
Storage and Reheating
- Refrigerator: These are best eaten right away. If you do have leftovers, they’ll keep for 1 day, but the cone softens and the fruit gives off moisture.
- Freezer: I don’t recommend freezing them. The fruit turns watery when thawed, and the cone loses its crisp texture completely.
- Reheating: Reheat only if the cones were assembled ahead and chilled. Warm them in foil over low campfire heat until the filling softens; high heat will burn the cone before the center melts.
Questions I Get Asked About This Recipe
Campfire Cones
Ingredients
Equipment
Method
- Fill each waffle ice cream cone with layers of mini marshmallows, chocolate chips, banana slices, strawberries, and graham cracker pieces.
- Wrap each filled cone completely in aluminum foil to enclose the filling.
- Place the wrapped cones on a campfire grate over medium heat for 4-5 minutes, rotating occasionally so the marshmallows melt evenly.
- Remove the cones from the fire and let cool for 2 minutes so the filling sets slightly.
- Carefully unwrap the foil and enjoy with a spoon.