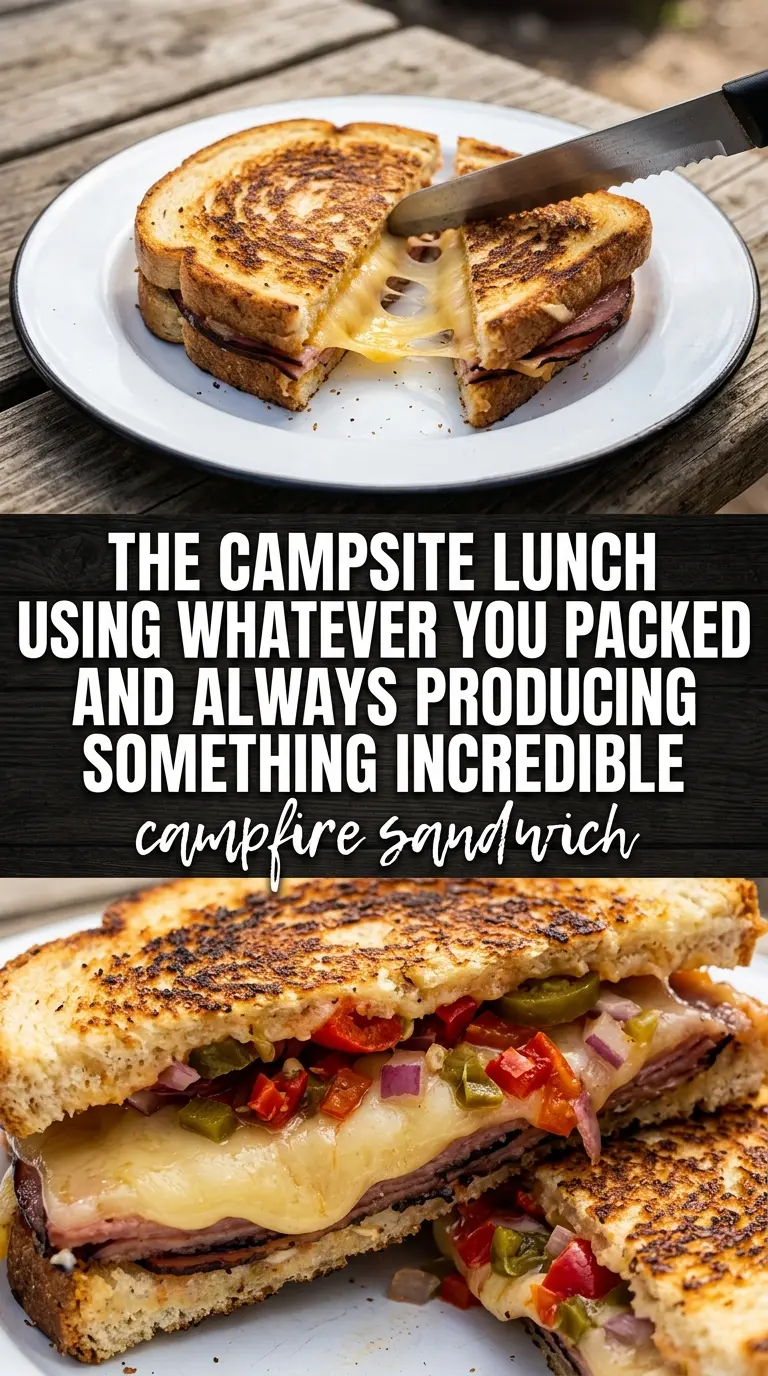
Campfire sandwiches earn their spot fast: crisp, buttery bread on the outside, melted cheese holding everything together, and smoky heat giving the whole thing a little extra character. When the grate is hot enough to toast without scorching, you get that shattering golden crust and a center that turns soft and savory instead of greasy.
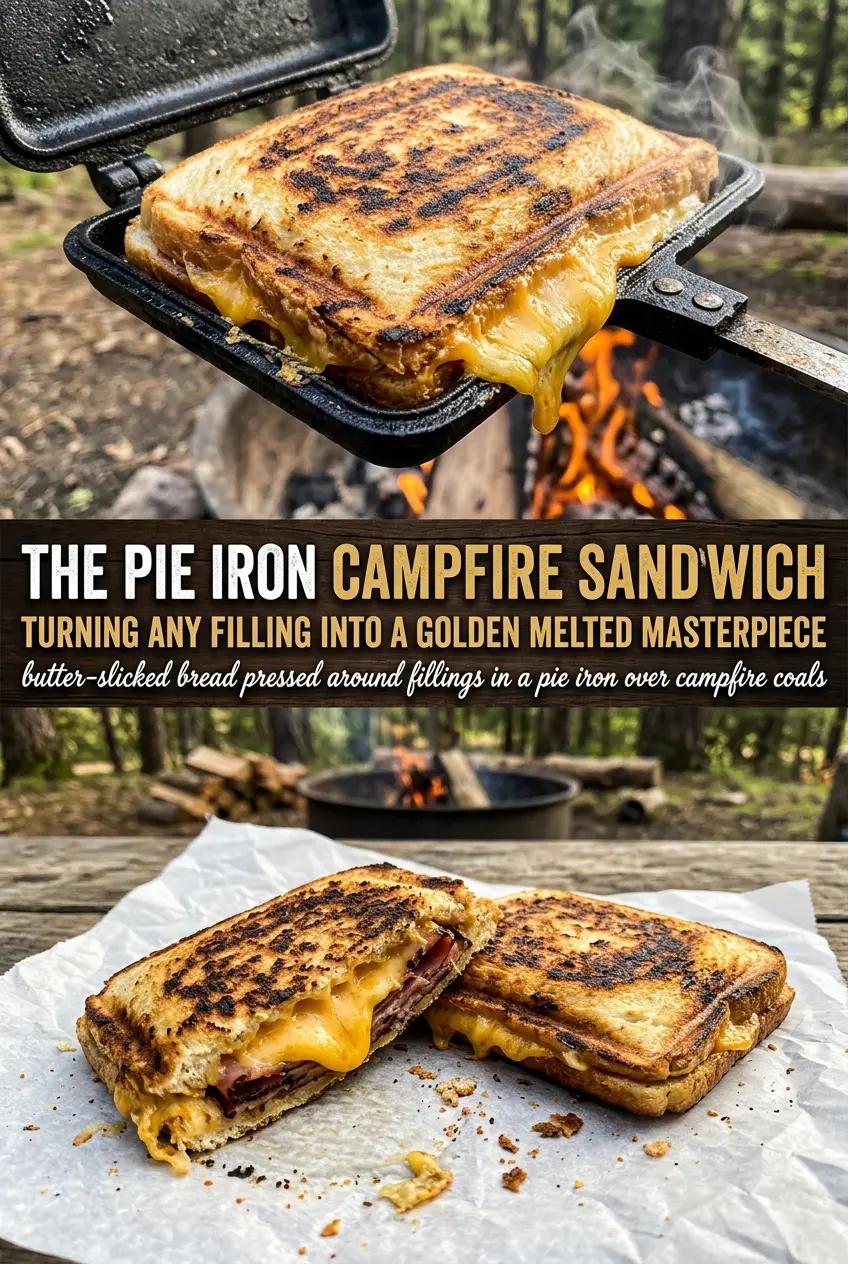
The trick is building the sandwich with the butter on the outside, not the inside. That keeps the bread protected and lets the heat do its job while the cheese melts into the ham and turkey. A moderate fire matters more than a roaring one here; too much heat burns the bread before the filling warms through, and then you end up with a dry sandwich and cold cheese.
Below, I’ve included the small timing cues that make the difference between a decent camping lunch and one that disappears the second it comes off the grate. There’s also a simple way to adapt it when you want to change the cheese, skip the mustard, or pack it up for a quick outdoor lunch.
I used the campfire grate over medium coals and the bread came out evenly toasted with the cheese melted all the way through. The buttered outside made a huge difference — no soggy spots, just a crisp sandwich that held together when we cut it in half.
Save this campfire sandwich for the next time you want a melty outdoor lunch with crisp bread and simple fillings.
The Part That Stops the Bread From Burning Before the Cheese Melts
The biggest mistake with a campfire sandwich is treating the fire like a stovetop. Campfire heat hits unevenly, so one side of the bread can toast fast while the center of the filling stays cool. The answer is simple: medium heat, steady turning, and a little patience. If the grate is screaming hot, pull the sandwiches to the cooler edge of the fire until the bread starts to color evenly.
Butter on the outside is doing more than adding flavor. It creates a protective layer that browns slowly enough for the cheese to melt before the crust overcooks. Thick bread helps here because it gives you a sturdier shell, but regular sandwich bread works if you keep the fire controlled and watch the first side closely.
What Each Layer Is Doing in the Sandwich
- Bread — Standard sandwich bread works well, but a slightly sturdier loaf holds up better over open heat. Thin bread can tear when you flip it, especially once the butter softens, so if yours is soft and flimsy, keep the heat lower and turn with care.
- Cheese — Cheddar gives sharper flavor, while Swiss melts a little silkier and milder. Use slices, not shredded cheese, because slices melt evenly inside the bread instead of escaping onto the grate.
- Ham and turkey — The combo gives the sandwich enough savoriness without making it heavy. Thin deli slices warm through faster than thick-cut meat, which matters when you only have a few minutes over the fire.
- Butter — Softened butter spreads evenly and browns better than cold butter. If you try to use melted butter, it soaks into the bread too quickly and you lose some of that crisp outer crust.
- Mustard and mayo — Optional, but a thin layer adds tang and moisture without turning the sandwich soggy. Keep the spread light; too much mayo can leak during grilling and make the bread slick instead of crisp.
Getting a Golden Crust Without Losing the Melt
Butter the Outside, Not the Filling
Spread butter on one side of each bread slice and keep that side facing out when you build the sandwiches. That puts the fat where the heat can toast it, and it keeps the inside from getting greasy. If the butter layer is patchy, you’ll get pale spots that stay soft while the rest browns, so cover the bread edge to edge.
Stack the Cheese Against the Meat
Build the sandwich with cheese on both sides of the ham and turkey so the warm meat sits between the melting layers. That helps glue everything together and keeps the fillings from sliding out when you cut it. If you pile all the cheese on one side, the sandwich can split open on the grate before the center melts.
Grill Over Medium Heat and Turn Once
Set the sandwiches on the grate and let the first side cook until the bread is deeply golden and you can smell the butter browning. Flip carefully and cook the second side until the cheese gives slightly when pressed with a spatula. If the bread darkens too quickly, move the sandwich farther from the flames; if the cheese isn’t melting, the fire is too cool and needs more coals, not more time directly over flame.
Slice and Serve Right Away
Take the sandwiches off the heat as soon as the cheese melts and the crust feels crisp. Letting them sit too long on the grate keeps cooking the bread and makes the bottom too hard. Cut them in half while they’re hot so the cheese stays in place and the steam doesn’t make the crust soften.
Three Ways to Make This Campfire Sandwich Work for Different Crowds
Swap the Meat for a Vegetarian Version
Leave out the ham and turkey and add sliced tomato, sautéed mushrooms, or roasted peppers with the cheese. The sandwich will be lighter and a little juicier, so keep the vegetable layer modest or the bread can soften before it crisps.
Make It Gluten-Free Without Changing the Method
Use a sturdy gluten-free sandwich bread with enough structure to hold up over the fire. Some gluten-free breads brown faster and dry out sooner, so keep the heat moderate and check the first side early.
Change the Cheese for a Stronger or Milder Finish
Sharp cheddar gives the most punch, while Swiss stays mellow and melts smoothly. Pepper jack works if you want heat, but it can leak a little more when it gets very soft, so keep the sandwich centered on the grate and don’t overfill it.
Use Mayo Instead of Butter for a Different Crust
A thin layer of mayo on the outside browns well and gives the bread a deeper, more even color. It won’t taste like mayonnaise once cooked, but it does brown a little faster than butter, so watch the sandwich closely and move it if the color builds too quickly.
Storage and Reheating
- Refrigerator: Store leftovers wrapped tightly for up to 2 days. The bread softens as it sits, so the crust won’t be as crisp the next day.
- Freezer: I don’t recommend freezing these. The bread and cheese both change texture after thawing, and the sandwich turns dense instead of crisp.
- Reheating: Rewarm in a skillet over low to medium-low heat until the bread re-crisps and the center heats through. The common mistake is blasting it over high heat, which burns the outside before the cheese loosens again.
Questions I Get Asked About This Recipe
Campfire Sandwich
Ingredients
Equipment
Method
- Butter one side of each bread slice so the outside browns and crisps on the grate.
- Build sandwiches with butter-side out: bread, cheese, ham, turkey, cheese, then bread (add mustard and mayo if using).
- Place sandwiches on a campfire grate over medium heat so they cook evenly without burning.
- Grill for 4-5 minutes per side until the bread is golden and the cheese melts, with clear grill marks forming on the outside.
- Remove from heat, cut in half to show the melted interior, and serve hot.